





How the Model Context Protocol turns your NAS into a conversational system
The Model Context Protocol (MCP) is an open standard developed by Anthropic that allows AI assistants like Claude to connect to external tools, services, and data sources. Think of it as a universal plugin system for AI — instead of copy-pasting terminal output into a chat window, you give the AI a live, structured connection to your systems so it can query and act on them directly.
MCP servers are small programs that speak a standardized JSON-RPC protocol. The AI client (Claude Desktop, Claude Code, etc.) spawns the server process and communicates with it over stdio. The server translates AI requests into real API calls — in this case, against the TrueNAS middleware WebSocket API.
TrueNAS Research Labs recently released an official MCP server for TrueNAS systems. It is a single native Go binary that runs on your desktop or workstation, connects to your TrueNAS over an encrypted WebSocket (wss://), authenticates with an API key, and exposes the full TrueNAS middleware API to any MCP-compatible AI client.
Crucially, nothing is installed on the NAS itself. The binary runs entirely on your local machine.
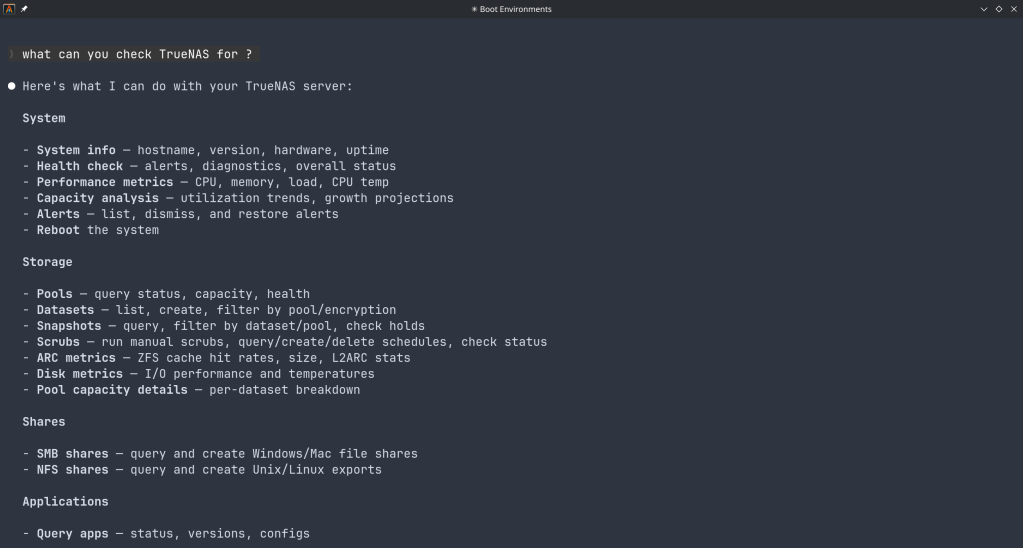
The connector covers essentially the full surface area of TrueNAS management:
Storage — query pool health, list datasets with utilization, manage snapshots, configure SMB/NFS/iSCSI shares. Ask “which datasets are above 80% quota?” and get a direct answer.
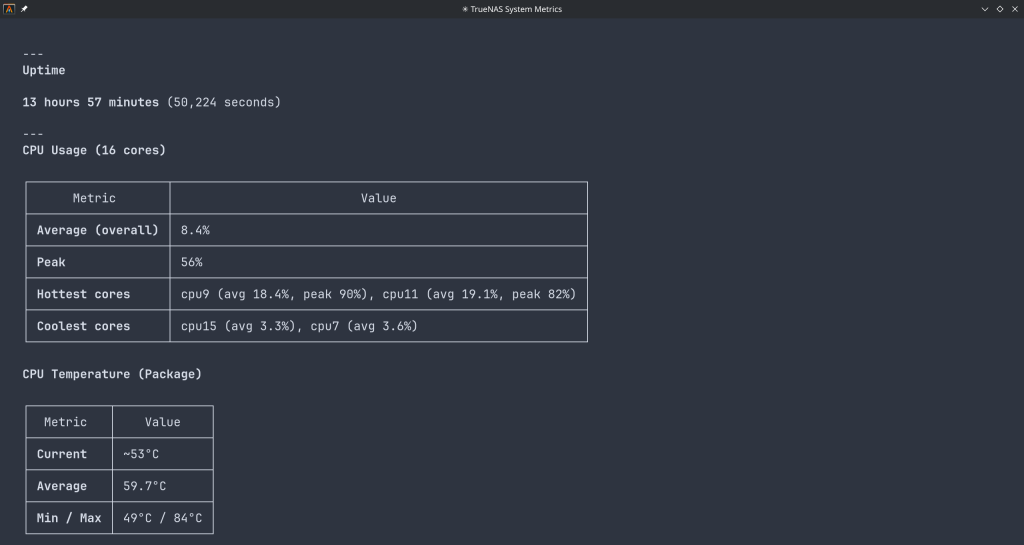
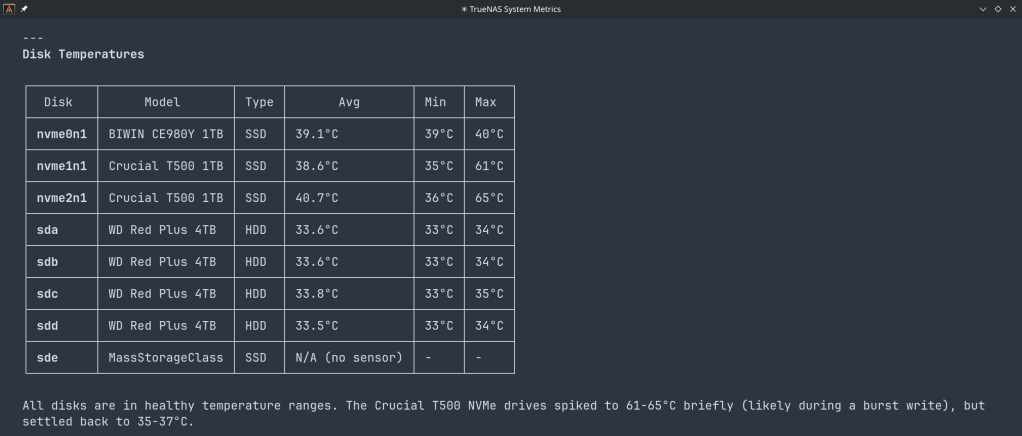
System monitoring — real-time CPU, memory, disk I/O, and network metrics. Active alerts, system version, hardware info. The kind of overview that normally requires clicking through several pages of the web UI.
Maintenance — check for available updates, scrub status, boot environment management, last backup timestamps.
Application management — list, install, upgrade, and monitor the status of TrueNAS applications (Docker containers on SCALE).
Virtual machines — full VM lifecycle: create, start, stop, monitor resource usage.
Capacity planning — utilization trends, forecasting, and recommendations. Ask “how long until my main pool is full at current growth rate?” and get a reasoned answer.
Directory services — Active Directory, LDAP, and FreeIPA integration status and management.
The connector includes a dry-run mode that previews any destructive operation before executing it, showing estimated execution time and a diff of what would change. Built-in validation blocks dangerous operations automatically. Long-running tasks (scrubs, migrations, upgrades) are tracked in the background with progress updates.
Traditional NAS management is a context-switching problem. You have a question — “why is this pool degraded?” — and answering it means opening the web UI, navigating to storage, cross-referencing the alert log, checking disk SMART data, and reading documentation. Each step is manual.
With MCP, the AI holds all of that context simultaneously. A single question like “my pool has an error, what should I do?” triggers the AI to query pool status, check SMART data, look at recent alerts, and synthesize a diagnosis — in one response, with no tab-switching.
This is especially powerful for complex homelab setups with many datasets, containers, and services. Instead of maintaining mental models of your storage layout, you can just ask.
The setup takes about five minutes:
~/.config/claude/claude_desktop_config.json) or Claude Code (claude mcp add ...).The binary supports self-signed certificates (pass -insecure for typical TrueNAS setups) and works over Tailscale or any network path to your NAS.
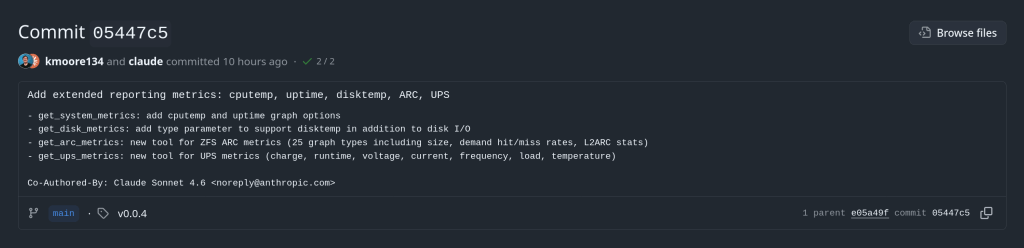
The TrueNAS MCP connector is a research preview (currently v0.0.4). It is functional and comprehensive, but not yet recommended for production-critical automation. It is well-suited for monitoring, querying, and exploratory management. Treat destructive operations (dataset deletion, VM reconfiguration) with the same care you would in the web UI — use dry-run mode first.
The project is open source and actively developed. Given that this is an official TrueNAS Labs project, it is likely to become a supported feature in future TrueNAS releases.
The TrueNAS MCP connector is an early example of a pattern that will become common: infrastructure that exposes a semantic API layer for AI consumption, not just a REST API for human-written scripts. The difference is significant. A REST API tells you what the data looks like. An MCP server tells the AI what operations are possible, what they mean, and how to chain them safely.
As more homelab and enterprise tools adopt MCP, the practical vision of a conversational infrastructure layer — where you describe intent and the AI handles execution — becomes genuinely achievable, not just a demo.
The TrueNAS MCP connector is available at github.com/truenas/truenas-mcp. Setup documentation is at the TrueNAS Research Labs page.
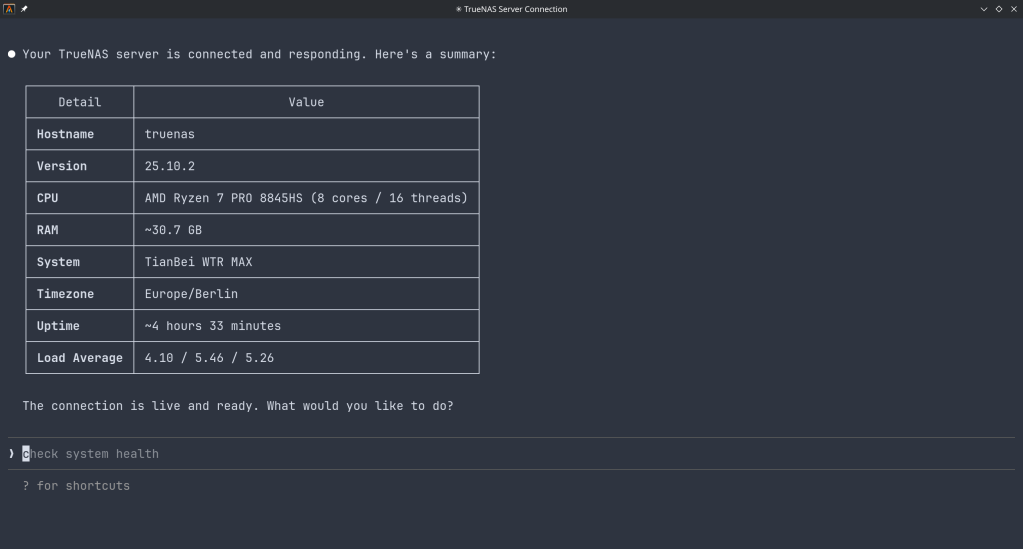
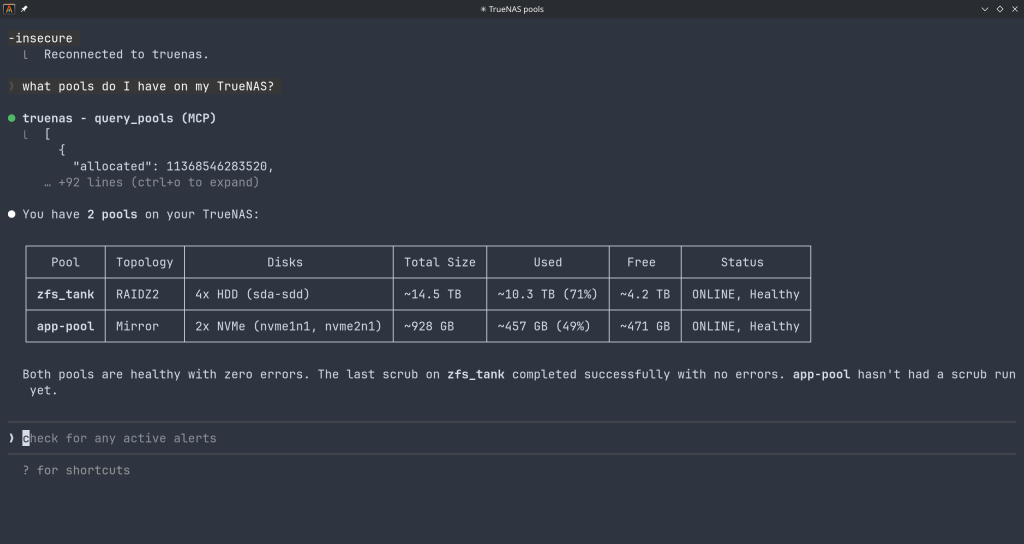
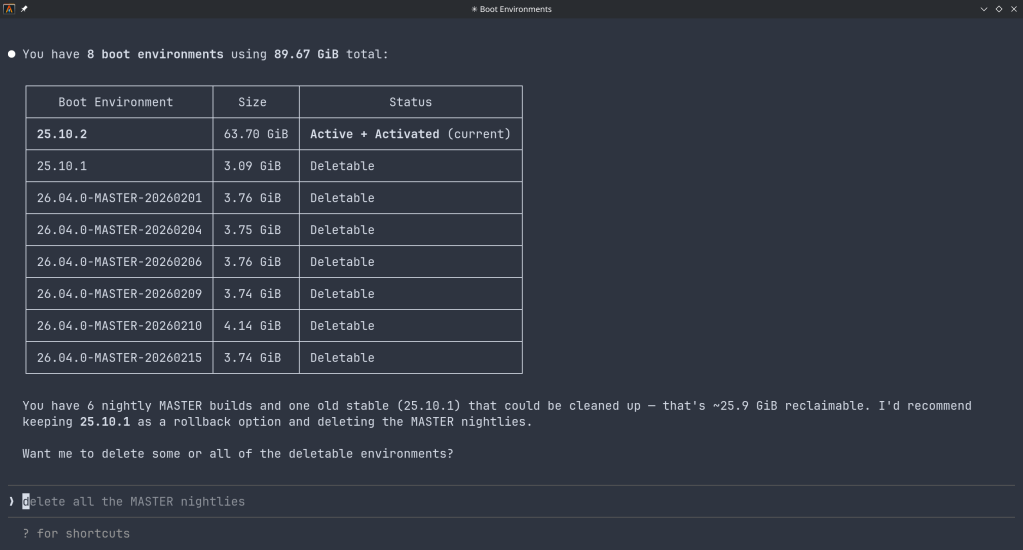
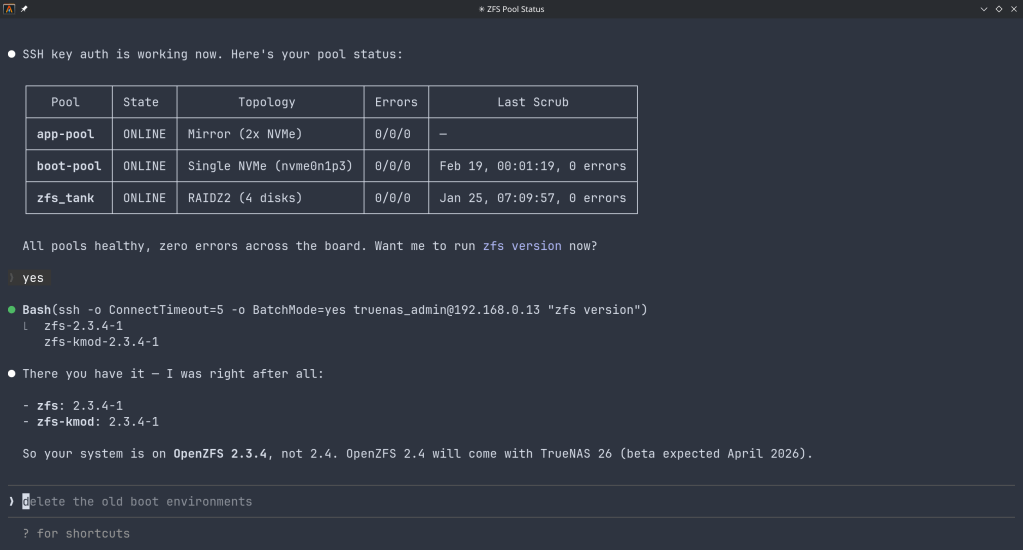
Sample screenshots!!
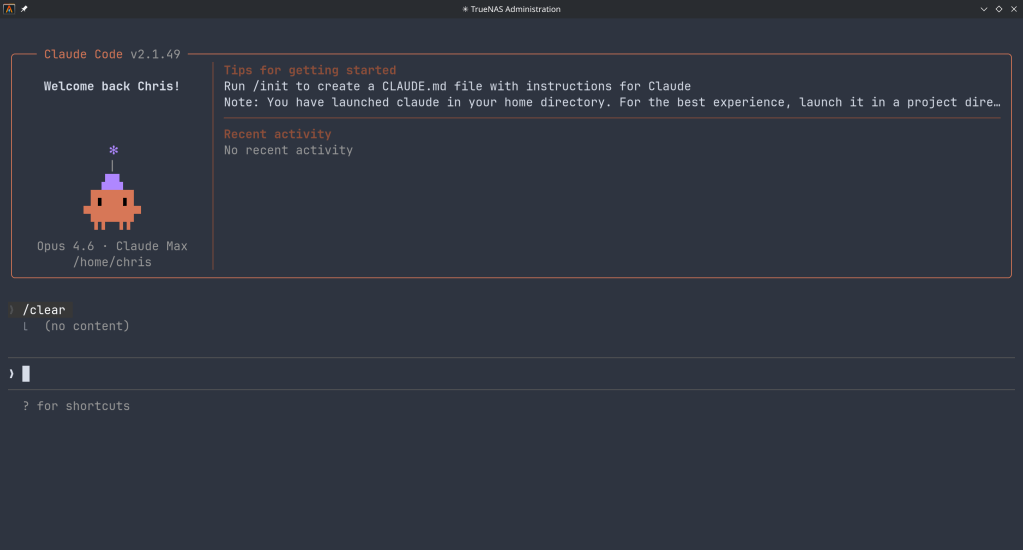
This article describes a kernel-level patch to the FreeBSD rge(4) network driver that enables proper identification of Realtek RTL8125/8126/8127 silicon variants at attach time. The change is small but reveals an interesting idiom gap between two BSD kernels.
The rge(4) driver supports a family of Realtek multi-gigabit NICs spanning three product generations. Despite sharing a common PCI device ID tree, each silicon revision has meaningfully different characteristics: different firmware images, different register maps for some functions, and different feature sets.
| Chip | hwrev register | Type constant | Generation |
|---|---|---|---|
| RTL8125 | 0x60900000 | MAC_R25 | 2.5GbE first gen |
| RTL8125B | 0x64100000 | MAC_R25B | 2.5GbE revised |
| RTL8125D_1 | 0x68800000 | MAC_R25D | 2.5GbE third gen |
| RTL8125D_2 | 0x68900000 | MAC_R25D | 2.5GbE third gen alt |
| RTL8126_1 | 0x64900000 | MAC_R26 | 5GbE first gen |
| RTL8126_2 | 0x64a00000 | MAC_R26 | 5GbE alt |
| RTL8127 | 0x6c900000 | MAC_R27 | 10GbE |
The hardware revision is detected by reading the RGE_TXCFG register and masking off the lower bits, yielding the hwrev value. This happens in rge_get_macaddr() via the attachment path in rge_attach().
The detection is a straightforward switch statement in sys/dev/rge/if_rge.c:
hwrev = CSR_READ_4(sc, RGE_TXCFG) & RGE_TXCFG_HWREV;
switch (hwrev) {
case 0x60900000:
    sc->rge_type = MAC_R25;
    break;
case 0x64100000:
    sc->rge_type = MAC_R25B;
    break;
/* ... */
}
The rge_type field stored in the softc structure is then used throughout the driver to select chip-specific paths — for example, firmware loading, ring configuration, and certain register sequences differ between MAC_R25 and MAC_R25B.
Before the patch, despite detecting seven distinct silicon variants at runtime, the driver logged nothing about which one was found. All three product families produce dmesg output that looks like this:
pci0: <network> at device 0.0 (no driver attached)
rge0: <RTL8125> mem 0xfc400000-0xfc40ffff [...] at device 0.0 on pci2
rge0: Using 1 MSI-X message
rge0: CHIP: 0x00000000
miibus0: <MII bus> on rge0
The string <RTL8125> comes from the PCI probe function — specifically device_set_desc() — which is set once during probe based on the PCI subsystem ID, before the hardware revision register is even read. It cannot distinguish RTL8125 from RTL8125B, or RTL8126_1 from RTL8126_2. A user filing a bug report, or a developer debugging an issue specific to one silicon stepping, had no way to confirm which variant was present without writing custom code to read RGE_TXCFG manually.
Examining the original import commit reveals that identification prints were always present in the source — just commented out in a non-idiomatic style:
case 0x60900000:
    sc->rge_type = MAC_R25;
// device_printf(dev, "RTL8125\n");
    break;
case 0x64100000:
    sc->rge_type = MAC_R25B;
// device_printf(dev, "RTL8125B\n");
    break;
The use of // comments is itself a signal: the FreeBSD kernel style guide mandates /* */ C89-style comments for all kernel code. The // style is characteristic of code copied directly from another source and then quickly commented out.
The origin is OpenBSD’s sys/dev/pci/if_rge.c, where the equivalent identification uses a different printing idiom:
/* OpenBSD style — appends to the in-progress attach line */
case 0x64100000:
    sc->rge_type = MAC_R25B;
    printf(": RTL8125B");
    break;
In OpenBSD, the device attachment infrastructure prints the device name on a line and drivers call bare printf() to append chip identification to that same line, producing output like:
rge0 at pci2 dev 0 function 0 "Realtek 8125" rev 0x00: RTL8125B, ...FreeBSD’s driver framework does not work this way. device_printf(dev, ...) always begins a new line prefixed with the device name — it cannot append to an existing line. A direct translation of the OpenBSD bare printf() would either produce garbled output or nothing useful. Rather than translating the idiom at import time, the prints were commented out.
The correct FreeBSD idiom is device_printf() on its own line, following attach. The patch enables all seven commented prints in the proper style, and adds the raw hwrev register value alongside the human-readable name — consistent with how the re(4) driver reports chip revisions:
switch (hwrev) {
case 0x60900000:
    sc->rge_type = MAC_R25;
    device_printf(dev, "chip rev: RTL8125 (0x%08x)\n", hwrev);
    break;
case 0x64100000:
    sc->rge_type = MAC_R25B;
    device_printf(dev, "chip rev: RTL8125B (0x%08x)\n", hwrev);
    break;
case 0x64900000:
    sc->rge_type = MAC_R26_1;
    device_printf(dev, "chip rev: RTL8126_1 (0x%08x)\n", hwrev);
    break;
case 0x64a00000:
    sc->rge_type = MAC_R26_2;
    device_printf(dev, "chip rev: RTL8126_2 (0x%08x)\n", hwrev);
    break;
case 0x68800000:
    sc->rge_type = MAC_R25D;
    device_printf(dev, "chip rev: RTL8125D_1 (0x%08x)\n", hwrev);
    break;
case 0x68900000:
    sc->rge_type = MAC_R25D;
    device_printf(dev, "chip rev: RTL8125D_2 (0x%08x)\n", hwrev);
    break;
case 0x6c900000:
    sc->rge_type = MAC_R27;
    device_printf(dev, "chip rev: RTL8127 (0x%08x)\n", hwrev);
    break;
}
Including the raw hex value serves two purposes. First, it allows unambiguous identification even if the human-readable label ever becomes incorrect or incomplete. Second, it mirrors the diagnostic value already present in the CHIP: line printed slightly later in attach, but associates it directly with the revision identification step.
After the patch, a system with an RTL8125B produces:
rge0: <RTL8125> mem 0xfc400000-0xfc40ffff [...] at device 0.0 on pci2
rge0: chip rev: RTL8125B (0x64100000)
rge0: Using 1 MSI-X message
A system with RTL8126_1 (a 5GbE part that probes as <RTL8126>) produces:
rge0: <RTL8126> mem 0xfc400000-0xfc40ffff [...] at device 0.0 on pci2
rge0: chip rev: RTL8126_1 (0x64900000)
rge0: Using 1 MSI-X message
The chip revision is now permanently captured in dmesg(8) output and system logs, available without any special tools or kernel knowledge.
The hwrev bitmask is read from bits [31:20] of RGE_TXCFG. Realtek does not publish full public documentation for these register fields, and the driver’s variant table has been built incrementally as new silicon steppings were encountered in the wild. Including the raw value means that if a new stepping appears with an hwrev not yet in the driver’s switch statement, it will still be captured in the log — giving developers the exact value needed to add support for it.
hwrev leaves rge_type at its zero-initialized value. With the patch, the raw value is logged for all handled cases, but an unknown stepping would produce no chip rev line at all — a future improvement could add a default case that logs the unknown value explicitly.
The complete change touches a single file, sys/dev/rge/if_rge.c:
7 lines changed: 7 insertions(+), 7 deletions(-)
- // device_printf(dev, "RTL8125\n");   (×7 variants)
+ device_printf(dev, "chip rev: RTL8125 (0x%08x)\n", hwrev);  (×7 variants)
No logic changes. No new dependencies. No behavioral differences other than the additional log line per attach.
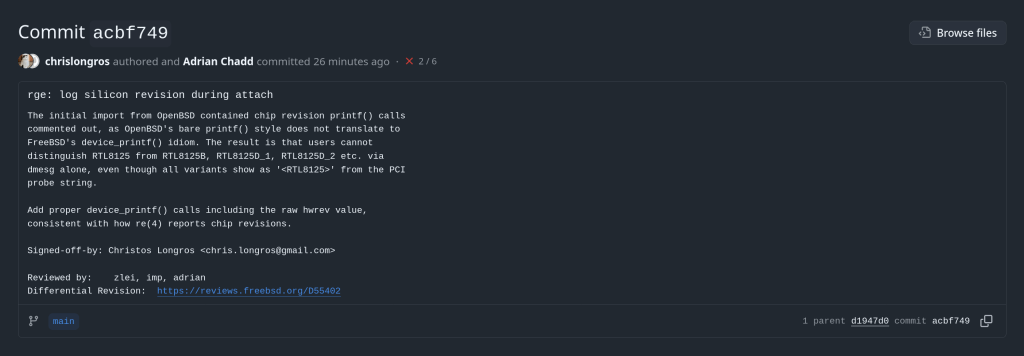
The patch is under review at reviews.freebsd.org/D55402, where it will be integrated into the broader rge(4) improvement stack for the upcoming development cycle.
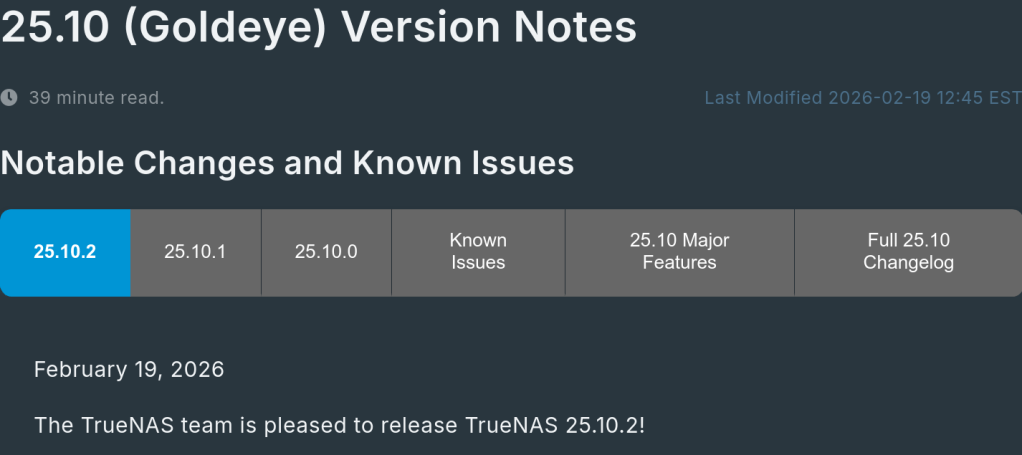
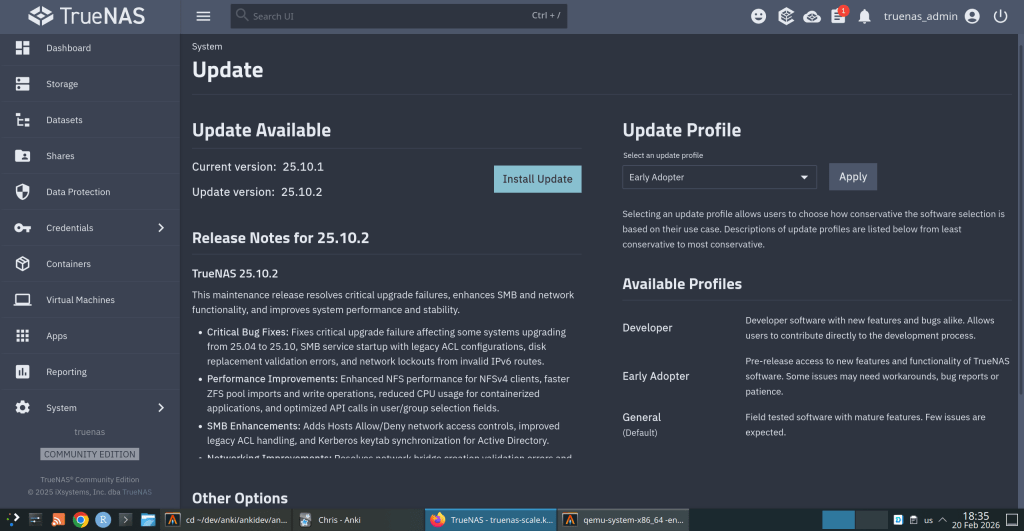
iXsystems has released TrueNAS 25.10.2, a maintenance update to the 25.10 branch. If you’re running TrueNAS Scale on the Early Adopter channel, this is a recommended update — it fixes several critical issues including an upgrade path bug that could leave systems unbootable.
Upgrade failure fix (NAS-139541). Some systems upgrading from TrueNAS 25.04 to 25.10 encountered a “No space left on device” error during boot variable preparation, leaving the system unbootable after the failed attempt. This is fixed in 25.10.2.
SMB service startup after upgrade (NAS-139076). Systems with legacy ACL configurations from older TrueNAS versions could not start the SMB service after upgrading to 25.10.1. The update now automatically converts legacy permission formats during service initialization.
Disk replacement validation (NAS-138678). A frustrating bug rejected replacement drives with identical capacity to the failed drive, showing a “device is too small” error. Fixed — identical capacity replacements now work correctly.
NFS performance for NFSv4 clients (NAS-139128). Support for STATX_CHANGE_COOKIE has been added, surfacing ZFS sequence numbers to NFS clients via knfsd. Previously, the system synthesized change IDs based on ctime, which could fail to increment consistently due to kernel timer coarseness. This improves client attribute cache invalidation and reduces unnecessary server requests.
ZFS pool import performance (NAS-138879). Async destroy operations — which can run during pool import — now have a time limit per transaction group. Pool imports that previously stalled due to prolonged async destroy operations will complete significantly faster.
Containerized app CPU usage (NAS-139089). Background CPU usage from Docker stats collection and YAML processing has been reduced by optimizing asyncio_loop operations that were holding the Global Interpreter Lock during repeated container inspections.
Network configuration lockout fix (NAS-139575). Invalid IPv6 route entries in the routing table could block access to network settings, app management, and bug reporting. The system now handles invalid route entries gracefully.
Network bridge creation fix (NAS-139196). Pydantic validation errors were preventing bridge creation through the standard workflow of removing IPs from an interface, creating a bridge, and reassigning those IPs.
IPv6 Kerberos fix (NAS-139734). Active Directory authentication failed when using IPv6 addresses for Kerberos Distribution Centers. IPv6 addresses are now properly formatted with square brackets in krb5.conf.
SMB Hosts Allow/Deny controls (NAS-138814). IP-based access restrictions are now available for SMB shares across all relevant purpose presets. Also adds the ability to synchronize Kerberos keytab SPNs with Active Directory updates.
Dashboard storage widget (NAS-138705). Secondary storage pools were showing “Unknown” for used and free space in the Dashboard widget. Fixed.
Cloud Sync tasks invisible after CORE → SCALE upgrade (NAS-138886). Tasks were functional via CLI but invisible in the web UI due to a data inconsistency where the bwlimit field contained empty objects instead of empty arrays.
S3 endpoint validation (NAS-138903). Cloud Sync tasks now validate that S3 endpoints include the required https:// protocol prefix upfront, with a clear error message instead of the unhelpful “Invalid endpoint” response.
Session expiry fix (NAS-138467). Users were being unexpectedly logged out during active operations despite configured session timeout settings. Page refresh (F5) was also triggering the login screen during active sessions. Both are now fixed.
Error notifications showing placeholder text (NAS-139010). Error notifications were displaying “%(err)s Warning” instead of actual error messages.
Users page now shows Directory Services users by default (NAS-139073). Directory Services users now appear in the default view without requiring a manual filter change.
SSH access removal fix (NAS-139130). Clearing the SSH Access option appeared to save successfully but the SSH indicator persisted in the user list. Now properly disabled through the UI.
Certificate management for large DNs (NAS-139056). Certificates with Distinguished Names exceeding 1024 characters — typically those with many Subject Alternative Names — can now be properly imported and managed.
The root account’s group membership is now locked to builtin_administrators and cannot be modified through the UI. This prevents accidental removal of privileges that could break scheduled tasks, cloud sync, and cron jobs. To disable root UI access, use the Disable Password option in Credentials → Local Users instead.
Update via System → Update in the web UI, or download from truenas.com. Full release notes and changelog are available at the TrueNAS Documentation Hub.
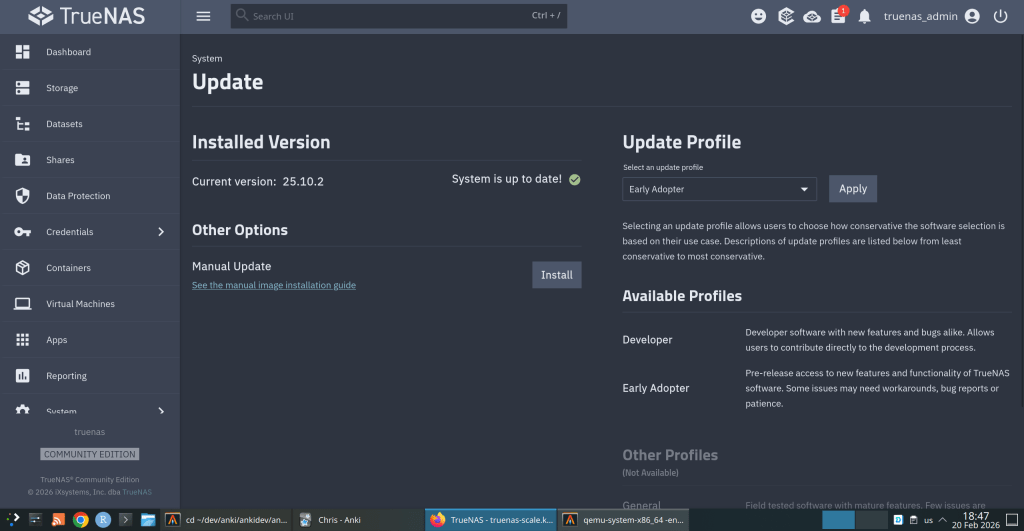
https://forums.truenas.com/t/truenas-25-10-2-is-now-available/63778
The rge(4) driver recently landed in FreeBSD HEAD, ported from OpenBSD. I tested it with a physical RTL8125 2.5GbE NIC passed through to a QEMU/KVM virtual machine running FreeBSD 16.0-CURRENT. Here’s what works, what doesn’t, and what’s worth reporting upstream.
The Realtek RTL8125 is one of the most common 2.5 Gigabit Ethernet controllers on consumer motherboards. For years, FreeBSD users had to rely on either the in-tree re(4) driver (which didn’t support the RTL8125 at all) or the third-party realtek-re-kmod port, which was Realtek’s own driver adapted for FreeBSD but suffered from stability issues and coding standard mismatches with the FreeBSD kernel.
In December 2025, Adrian Chadd imported the OpenBSD rge(4) driver into FreeBSD HEAD. This driver, originally written by Kevin Lo for OpenBSD 6.6, provides native support for the RTL8125, RTL8126, and RTL8127 families. Bernard Spil created the net/realtek-rge-kmod port for testing on stable branches. The driver is still young on FreeBSD, and the community is actively seeking testing feedback.
I have an RTL8125 on my Gigabyte motherboard (Ryzen 7950X system running Arch Linux), so I set out to test the driver using VFIO/PCI passthrough into a FreeBSD 16.0-CURRENT VM.
The test environment uses PCI passthrough to give the FreeBSD VM direct hardware access to the physical RTL8125 NIC. This is the closest you can get to bare-metal testing without installing FreeBSD directly. The host keeps its network via WiFi (RTL8852CE) while the Ethernet card is handed to the guest.
host$ lspci -nn | grep -i realtek
06:00.0 Network controller: Realtek ... RTL8852CE [10ec:c852]
07:00.0 Ethernet controller: Realtek ... RTL8125 [10ec:8125] (rev 05)

$ find /sys/kernel/iommu_groups/ -type l | sort -V | grep 07:00
/sys/kernel/iommu_groups/16/devices/0000:07:00.0
The RTL8125 sits at PCI address 07:00.0 in IOMMU group 16, isolated from other devices. The RTL8852CE WiFi card at 06:00.0 stays on the host for connectivity.
host (root)# Load the VFIO PCI module
$ sudo modprobe vfio-pci

# Unbind from the r8169 host driver
$ sudo sh -c 'echo "0000:07:00.0" > /sys/bus/pci/devices/0000:07:00.0/driver/unbind'

# Bind to vfio-pci for passthrough
$ sudo sh -c 'echo "0000:07:00.0" > /sys/bus/pci/drivers/vfio-pci/bind'

# Verify
$ lspci -k -s 07:00.0
07:00.0 Ethernet controller: Realtek ... RTL8125 2.5GbE Controller (rev 05)
Kernel driver in use: vfio-pcihost$ sudo qemu-system-x86_64 \
-enable-kvm \
-m 4G \
-smp 4 \
-hda FreeBSD-16.0-CURRENT-amd64-ufs.qcow2 \
-device vfio-pci,host=07:00.0 \
-nographicem0 (Intel e1000) by default, which routes through QEMU’s user-mode NAT. Since the default route points to em0, you need to switch it to use the passthrough NIC: route delete default && route add default 192.168.0.1
FreeBSD detects the RTL8125 immediately on boot and attaches the rge(4) driver:
dmesgrge0: <RTL8125> port 0xc000-0xc0ff mem 0xc000000000-0xc00000ffff,
      0xc000010000-0xc000013fff irq 11 at device 4.0 on pci0
rge0: Ethernet address: xx:xx:xx:xx:xx:xx
rge0: link state changed to DOWN
rge0: link state changed to UP
DHCP works, DNS resolves, and the NIC gets a LAN address. Here’s what pciconf reports:
pciconf -lvrge0@pci0:0:4:0: class=0x020000 rev=0x05 vendor=0x10ec device=0x8125
    subvendor=0x1458 subdevice=0xe000
    vendor     = 'Realtek Semiconductor Co., Ltd.'
    device     = 'RTL8125 2.5GbE Controller'
    class      = network
subclass = ethernetThe sysctl dev.rge.0 output shows healthy operation with no concerning errors:
| Metric | Value | Status |
|---|---|---|
rge_rx_ok | 26,274 | OK |
rge_tx_ok | 13,115 | OK |
rge_tx_er | 6 | link negotiation |
intr_system_errcnt | 0 | OK |
tx_watchdog_timeout_cnt | 0 | OK |
transmit_full_cnt | 0 | OK |
rx_ether_csum_err | 0 | OK |
link_state_change_cnt | 2 | DOWN → UP |
Hardware checksum offload for IPv4, TCP, and UDP all function correctly — every csum_valid counter matches its corresponding csum_exists counter. Ping latency to external hosts averaged 14–18ms, which is reasonable for the test configuration.
Comparing the two NICs in the VM reveals a significant gap in advertised features:
| Feature | em0 (emulated) | rge0 (passthrough) |
|---|---|---|
| RXCSUM / TXCSUM | yes | yes |
| VLAN_MTU / HWTAGGING | yes | yes |
| VLAN_HWCSUM | yes | yes |
| TSO4 | yes | no |
| LRO | yes | no |
| Jumbo frames | yes | no |
| WoL | yes | no |
| VLAN_HWTSO | yes | no |
The rge(4) driver currently exposes a basic set of offload features (options=9b). TSO, LRO, jumbo frame support, and Wake-on-LAN are not yet implemented, though the OpenBSD man page mentions WoL support.
Here’s the most notable finding: the driver does not expose 2500baseT as a media type.
FreeBSD VMroot@freebsd:~# ifconfig rge0 media 2500baseT mediaopt full-duplex
ifconfig: unknown media subtype: 2500baseT

root@freebsd:~# ifconfig rge0
rge0: flags=1008843<UP,BROADCAST,RUNNING,SIMPLEX,MULTICAST,LOWER_UP>
      options=9b<RXCSUM,TXCSUM,VLAN_MTU,VLAN_HWTAGGING,VLAN_HWCSUM>
      media: Ethernet autoselect (1000baseT <full-duplex>)
      status: active
The NIC negotiates at 1000baseT only. This is a known limitation — another user on the FreeBSD forums with an RTL8125BG on an ASRock TRX50 motherboard reported the exact same behavior: options=9b, 1000baseT, no 2.5G option.
rge(4) man page explicitly documents the RTL8125 as capable of 2500Mbps operation. Since the FreeBSD driver was ported from OpenBSD, the 2.5G media type support may not have been fully adapted to FreeBSD’s ifmedia framework yet, or may require additional work in the FreeBSD-specific parts of the driver.
The rge(4) driver on FreeBSD 16.0-CURRENT works well for basic Ethernet functionality with the RTL8125. The NIC attaches cleanly, DHCP and DNS work, hardware checksum offload is functional, and there are no stability issues during my testing session. For a driver that landed in HEAD just two months ago, this is a solid start.
2500baseT media type not available — The hardware is a 2.5GbE controller, but the driver only negotiates at 1G. This is the most impactful limitation for users who specifically chose RTL8125-equipped boards for the faster link speed. I’ve reported this to the FreeBSD freebsd-net mailing list.
Limited offload features — TSO, LRO, jumbo frames, and WoL are not yet exposed. For typical desktop use this is fine, but it will affect throughput in high-bandwidth scenarios.
If you have an RTL8125 and are running FreeBSD 15 or CURRENT, testing the driver and reporting your results — positive or negative — will help get it stabilized and potentially backported to stable branches. The FreeBSD forums thread and the freebsd-current mailing list thread are the best places to contribute.
After shutting down the VM, don’t forget to give the NIC back to your host:
host$ sudo sh -c 'echo "0000:07:00.0" > /sys/bus/pci/drivers/vfio-pci/unbind'
$ sudo sh -c 'echo "0000:07:00.0" > /sys/bus/pci/drivers/r8169/bind'
$ sudo dhcpcd enp7s0Update:
ifconfig -vm rge0 confirms 2500Base-T is listed as a supported media type:
supported media:
media autoselect
media 2500Base-T mediaopt full-duplex
media 2500Base-T
media 1000baseT mediaopt full-duplex
media 1000baseT
media 100baseTX mediaopt full-duplex
media 100baseTX
media 10baseT/UTP mediaopt full-duplex
media 10baseT/UTP
My original error was using 2500baseT (lowercase) instead of 2500Base-T — the media subtype string is case-sensitive.
I also tried forcing 2500Base-T:
ifconfig rge0 media 2500Base-T mediaopt full-duplex
The link briefly dropped and came back at 1000baseT. The media line showed “Ethernet Other ” rather than the expected type. However, I then checked my router and all LAN ports are 1 Gbps only … so the fallback to 1000baseT is expected. I don’t currently have a 2.5G switch to verify actual 2.5G linking.
A summary of changes since BETA1 includes:

o Multiple bug fixes in diff(1)

o Several updates to qlnxe(4)

o Updates to the blocklist (aka blacklist) system

o Compatibility in the ipfw(8) userland tools with FreeBSD 15 kernels
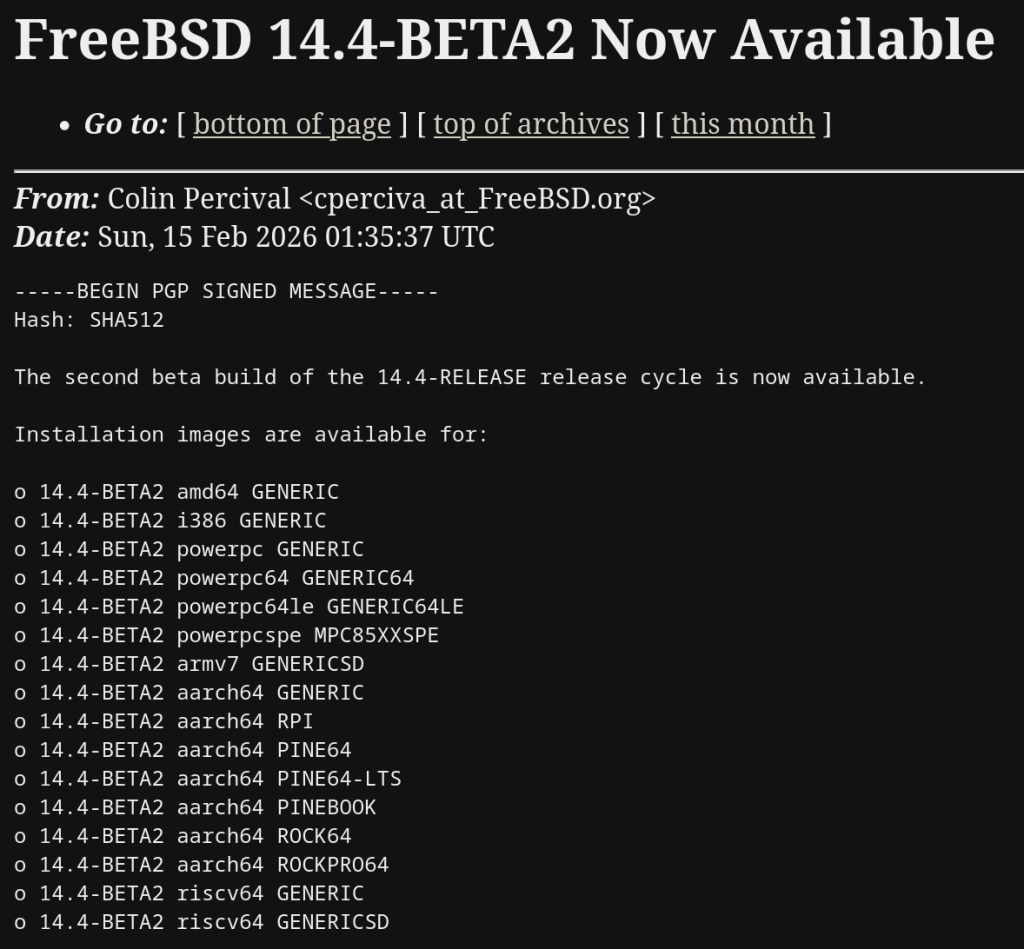
https://lists.freebsd.org/archives/freebsd-stable/2026-February/003848.html
How a failed nightly update left my TrueNAS server booting into an empty filesystem — and the two bugs responsible.
I run TrueNAS Scale on an Aoostar WTR Max as my homelab server, with dozens of Docker containers for everything from Immich to Jellyfin. I like to stay on the nightly builds to get early access to new features and contribute bug reports when things go wrong. Today, things went very wrong.
It started innocently enough. I kicked off the nightly update from the TrueNAS UI, updating from 26.04.0-MASTER-20260210-020233 to the latest 20260213 build. Instead of a smooth update, I got this:
error[EFAULT] Error: Command ['zfs', 'destroy', '-r',
  'boot-pool/ROOT/26.04.0-MASTER-20260213-020146-1']
  failed with exit code 1:
  cannot unmount '/tmp/tmpo8dbr91e': pool or dataset is busy
The update process was trying to clean up a previous boot environment but couldn’t unmount a temporary directory it had created. No big deal, I thought — I’ll just clean it up manually.
I checked what was holding the mount open:
bash$ fuser -m /tmp/tmpo8dbr91e    # nothing
$ lsof +D /tmp/tmpo8dbr91e     # nothing (just Docker overlay warnings)
Nothing was using it. A force unmount also failed:
bash$ sudo umount -f /tmp/tmpo8dbr91e
umount: /tmp/tmpo8dbr91e: target is busy.
Only a lazy unmount worked:
bash$ sudo umount -l /tmp/tmpo8dbr91e
So I unmounted it and destroyed the stale boot environment manually. Then I retried the update. Same error, different temp path. Unmount, destroy, retry. Same error again. Each attempt, the updater would mount a new temporary directory, fail to unmount it, and bail out.
I even tried stopping Docker before the update, thinking the overlay mounts might be interfering. No luck.
Frustrated, I rebooted the server thinking a clean slate might help. The server didn’t come back. After 10 minutes of pinging with no response, I plugged in a monitor and saw this:
consoleMounting 'boot-pool/ROOT/26.04.0-MASTER-20260213-020146' on '/root/' ... done.
Begin: Running /scripts/local-bottom ... done.
Begin: Running /scripts/nfs-bottom ... done.
run-init: can't execute '/sbin/init': No such file or directory
Target filesystem doesn't have requested /sbin/init.
run-init: can't execute '/etc/init': No such file or directory
run-init: can't execute '/bin/init': No such file or directory
run-init: can't execute '/bin/sh': No such file or directory
No init found. Try passing init= bootarg.

BusyBox v1.37.0 (Debian 1:1.37.0-6+b3) built-in shell (ash)
Enter 'help' for a list of built-in commands.

(initramfs)
The system had booted into the incomplete boot environment from the failed update — an empty shell with no operating system in it. The update process had set this as the default boot environment before it was fully built.
Fortunately, ZFS boot environments make this recoverable. I rebooted again, caught the GRUB menu, and selected my previous working boot environment (20260210-020233). After booting successfully, I locked in the correct boot environment as the default:
bash$ sudo zpool set bootfs=boot-pool/ROOT/26.04.0-MASTER-20260210-020233 boot-pool
Then cleaned up the broken environment:
bash$ sudo zfs destroy -r boot-pool/ROOT/26.04.0-MASTER-20260213-020146
Server back to normal.
There are actually two separate bugs here:
umount -f doesn’t work; only umount -l does. And since each retry creates a new temp mount, the problem is self-perpetuating.
The updater should only set the new boot environment as the default after the update is verified complete. And it should use umount -l as a fallback when umount -f fails, since the standard force unmount clearly isn’t sufficient here.
I’ve filed this as NAS-139794 on the TrueNAS Jira. If you’re running nightly builds, be aware of this issue — and make sure you have console access to your server in case you need to select a different boot environment from GRUB.
Running nightly builds is inherently risky, and I accept that. But an update failure should never leave a system unbootable. The whole point of ZFS boot environments is to provide a safety net — but that net has a hole when the updater switches the default before the new environment is ready.
In the meantime, keep a monitor and keyboard accessible for your TrueNAS box, and remember: if you ever drop to an initramfs shell after an update, your data is fine. Just reboot into GRUB and pick the previous boot environment.
The ArchZFS project has moved its official package repository from archzfs.com to GitHub Releases. Here’s how to migrate — and why this matters for Arch Linux ZFS users.
If you run ZFS on Arch Linux, you almost certainly depend on the ArchZFS project for your kernel modules. The project has been the go-to source for prebuilt ZFS packages on Arch for years, saving users from the pain of building DKMS modules on every kernel update.
The old archzfs.com repository has gone stale, and the project has migrated to serving packages directly from GitHub Releases. The packages are built the same way and provide the same set of packages — the only difference is a new PGP signing key and the repository URL.
If you’re currently using the old archzfs.com server in your /etc/pacman.conf, you need to update it. There are two options depending on your trust model.
The PGP signing system is still being finalized, so if you just want it working right away, you can skip signature verification for now:
pacman.conf[archzfs]
SigLevel = Never
Server = https://github.com/archzfs/archzfs/releases/download/experimental
For proper package verification, import the new signing key first:
bash# pacman-key --init
# pacman-key --recv-keys 3A9917BF0DED5C13F69AC68FABEC0A1208037BE9
# pacman-key --lsign-key 3A9917BF0DED5C13F69AC68FABEC0A1208037BE9
Then set the repo to require signatures:
pacman.conf[archzfs]
SigLevel = Required
Server = https://github.com/archzfs/archzfs/releases/download/experimental
After updating your config, sync and refresh:
bash# pacman -Sy
The repository provides the same package groups as before, targeting different kernels:
| Package Group | Kernel | Use Case |
|---|---|---|
archzfs-linux | linux (default) | Best for most users, latest stable OpenZFS |
archzfs-linux-lts | linux-lts | LTS kernel, better compatibility |
archzfs-linux-zen | linux-zen | Zen kernel with extra features |
archzfs-linux-hardened | linux-hardened | Security-focused kernel |
archzfs-dkms | Any kernel | Auto-rebuilds on kernel update, works with any kernel |
Hosting a pacman repository on GitHub Releases is a clever approach. GitHub handles the CDN, availability, and bandwidth — no more worrying about a single server going down and blocking ZFS users from updating. The build pipeline uses GitHub Actions, so packages are built automatically and transparently. You can even inspect the build scripts in the repository itself.
The trade-off is that the URL is a bit unwieldy compared to the old archzfs.com/$repo/$arch, but that’s a minor cosmetic issue.
The project labels this as experimental and advises starting with non-critical systems. In practice, the packages are the same ones the community has been using — the “experimental” label applies to the new distribution method, not the packages themselves. Still, the PGP signing system is being reworked, so you may want to revisit your SigLevel setting once that’s finalized.
archzfs.com repository is stale and will not receive updates. If you haven’t migrated yet, do it now — before your next pacman -Syu pulls a kernel that your current ZFS modules don’t support, leaving you unable to import your pools after reboot.
For full details and ongoing updates, check the ArchZFS wiki and the release page.
A kernel-to-userspace patch that replaces a vague zpool create error with one that names the exact device and pool causing the problem. Here’s how it works, from the ioctl layer to the formatted error message.
If you’ve managed ZFS pools with more than a handful of disks, you’ve almost certainly hit this error:
bash$ sudo zpool create tank mirror /dev/sda /dev/sdb /dev/sdc /dev/sdd
cannot create 'tank': one or more vdevs refer to the same device,
or one of the devices is part of an active md or lvm device
Which device? What pool? The error gives you nothing. In a 12-disk server you’re left checking each device one by one until you find the culprit.
I’d been working on a previous PR (#18184) improving zpool create error messages when Brian Behlendorf suggested a follow-up: pass device-specific error information from the kernel back to userspace, following the existing ZPOOL_CONFIG_LOAD_INFO pattern that zpool import already uses.
So I built it. The result is PR #18213:
| Error message | |
|---|---|
| Before | cannot create 'tank': one or more vdevs refer to the same device |
| After | cannot create 'tank': device '/dev/sdb1' is part of active pool 'rpool' |
The obvious approach would be: when zpool create fails, walk the vdev tree, find the device with the error, and report it. But there’s a timing problem in the kernel that makes this impossible.
When spa_create() fails, the error cleanup path calls vdev_close() on all vdevs. This function unconditionally resets vd->vdev_stat.vs_aux to VDEV_AUX_NONE on every device in the tree. By the time the error code reaches the ioctl handler, all evidence of which device failed and why has been wiped clean.
vdev_label_init(), before the cleanup path destroys it. And it must be stored somewhere that survives the cleanup — the spa_t struct, which represents the pool itself.
The only errno that travels back through the ioctl is an integer like EBUSY. No context about which device, no pool name, nothing. The entire design challenge is getting two strings (a device path and a pool name) from a kernel function that runs during vdev initialization all the way back to the userspace zpool command.
The solution follows the same mechanism that zpool import already uses to return rich error information: an nvlist (ZFS’s key-value dictionary, like a JSON object) packed into the ioctl output buffer under a well-known key.
Four touch points, each doing one small thing. Let’s walk through them.
This is the heart of the change. Inside vdev_label_init(), when vdev_inuse() returns true, we build an nvlist with the device path, then read the on-disk label to extract the pool name:
module/zfs/vdev_label.c/*
 * Determine if the vdev is in use.
 */
if (reason != VDEV_LABEL_REMOVE && reason != VDEV_LABEL_SPLIT &&
    vdev_inuse(vd, crtxg, reason, &spare_guid, &l2cache_guid)) {
        if (spa->spa_create_errlist == NULL) {
                nvlist_t *nv = fnvlist_alloc();
                nvlist_t *cfg;

                if (vd->vdev_path != NULL)
                        fnvlist_add_string(nv,
                            ZPOOL_CREATE_INFO_VDEV, vd->vdev_path);

                cfg = vdev_label_read_config(vd, -1ULL);
                if (cfg != NULL) {
                        const char *pname;
                        if (nvlist_lookup_string(cfg,
                            ZPOOL_CONFIG_POOL_NAME, &pname) == 0)
                                fnvlist_add_string(nv,
                                    ZPOOL_CREATE_INFO_POOL, pname);
                        nvlist_free(cfg);
                }

                spa->spa_create_errlist = nv;
        }
        return (SET_ERROR(EBUSY));
}
The NULL check on spa_create_errlist ensures we only record the first failing device. If there are multiple conflicts, the first one is what you need to fix anyway. fnvlist_alloc() and fnvlist_add_string() are the “fatal” nvlist functions that panic on allocation failure — appropriate here since we’re in a code path where memory should be available.
On error, spa_create() transfers ownership of the errlist via the new errinfo output parameter:
module/zfs/spa.cif (error != 0) {
        if (errinfo != NULL) {
                *errinfo = spa->spa_create_errlist;
                spa->spa_create_errlist = NULL;
        }
        spa_unload(spa);
        spa_deactivate(spa);
        spa_remove(spa);
        ...
Setting spa_create_errlist to NULL after the handoff prevents spa_deactivate() from freeing it — ownership transfers to the caller.
The ioctl handler wraps the errlist under a ZPOOL_CONFIG_CREATE_INFO key, mirroring how zpool import uses ZPOOL_CONFIG_LOAD_INFO:
module/zfs/zfs_ioctl.cerror = spa_create(zc->zc_name, config, props, zplprops, dcp,
    &errinfo);
if (errinfo != NULL) {
        nvlist_t *outnv = fnvlist_alloc();
        fnvlist_add_nvlist(outnv,
            ZPOOL_CONFIG_CREATE_INFO, errinfo);
        (void) put_nvlist(zc, outnv);
        nvlist_free(outnv);
        nvlist_free(errinfo);
}
put_nvlist() serializes the nvlist into zc->zc_nvlist_dst, which is a shared buffer between kernel and userspace.
In libzfs, after the ioctl fails, we unpack the buffer, extract the device and pool name, and format the error:
lib/libzfs/libzfs_pool.cnvlist_t *outnv = NULL;
if (zc.zc_nvlist_dst_size > 0 &&
    nvlist_unpack((void *)(uintptr_t)zc.zc_nvlist_dst,
    zc.zc_nvlist_dst_size, &outnv, 0) == 0 &&
    outnv != NULL) {
        nvlist_t *errinfo = NULL;
        if (nvlist_lookup_nvlist(outnv,
            ZPOOL_CONFIG_CREATE_INFO, &errinfo) == 0) {
                const char *vdev = NULL;
                const char *pname = NULL;
                (void) nvlist_lookup_string(errinfo,
                    ZPOOL_CREATE_INFO_VDEV, &vdev);
                (void) nvlist_lookup_string(errinfo,
                    ZPOOL_CREATE_INFO_POOL, &pname);
                if (vdev != NULL) {
                        if (pname != NULL)
                                zfs_error_aux(hdl,
                                    dgettext(TEXT_DOMAIN,
                                    "device '%s' is part of "
                                    "active pool '%s'"),
                                    vdev, pname);
                        else
                                zfs_error_aux(hdl,
                                    dgettext(TEXT_DOMAIN,
                                    "device '%s' is in use"),
                                    vdev);
                        ...
                }
        }
}
If both values are available, you get: device ‘/dev/sdb1’ is part of active pool ‘rpool’. If only the path is available (label can’t be read), you get: device ‘/dev/sdb1’ is in use. If no errinfo came back at all, the existing generic error handling kicks in unchanged.
| File | + | − |
|---|---|---|
module/zfs/vdev_label.c | +23 | -1 |
lib/libzfs/libzfs_pool.c | +41 | |
module/zfs/zfs_ioctl.c | +12 | -1 |
module/zfs/spa.c | +10 | -1 |
cmd/ztest.c | +5 | -5 |
include/sys/fs/zfs.h | +3 | |
include/sys/spa.h | +1 | -1 |
include/sys/spa_impl.h | +1 | |
tests/.../zpool_create_errinfo_001_neg.ksh | +99 | |
| 11 files total | +195 | -10 |
93 lines of feature code across 8 C files, plus a 99-line ZTS test. The cmd/ztest.c changes are mechanical — just adding a NULL parameter to each spa_create() call to match the new signature.
I tested on an Arch Linux VM running kernel 6.18.9-arch1-2 with ZFS built from source. The test environment used loopback devices, which is the standard approach in the ZFS Test Suite — the kernel code path is identical regardless of the underlying block device.
bash$ truncate -s 128M /tmp/vdev1
$ sudo losetup /dev/loop10 /tmp/vdev1
$ sudo losetup /dev/loop12 /tmp/vdev1   # same backing file
$ sudo zpool create testpool1 mirror /dev/loop10 /dev/loop12
cannot create 'testpool1': device '/dev/loop12' is part of active pool 'testpool1'bash$ truncate -s 128M /tmp/vdev1 /tmp/vdev2
$ sudo zpool create testpool1 mirror /tmp/vdev1 /tmp/vdev2
$ sudo zpool status testpool1
pool: testpool1
state: ONLINE
config:
NAME STATE READ WRITE CKSUM
testpool1 ONLINE 0 0 0
mirror-0 ONLINE 0 0 0
/tmp/vdev1 ONLINE 0 0 0
/tmp/vdev2 ONLINE 0 0 0A new negative test (zpool_create_errinfo_001_neg) creates two loopback devices backed by the same file and attempts a mirror pool creation. It verifies three things: the command fails, the error names the specific device, and the error mentions the active pool.
ZTS$ zfs-tests.sh -vx -t cli_root/zpool_create/zpool_create_errinfo_001_neg

Test: zpool_create_errinfo_001_neg (run as root) [00:00] [PASS]

Results Summary
PASS       1
Running Time:  00:00:00
Percent passed: 100.0%
CI checkstyle passes on all platforms (Ubuntu 22/24, Debian 12/13, CentOS Stream 9, AlmaLinux 8/10, FreeBSD 14). Clean build with no compiler warnings.
Only the first failing device is recorded. If multiple vdevs conflict, only the first one goes into spa_create_errlist. You need to fix the first problem before you can see the next one anyway, and it keeps the implementation simple.
The label is read twice. vdev_inuse() already reads the on-disk label and frees it before returning. We read it again with vdev_label_read_config() to extract the pool name. Modifying vdev_inuse() to optionally return the label would avoid this, but changing that function signature affects many callers — a much larger change for a follow-up.
The errlist field lives on spa_t permanently. It’s only used during spa_create(), but the field exists on every pool in memory. This costs 8 bytes per pool (one pointer, always NULL during normal operation) — negligible.
Only one error path is covered. The mechanism only fires for the vdev_inuse() EBUSY case inside vdev_label_init(). Other failures (open errors, size mismatches) still produce generic messages. The spa_create_errlist infrastructure is there for future extension.
This is a focused first step. The spa_create_errlist mechanism could be extended to cover more error paths — vdev_open() failures, size mismatches, GUID conflicts. The infrastructure is in place; it just needs more callsites.
The PR is at openzfs/zfs #18213. Feedback welcome.