-
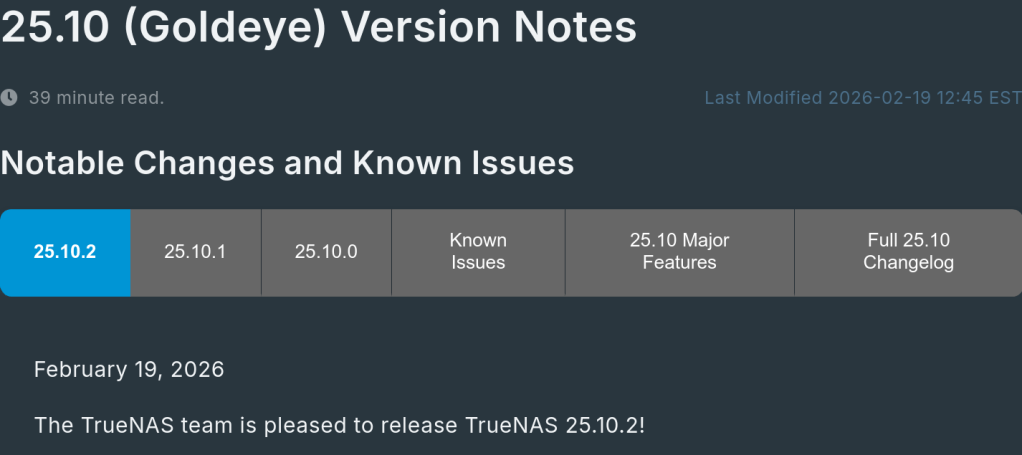
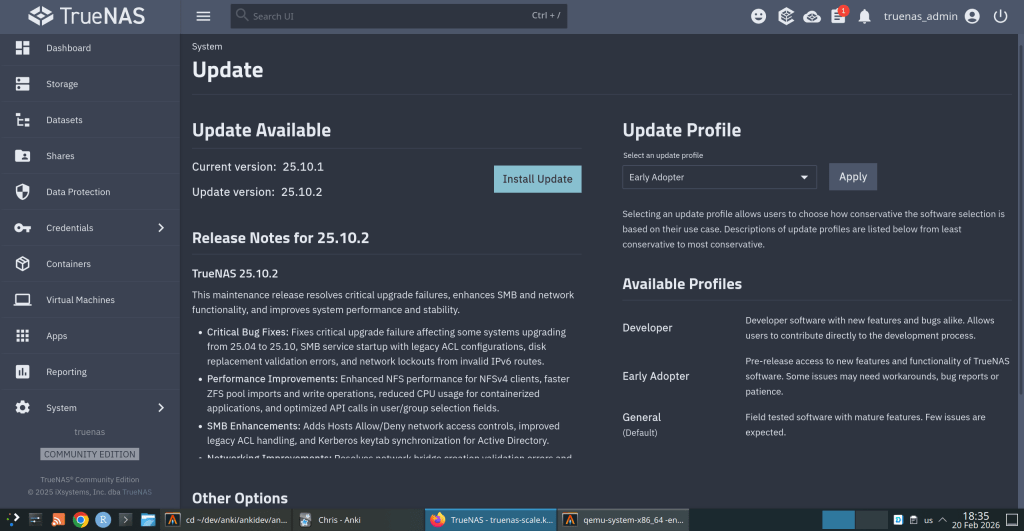
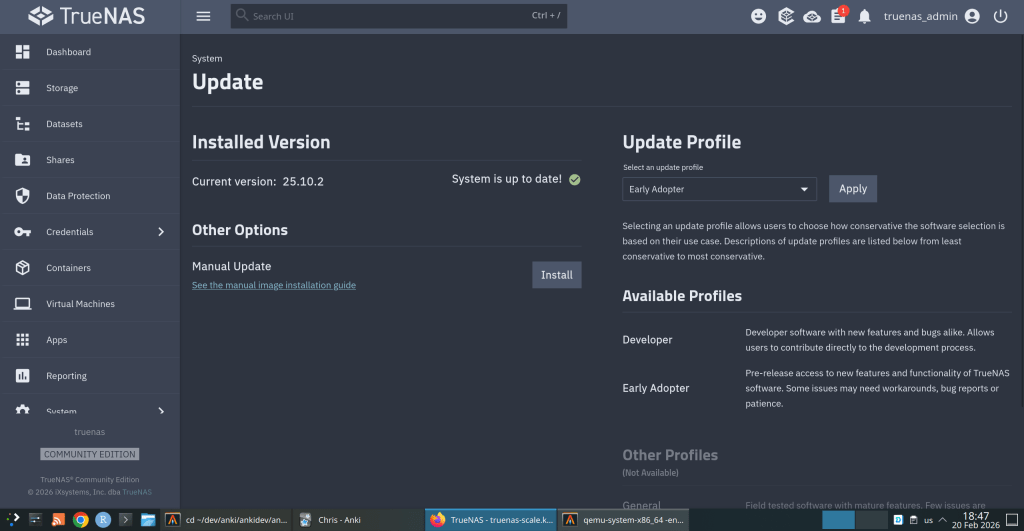
TrueNAS 25.10.2 Released: What’s New
iXsystems has released TrueNAS 25.10.2, a maintenance update to the 25.10 branch. If you’re running TrueNAS Scale on the Early Adopter channel, this is a recommended update — it fixes several critical issues including an upgrade path bug that could leave systems unbootable.
Critical Fixes
Upgrade failure fix (NAS-139541). Some systems upgrading from TrueNAS 25.04 to 25.10 encountered a “No space left on device” error during boot variable preparation, leaving the system unbootable after the failed attempt. This is fixed in 25.10.2.
SMB service startup after upgrade (NAS-139076). Systems with legacy ACL configurations from older TrueNAS versions could not start the SMB service after upgrading to 25.10.1. The update now automatically converts legacy permission formats during service initialization.
Disk replacement validation (NAS-138678). A frustrating bug rejected replacement drives with identical capacity to the failed drive, showing a “device is too small” error. Fixed — identical capacity replacements now work correctly.
Performance Improvements
NFS performance for NFSv4 clients (NAS-139128). Support for
STATX_CHANGE_COOKIEhas been added, surfacing ZFS sequence numbers to NFS clients via knfsd. Previously, the system synthesized change IDs based on ctime, which could fail to increment consistently due to kernel timer coarseness. This improves client attribute cache invalidation and reduces unnecessary server requests.ZFS pool import performance (NAS-138879). Async destroy operations — which can run during pool import — now have a time limit per transaction group. Pool imports that previously stalled due to prolonged async destroy operations will complete significantly faster.
Containerized app CPU usage (NAS-139089). Background CPU usage from Docker stats collection and YAML processing has been reduced by optimizing asyncio_loop operations that were holding the Global Interpreter Lock during repeated container inspections.
Networking
Network configuration lockout fix (NAS-139575). Invalid IPv6 route entries in the routing table could block access to network settings, app management, and bug reporting. The system now handles invalid route entries gracefully.
Network bridge creation fix (NAS-139196). Pydantic validation errors were preventing bridge creation through the standard workflow of removing IPs from an interface, creating a bridge, and reassigning those IPs.
IPv6 Kerberos fix (NAS-139734). Active Directory authentication failed when using IPv6 addresses for Kerberos Distribution Centers. IPv6 addresses are now properly formatted with square brackets in
krb5.conf.SMB Hosts Allow/Deny controls (NAS-138814). IP-based access restrictions are now available for SMB shares across all relevant purpose presets. Also adds the ability to synchronize Kerberos keytab SPNs with Active Directory updates.
UI and Cloud
Dashboard storage widget (NAS-138705). Secondary storage pools were showing “Unknown” for used and free space in the Dashboard widget. Fixed.
Cloud Sync tasks invisible after CORE → SCALE upgrade (NAS-138886). Tasks were functional via CLI but invisible in the web UI due to a data inconsistency where the
bwlimitfield contained empty objects instead of empty arrays.S3 endpoint validation (NAS-138903). Cloud Sync tasks now validate that S3 endpoints include the required
https://protocol prefix upfront, with a clear error message instead of the unhelpful “Invalid endpoint” response.Session expiry fix (NAS-138467). Users were being unexpectedly logged out during active operations despite configured session timeout settings. Page refresh (F5) was also triggering the login screen during active sessions. Both are now fixed.
Error notifications showing placeholder text (NAS-139010). Error notifications were displaying “%(err)s Warning” instead of actual error messages.
Users page now shows Directory Services users by default (NAS-139073). Directory Services users now appear in the default view without requiring a manual filter change.
SSH access removal fix (NAS-139130). Clearing the SSH Access option appeared to save successfully but the SSH indicator persisted in the user list. Now properly disabled through the UI.
Certificate management for large DNs (NAS-139056). Certificates with Distinguished Names exceeding 1024 characters — typically those with many Subject Alternative Names — can now be properly imported and managed.
Notable Security Change
The root account’s group membership is now locked to
builtin_administratorsand cannot be modified through the UI. This prevents accidental removal of privileges that could break scheduled tasks, cloud sync, and cron jobs. To disable root UI access, use the Disable Password option in Credentials → Local Users instead.Upgrade
Update via System → Update in the web UI, or download from truenas.com. Full release notes and changelog are available at the TrueNAS Documentation Hub.
https://forums.truenas.com/t/truenas-25-10-2-is-now-available/63778
-
The rge(4) driver recently landed in FreeBSD HEAD, ported from OpenBSD. I tested it with a physical RTL8125 2.5GbE NIC passed through to a QEMU/KVM virtual machine running FreeBSD 16.0-CURRENT. Here’s what works, what doesn’t, and what’s worth reporting upstream.
Background
The Realtek RTL8125 is one of the most common 2.5 Gigabit Ethernet controllers on consumer motherboards. For years, FreeBSD users had to rely on either the in-tree
re(4)driver (which didn’t support the RTL8125 at all) or the third-partyrealtek-re-kmodport, which was Realtek’s own driver adapted for FreeBSD but suffered from stability issues and coding standard mismatches with the FreeBSD kernel.In December 2025, Adrian Chadd imported the OpenBSD
rge(4)driver into FreeBSD HEAD. This driver, originally written by Kevin Lo for OpenBSD 6.6, provides native support for the RTL8125, RTL8126, and RTL8127 families. Bernard Spil created thenet/realtek-rge-kmodport for testing on stable branches. The driver is still young on FreeBSD, and the community is actively seeking testing feedback.I have an RTL8125 on my Gigabyte motherboard (Ryzen 7950X system running Arch Linux), so I set out to test the driver using VFIO/PCI passthrough into a FreeBSD 16.0-CURRENT VM.
Test Setup: VFIO Passthrough
The test environment uses PCI passthrough to give the FreeBSD VM direct hardware access to the physical RTL8125 NIC. This is the closest you can get to bare-metal testing without installing FreeBSD directly. The host keeps its network via WiFi (RTL8852CE) while the Ethernet card is handed to the guest.
Arch Linux Host
RTL8852CE (WiFi)→vfio-pci
RTL8125→QEMU/KVM VM
FreeBSD 16-CURRENTStep 1: Identify the NIC and IOMMU group
host$ lspci -nn | grep -i realtek
06:00.0 Network controller: Realtek ... RTL8852CE [10ec:c852]
07:00.0 Ethernet controller: Realtek ... RTL8125 [10ec:8125] (rev 05)

$ find /sys/kernel/iommu_groups/ -type l | sort -V | grep 07:00
/sys/kernel/iommu_groups/16/devices/0000:07:00.0
The RTL8125 sits at PCI address
07:00.0in IOMMU group 16, isolated from other devices. The RTL8852CE WiFi card at06:00.0stays on the host for connectivity.Step 2: Unbind from host and bind to VFIO
host (root)# Load the VFIO PCI module
$ sudo modprobe vfio-pci

# Unbind from the r8169 host driver
$ sudo sh -c 'echo "0000:07:00.0" > /sys/bus/pci/devices/0000:07:00.0/driver/unbind'

# Bind to vfio-pci for passthrough
$ sudo sh -c 'echo "0000:07:00.0" > /sys/bus/pci/drivers/vfio-pci/bind'

# Verify
$ lspci -k -s 07:00.0
07:00.0 Ethernet controller: Realtek ... RTL8125 2.5GbE Controller (rev 05)
        Kernel driver in use: vfio-pci
Step 3: Launch the FreeBSD VM
host$ sudo qemu-system-x86_64 \
    -enable-kvm \
    -m 4G \
    -smp 4 \
    -hda FreeBSD-16.0-CURRENT-amd64-ufs.qcow2 \
    -device vfio-pci,host=07:00.0 \
    -nographic
Note The VM also gets QEMU’s emulatedem0(Intel e1000) by default, which routes through QEMU’s user-mode NAT. Since the default route points toem0, you need to switch it to use the passthrough NIC:route delete default && route add default 192.168.0.1Driver Behavior & Results
FreeBSD detects the RTL8125 immediately on boot and attaches the
rge(4)driver:dmesgrge0: <RTL8125> port 0xc000-0xc0ff mem 0xc000000000-0xc00000ffff, 0xc000010000-0xc000013fff irq 11 at device 4.0 on pci0 rge0: Ethernet address: xx:xx:xx:xx:xx:xx rge0: link state changed to DOWN rge0: link state changed to UPDHCP works, DNS resolves, and the NIC gets a LAN address. Here’s what
pciconfreports:pciconf -lvrge0@pci0:0:4:0: class=0x020000 rev=0x05 vendor=0x10ec device=0x8125 subvendor=0x1458 subdevice=0xe000 vendor = 'Realtek Semiconductor Co., Ltd.' device = 'RTL8125 2.5GbE Controller' class = network subclass = ethernetDriver Statistics
The
sysctl dev.rge.0output shows healthy operation with no concerning errors:Metric Value Status rge_rx_ok26,274 OK rge_tx_ok13,115 OK rge_tx_er6 link negotiation intr_system_errcnt0 OK tx_watchdog_timeout_cnt0 OK transmit_full_cnt0 OK rx_ether_csum_err0 OK link_state_change_cnt2 DOWN → UP Hardware checksum offload for IPv4, TCP, and UDP all function correctly — every
csum_validcounter matches its correspondingcsum_existscounter. Ping latency to external hosts averaged 14–18ms, which is reasonable for the test configuration.Interface capabilities: rge0 vs em0
Comparing the two NICs in the VM reveals a significant gap in advertised features:
Feature em0 (emulated) rge0 (passthrough) RXCSUM / TXCSUM yes yes VLAN_MTU / HWTAGGING yes yes VLAN_HWCSUM yes yes TSO4 yes no LRO yes no Jumbo frames yes no WoL yes no VLAN_HWTSO yes no The
rge(4)driver currently exposes a basic set of offload features (options=9b). TSO, LRO, jumbo frame support, and Wake-on-LAN are not yet implemented, though the OpenBSD man page mentions WoL support.The 2.5G Question
Here’s the most notable finding: the driver does not expose 2500baseT as a media type.
FreeBSD VMroot@freebsd:~# ifconfig rge0 media 2500baseT mediaopt full-duplex
ifconfig: unknown media subtype: 2500baseT

root@freebsd:~# ifconfig rge0
rge0: flags=1008843<UP,BROADCAST,RUNNING,SIMPLEX,MULTICAST,LOWER_UP>
      options=9b<RXCSUM,TXCSUM,VLAN_MTU,VLAN_HWTAGGING,VLAN_HWCSUM>
      media: Ethernet autoselect (1000baseT <full-duplex>)
      status: active
The NIC negotiates at 1000baseT only. This is a known limitation — another user on the FreeBSD forums with an RTL8125BG on an ASRock TRX50 motherboard reported the exact same behavior:
options=9b, 1000baseT, no 2.5G option.OpenBSD comparison The OpenBSDrge(4)man page explicitly documents the RTL8125 as capable of 2500Mbps operation. Since the FreeBSD driver was ported from OpenBSD, the 2.5G media type support may not have been fully adapted to FreeBSD’s ifmedia framework yet, or may require additional work in the FreeBSD-specific parts of the driver.Conclusion & Next Steps
The
rge(4)driver on FreeBSD 16.0-CURRENT works well for basic Ethernet functionality with the RTL8125. The NIC attaches cleanly, DHCP and DNS work, hardware checksum offload is functional, and there are no stability issues during my testing session. For a driver that landed in HEAD just two months ago, this is a solid start.2500baseT media type not available — The hardware is a 2.5GbE controller, but the driver only negotiates at 1G. This is the most impactful limitation for users who specifically chose RTL8125-equipped boards for the faster link speed. I’ve reported this to the FreeBSD freebsd-net mailing list.
Limited offload features — TSO, LRO, jumbo frames, and WoL are not yet exposed. For typical desktop use this is fine, but it will affect throughput in high-bandwidth scenarios.
If you have an RTL8125 and are running FreeBSD 15 or CURRENT, testing the driver and reporting your results — positive or negative — will help get it stabilized and potentially backported to stable branches. The FreeBSD forums thread and the freebsd-current mailing list thread are the best places to contribute.
Reverting passthrough on the host
After shutting down the VM, don’t forget to give the NIC back to your host:
host$ sudo sh -c 'echo "0000:07:00.0" > /sys/bus/pci/drivers/vfio-pci/unbind' $ sudo sh -c 'echo "0000:07:00.0" > /sys/bus/pci/drivers/r8169/bind' $ sudo dhcpcd enp7s0Update:
ifconfig -vm rge0confirms 2500Base-T is listed as a supported media type:supported media:
media autoselect
media 2500Base-T mediaopt full-duplex
media 2500Base-T
media 1000baseT mediaopt full-duplex
media 1000baseT
media 100baseTX mediaopt full-duplex
media 100baseTX
media 10baseT/UTP mediaopt full-duplex
media 10baseT/UTPMy original error was using
2500baseT(lowercase) instead of2500Base-T— the media subtype string is case-sensitive.I also tried forcing 2500Base-T:
ifconfig rge0 media 2500Base-T mediaopt full-duplex
The link briefly dropped and came back at 1000baseT. The media line showed “Ethernet Other ” rather than the expected type. However, I then checked my router and all LAN ports are 1 Gbps only … so the fallback to 1000baseT is expected. I don’t currently have a 2.5G switch to verify actual 2.5G linking.
-
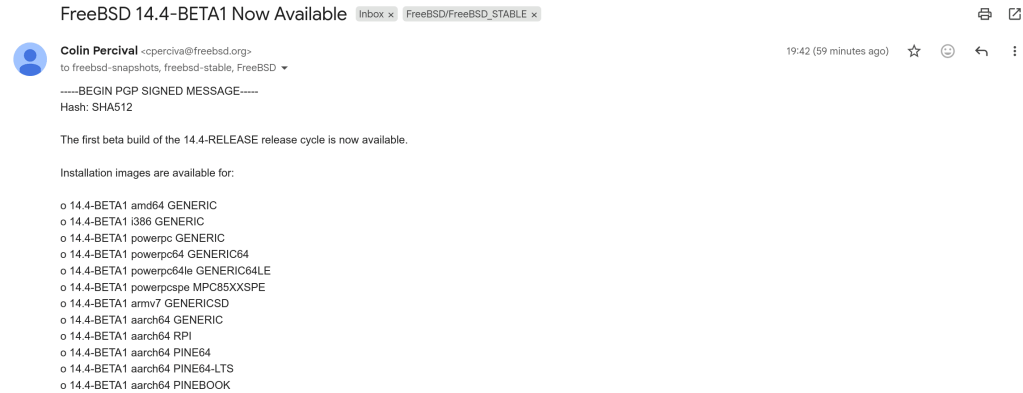
A summary of changes since BETA1 includes:

o Multiple bug fixes in diff(1)

o Several updates to qlnxe(4)

o Updates to the blocklist (aka blacklist) system

o Compatibility in the ipfw(8) userland tools with FreeBSD 15 kernels
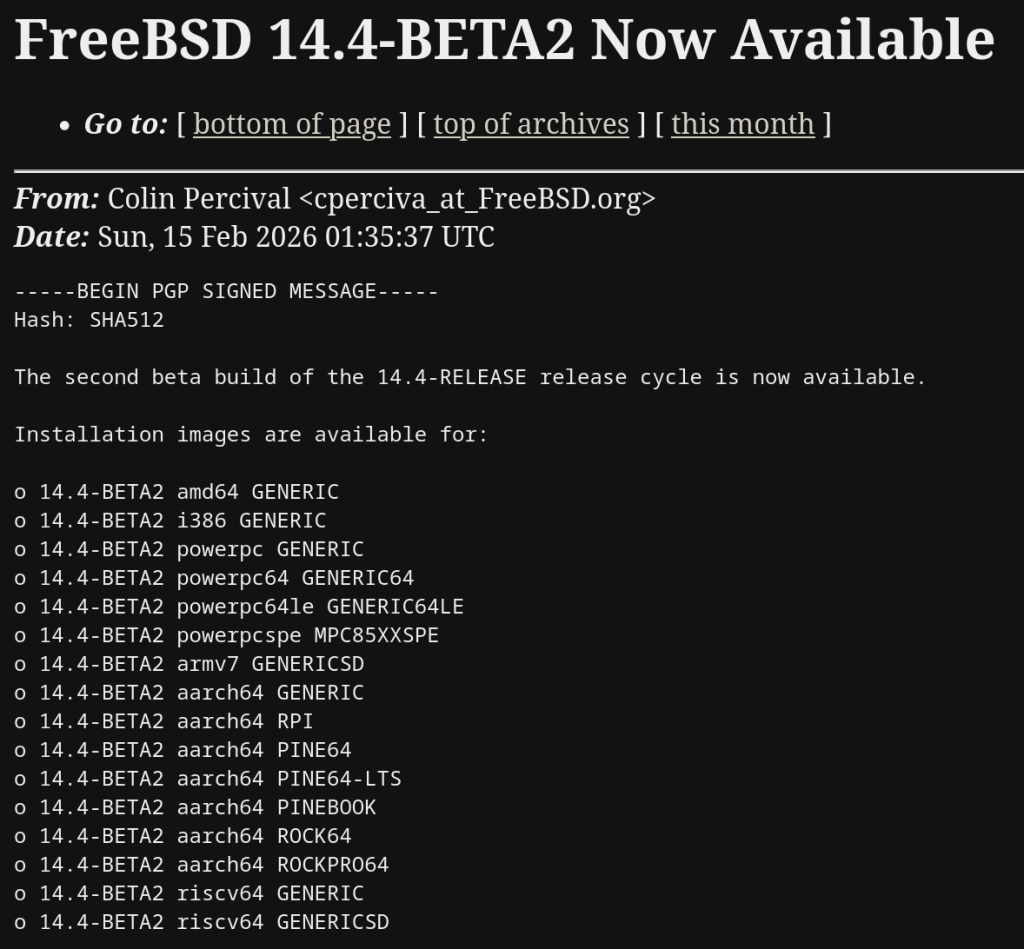
https://lists.freebsd.org/archives/freebsd-stable/2026-February/003848.html
-
How a failed nightly update left my TrueNAS server booting into an empty filesystem — and the two bugs responsible.
I run TrueNAS Scale on an Aoostar WTR Max as my homelab server, with dozens of Docker containers for everything from Immich to Jellyfin. I like to stay on the nightly builds to get early access to new features and contribute bug reports when things go wrong. Today, things went very wrong.
The Update Failure
It started innocently enough. I kicked off the nightly update from the TrueNAS UI, updating from
26.04.0-MASTER-20260210-020233to the latest20260213build. Instead of a smooth update, I got this:error
[EFAULT] Error: Command ['zfs', 'destroy', '-r', 'boot-pool/ROOT/26.04.0-MASTER-20260213-020146-1'] failed with exit code 1: cannot unmount '/tmp/tmpo8dbr91e': pool or dataset is busyThe update process was trying to clean up a previous boot environment but couldn’t unmount a temporary directory it had created. No big deal, I thought — I’ll just clean it up manually.
Down the Rabbit Hole
I checked what was holding the mount open:
bash
$ fuser -m /tmp/tmpo8dbr91e # nothing $ lsof +D /tmp/tmpo8dbr91e # nothing (just Docker overlay warnings)Nothing was using it. A force unmount also failed:
bash
$ sudo umount -f /tmp/tmpo8dbr91e umount: /tmp/tmpo8dbr91e: target is busy.Only a lazy unmount worked:
bash
$ sudo umount -l /tmp/tmpo8dbr91eSo I unmounted it and destroyed the stale boot environment manually. Then I retried the update. Same error, different temp path. Unmount, destroy, retry. Same error again. Each attempt, the updater would mount a new temporary directory, fail to unmount it, and bail out.
I even tried stopping Docker before the update, thinking the overlay mounts might be interfering. No luck.
The Real Problem
Frustrated, I rebooted the server thinking a clean slate might help. The server didn’t come back. After 10 minutes of pinging with no response, I plugged in a monitor and saw this:
console
Mounting 'boot-pool/ROOT/26.04.0-MASTER-20260213-020146' on '/root/' ... done. Begin: Running /scripts/local-bottom ... done. Begin: Running /scripts/nfs-bottom ... done. run-init: can't execute '/sbin/init': No such file or directory Target filesystem doesn't have requested /sbin/init. run-init: can't execute '/etc/init': No such file or directory run-init: can't execute '/bin/init': No such file or directory run-init: can't execute '/bin/sh': No such file or directory No init found. Try passing init= bootarg. BusyBox v1.37.0 (Debian 1:1.37.0-6+b3) built-in shell (ash) Enter 'help' for a list of built-in commands. (initramfs)The system had booted into the incomplete boot environment from the failed update — an empty shell with no operating system in it. The update process had set this as the default boot environment before it was fully built.
The Recovery
Fortunately, ZFS boot environments make this recoverable. I rebooted again, caught the GRUB menu, and selected my previous working boot environment (
20260210-020233). After booting successfully, I locked in the correct boot environment as the default:bash
$ sudo zpool set bootfs=boot-pool/ROOT/26.04.0-MASTER-20260210-020233 boot-poolThen cleaned up the broken environment:
bash
$ sudo zfs destroy -r boot-pool/ROOT/26.04.0-MASTER-20260213-020146Server back to normal.
Two Bugs, One Update
There are actually two separate bugs here:
Bug 1 — Stale Mount Cleanup The update process mounts the boot environment into a temp directory but can’t clean it up when something fails.umount -fdoesn’t work; onlyumount -ldoes. And since each retry creates a new temp mount, the problem is self-perpetuating.Bug 2 — Premature Bootfs Switch (Critical) This is the dangerous one. The updater sets the new boot environment as the GRUB default before it’s fully populated. When the update fails mid-way, you’re left with a system that will boot into an empty filesystem on the next reboot. If you don’t have physical console access and a keyboard handy, you could be in serious trouble.What Happens During a Failed Update
Update starts→Sets new bootfs→Build fails→Reboot = initramfsThe Fix Should Be Simple
The updater should only set the new boot environment as the default after the update is verified complete. And it should use
umount -las a fallback whenumount -ffails, since the standard force unmount clearly isn’t sufficient here.I’ve filed this as NAS-139794 on the TrueNAS Jira. If you’re running nightly builds, be aware of this issue — and make sure you have console access to your server in case you need to select a different boot environment from GRUB.
Lessons Learned
Running nightly builds is inherently risky, and I accept that. But an update failure should never leave a system unbootable. The whole point of ZFS boot environments is to provide a safety net — but that net has a hole when the updater switches the default before the new environment is ready.
In the meantime, keep a monitor and keyboard accessible for your TrueNAS box, and remember: if you ever drop to an initramfs shell after an update, your data is fine. Just reboot into GRUB and pick the previous boot environment.
-
The ArchZFS project has moved its official package repository from archzfs.com to GitHub Releases. Here’s how to migrate — and why this matters for Arch Linux ZFS users.
If you run ZFS on Arch Linux, you almost certainly depend on the ArchZFS project for your kernel modules. The project has been the go-to source for prebuilt ZFS packages on Arch for years, saving users from the pain of building DKMS modules on every kernel update.
The old
archzfs.comrepository has gone stale, and the project has migrated to serving packages directly from GitHub Releases. The packages are built the same way and provide the same set of packages — the only difference is a new PGP signing key and the repository URL.How to Migrate
If you’re currently using the old
archzfs.comserver in your/etc/pacman.conf, you need to update it. There are two options depending on your trust model.Option 1: Without PGP Verification
The PGP signing system is still being finalized, so if you just want it working right away, you can skip signature verification for now:
pacman.conf
[archzfs] SigLevel = Never Server = https://github.com/archzfs/archzfs/releases/download/experimentalOption 2: With PGP Verification (Recommended)
For proper package verification, import the new signing key first:
bash
# pacman-key --init # pacman-key --recv-keys 3A9917BF0DED5C13F69AC68FABEC0A1208037BE9 # pacman-key --lsign-key 3A9917BF0DED5C13F69AC68FABEC0A1208037BE9Then set the repo to require signatures:
pacman.conf
[archzfs] SigLevel = Required Server = https://github.com/archzfs/archzfs/releases/download/experimentalAfter updating your config, sync and refresh:
bash
# pacman -SyWhat’s Available
The repository provides the same package groups as before, targeting different kernels:
Package Group Kernel Use Case archzfs-linuxlinux (default) Best for most users, latest stable OpenZFS archzfs-linux-ltslinux-lts LTS kernel, better compatibility archzfs-linux-zenlinux-zen Zen kernel with extra features archzfs-linux-hardenedlinux-hardened Security-focused kernel archzfs-dkmsAny kernel Auto-rebuilds on kernel update, works with any kernel Note on DKMS vs Prebuilt Prebuilt packages are tied to a specific kernel version — if the Arch repos push a newer kernel than ArchZFS has built for, you’ll be blocked from updating until ArchZFS catches up. The DKMS packages avoid this by compiling locally, at the cost of longer update times. Choose based on your tolerance for build times vs. update delays.Why GitHub Releases?
Hosting a pacman repository on GitHub Releases is a clever approach. GitHub handles the CDN, availability, and bandwidth — no more worrying about a single server going down and blocking ZFS users from updating. The build pipeline uses GitHub Actions, so packages are built automatically and transparently. You can even inspect the build scripts in the repository itself.
The trade-off is that the URL is a bit unwieldy compared to the old
archzfs.com/$repo/$arch, but that’s a minor cosmetic issue.A Note of Caution
The project labels this as experimental and advises starting with non-critical systems. In practice, the packages are the same ones the community has been using — the “experimental” label applies to the new distribution method, not the packages themselves. Still, the PGP signing system is being reworked, so you may want to revisit your
SigLevelsetting once that’s finalized.If You’re Using the Old Repository The oldarchzfs.comrepository is stale and will not receive updates. If you haven’t migrated yet, do it now — before your nextpacman -Syupulls a kernel that your current ZFS modules don’t support, leaving you unable to import your pools after reboot.Quick Migration Checklist
Edit pacman.conf→Import new PGP key→pacman -Sy→pacman -SyuFor full details and ongoing updates, check the ArchZFS wiki and the release page.
-
A kernel-to-userspace patch that replaces a vague
zpool createerror with one that names the exact device and pool causing the problem. Here’s how it works, from the ioctl layer to the formatted error message.The problem
If you’ve managed ZFS pools with more than a handful of disks, you’ve almost certainly hit this error:
bash$ sudo zpool create tank mirror /dev/sda /dev/sdb /dev/sdc /dev/sdd
cannot create 'tank': one or more vdevs refer to the same device,
or one of the devices is part of an active md or lvm device
Which device? What pool? The error gives you nothing. In a 12-disk server you’re left checking each device one by one until you find the culprit.
I’d been working on a previous PR (#18184) improving
zpool createerror messages when Brian Behlendorf suggested a follow-up: pass device-specific error information from the kernel back to userspace, following the existingZPOOL_CONFIG_LOAD_INFOpattern thatzpool importalready uses.So I built it. The result is PR #18213:
Error message Before cannot create 'tank': one or more vdevs refer to the same deviceAfter cannot create 'tank': device '/dev/sdb1' is part of active pool 'rpool'Why this is harder than it looks
The obvious approach would be: when
zpool createfails, walk the vdev tree, find the device with the error, and report it. But there’s a timing problem in the kernel that makes this impossible.When
spa_create()fails, the error cleanup path callsvdev_close()on all vdevs. This function unconditionally resetsvd->vdev_stat.vs_auxtoVDEV_AUX_NONEon every device in the tree. By the time the error code reaches the ioctl handler, all evidence of which device failed and why has been wiped clean.Key Insight The error information must be captured at the exact moment of failure, insidevdev_label_init(), before the cleanup path destroys it. And it must be stored somewhere that survives the cleanup — thespa_tstruct, which represents the pool itself.The only
errnothat travels back through the ioctl is an integer likeEBUSY. No context about which device, no pool name, nothing. The entire design challenge is getting two strings (a device path and a pool name) from a kernel function that runs during vdev initialization all the way back to the userspacezpoolcommand.Architecture: the data flow
The solution follows the same mechanism that
zpool importalready uses to return rich error information: an nvlist (ZFS’s key-value dictionary, like a JSON object) packed into the ioctl output buffer under a well-known key.vdev_label_init()
detect conflict,
read label→spa→errlist
vdev + pool name→spa_create()
hand off errlist→ioc_pool_create()
wrap → put_nvlist→ioctl
kernel → user→zpool_create()
unpack → formatFour touch points, each doing one small thing. Let’s walk through them.
Implementation
1. Capture the error at the moment of failure
This is the heart of the change. Inside
vdev_label_init(), whenvdev_inuse()returns true, we build an nvlist with the device path, then read the on-disk label to extract the pool name:module/zfs/vdev_label.c/* * Determine if the vdev is in use. */ if (reason != VDEV_LABEL_REMOVE && reason != VDEV_LABEL_SPLIT && vdev_inuse(vd, crtxg, reason, &spare_guid, &l2cache_guid)) { if (spa->spa_create_errlist == NULL) { nvlist_t *nv = fnvlist_alloc(); nvlist_t *cfg; if (vd->vdev_path != NULL) fnvlist_add_string(nv, ZPOOL_CREATE_INFO_VDEV, vd->vdev_path); cfg = vdev_label_read_config(vd, -1ULL); if (cfg != NULL) { const char *pname; if (nvlist_lookup_string(cfg, ZPOOL_CONFIG_POOL_NAME, &pname) == 0) fnvlist_add_string(nv, ZPOOL_CREATE_INFO_POOL, pname); nvlist_free(cfg); } spa->spa_create_errlist = nv; } return (SET_ERROR(EBUSY)); }The
NULLcheck onspa_create_errlistensures we only record the first failing device. If there are multiple conflicts, the first one is what you need to fix anyway.fnvlist_alloc()andfnvlist_add_string()are the “fatal” nvlist functions that panic on allocation failure — appropriate here since we’re in a code path where memory should be available.2. Hand the errlist to the caller
On error,
spa_create()transfers ownership of the errlist via the newerrinfooutput parameter:module/zfs/spa.cif (error != 0) { if (errinfo != NULL) { *errinfo = spa->spa_create_errlist; spa->spa_create_errlist = NULL; } spa_unload(spa); spa_deactivate(spa); spa_remove(spa); ...Setting
spa_create_errlisttoNULLafter the handoff preventsspa_deactivate()from freeing it — ownership transfers to the caller.3. Wrap and pack into the ioctl output
The ioctl handler wraps the errlist under a
ZPOOL_CONFIG_CREATE_INFOkey, mirroring howzpool importusesZPOOL_CONFIG_LOAD_INFO:module/zfs/zfs_ioctl.cerror = spa_create(zc->zc_name, config, props, zplprops, dcp, &errinfo); if (errinfo != NULL) { nvlist_t *outnv = fnvlist_alloc(); fnvlist_add_nvlist(outnv, ZPOOL_CONFIG_CREATE_INFO, errinfo); (void) put_nvlist(zc, outnv); nvlist_free(outnv); nvlist_free(errinfo); }put_nvlist()serializes the nvlist intozc->zc_nvlist_dst, which is a shared buffer between kernel and userspace.4. Unpack and format in userspace
In libzfs, after the ioctl fails, we unpack the buffer, extract the device and pool name, and format the error:
lib/libzfs/libzfs_pool.cnvlist_t *outnv = NULL;
if (zc.zc_nvlist_dst_size > 0 &&
    nvlist_unpack((void *)(uintptr_t)zc.zc_nvlist_dst,
    zc.zc_nvlist_dst_size, &outnv, 0) == 0 &&
    outnv != NULL) {
        nvlist_t *errinfo = NULL;
        if (nvlist_lookup_nvlist(outnv,
            ZPOOL_CONFIG_CREATE_INFO, &errinfo) == 0) {
                const char *vdev = NULL;
                const char *pname = NULL;
                (void) nvlist_lookup_string(errinfo,
                    ZPOOL_CREATE_INFO_VDEV, &vdev);
                (void) nvlist_lookup_string(errinfo,
                    ZPOOL_CREATE_INFO_POOL, &pname);
                if (vdev != NULL) {
                        if (pname != NULL)
                                zfs_error_aux(hdl,
                                    dgettext(TEXT_DOMAIN,
                                    "device '%s' is part of "
                                    "active pool '%s'"),
                                    vdev, pname);
                        else
                                zfs_error_aux(hdl,
                                    dgettext(TEXT_DOMAIN,
                                    "device '%s' is in use"),
                                    vdev);
                        ...
                }
        }
}
If both values are available, you get: device ‘/dev/sdb1’ is part of active pool ‘rpool’. If only the path is available (label can’t be read), you get: device ‘/dev/sdb1’ is in use. If no errinfo came back at all, the existing generic error handling kicks in unchanged.
What changed
File + − module/zfs/vdev_label.c+23 -1 lib/libzfs/libzfs_pool.c+41 module/zfs/zfs_ioctl.c+12 -1 module/zfs/spa.c+10 -1 cmd/ztest.c+5 -5 include/sys/fs/zfs.h+3 include/sys/spa.h+1 -1 include/sys/spa_impl.h+1 tests/.../zpool_create_errinfo_001_neg.ksh+99 11 files total +195 -10 93 lines of feature code across 8 C files, plus a 99-line ZTS test. The
cmd/ztest.cchanges are mechanical — just adding aNULLparameter to eachspa_create()call to match the new signature.Testing
I tested on an Arch Linux VM running kernel 6.18.9-arch1-2 with ZFS built from source. The test environment used loopback devices, which is the standard approach in the ZFS Test Suite — the kernel code path is identical regardless of the underlying block device.
Duplicate device — device-specific error
bash$ truncate -s 128M /tmp/vdev1
$ sudo losetup /dev/loop10 /tmp/vdev1
$ sudo losetup /dev/loop12 /tmp/vdev1   # same backing file
$ sudo zpool create testpool1 mirror /dev/loop10 /dev/loop12
cannot create 'testpool1': device '/dev/loop12' is part of active pool 'testpool1'
Normal creation — no regression
bash$ truncate -s 128M /tmp/vdev1 /tmp/vdev2
$ sudo zpool create testpool1 mirror /tmp/vdev1 /tmp/vdev2
$ sudo zpool status testpool1
  pool: testpool1
 state: ONLINE
config:

        NAME            STATE     READ WRITE CKSUM
        testpool1       ONLINE       0     0     0
          mirror-0      ONLINE       0     0     0
            /tmp/vdev1  ONLINE       0     0     0
            /tmp/vdev2  ONLINE       0     0     0
ZTS test
A new negative test (
zpool_create_errinfo_001_neg) creates two loopback devices backed by the same file and attempts a mirror pool creation. It verifies three things: the command fails, the error names the specific device, and the error mentions the active pool.ZTS$ zfs-tests.sh -vx -t cli_root/zpool_create/zpool_create_errinfo_001_neg Test: zpool_create_errinfo_001_neg (run as root) [00:00] [PASS] Results Summary PASS 1 Running Time: 00:00:00 Percent passed: 100.0%CI
checkstylepasses on all platforms (Ubuntu 22/24, Debian 12/13, CentOS Stream 9, AlmaLinux 8/10, FreeBSD 14). Clean build with no compiler warnings.Design trade-offs
Only the first failing device is recorded. If multiple vdevs conflict, only the first one goes into
spa_create_errlist. You need to fix the first problem before you can see the next one anyway, and it keeps the implementation simple.The label is read twice.
vdev_inuse()already reads the on-disk label and frees it before returning. We read it again withvdev_label_read_config()to extract the pool name. Modifyingvdev_inuse()to optionally return the label would avoid this, but changing that function signature affects many callers — a much larger change for a follow-up.The errlist field lives on
spa_tpermanently. It’s only used duringspa_create(), but the field exists on every pool in memory. This costs 8 bytes per pool (one pointer, alwaysNULLduring normal operation) — negligible.Only one error path is covered. The mechanism only fires for the
vdev_inuse()EBUSY case insidevdev_label_init(). Other failures (open errors, size mismatches) still produce generic messages. Thespa_create_errlistinfrastructure is there for future extension.What’s next
This is a focused first step. The
spa_create_errlistmechanism could be extended to cover more error paths —vdev_open()failures, size mismatches, GUID conflicts. The infrastructure is in place; it just needs more callsites.The PR is at openzfs/zfs #18213. Feedback welcome.
-
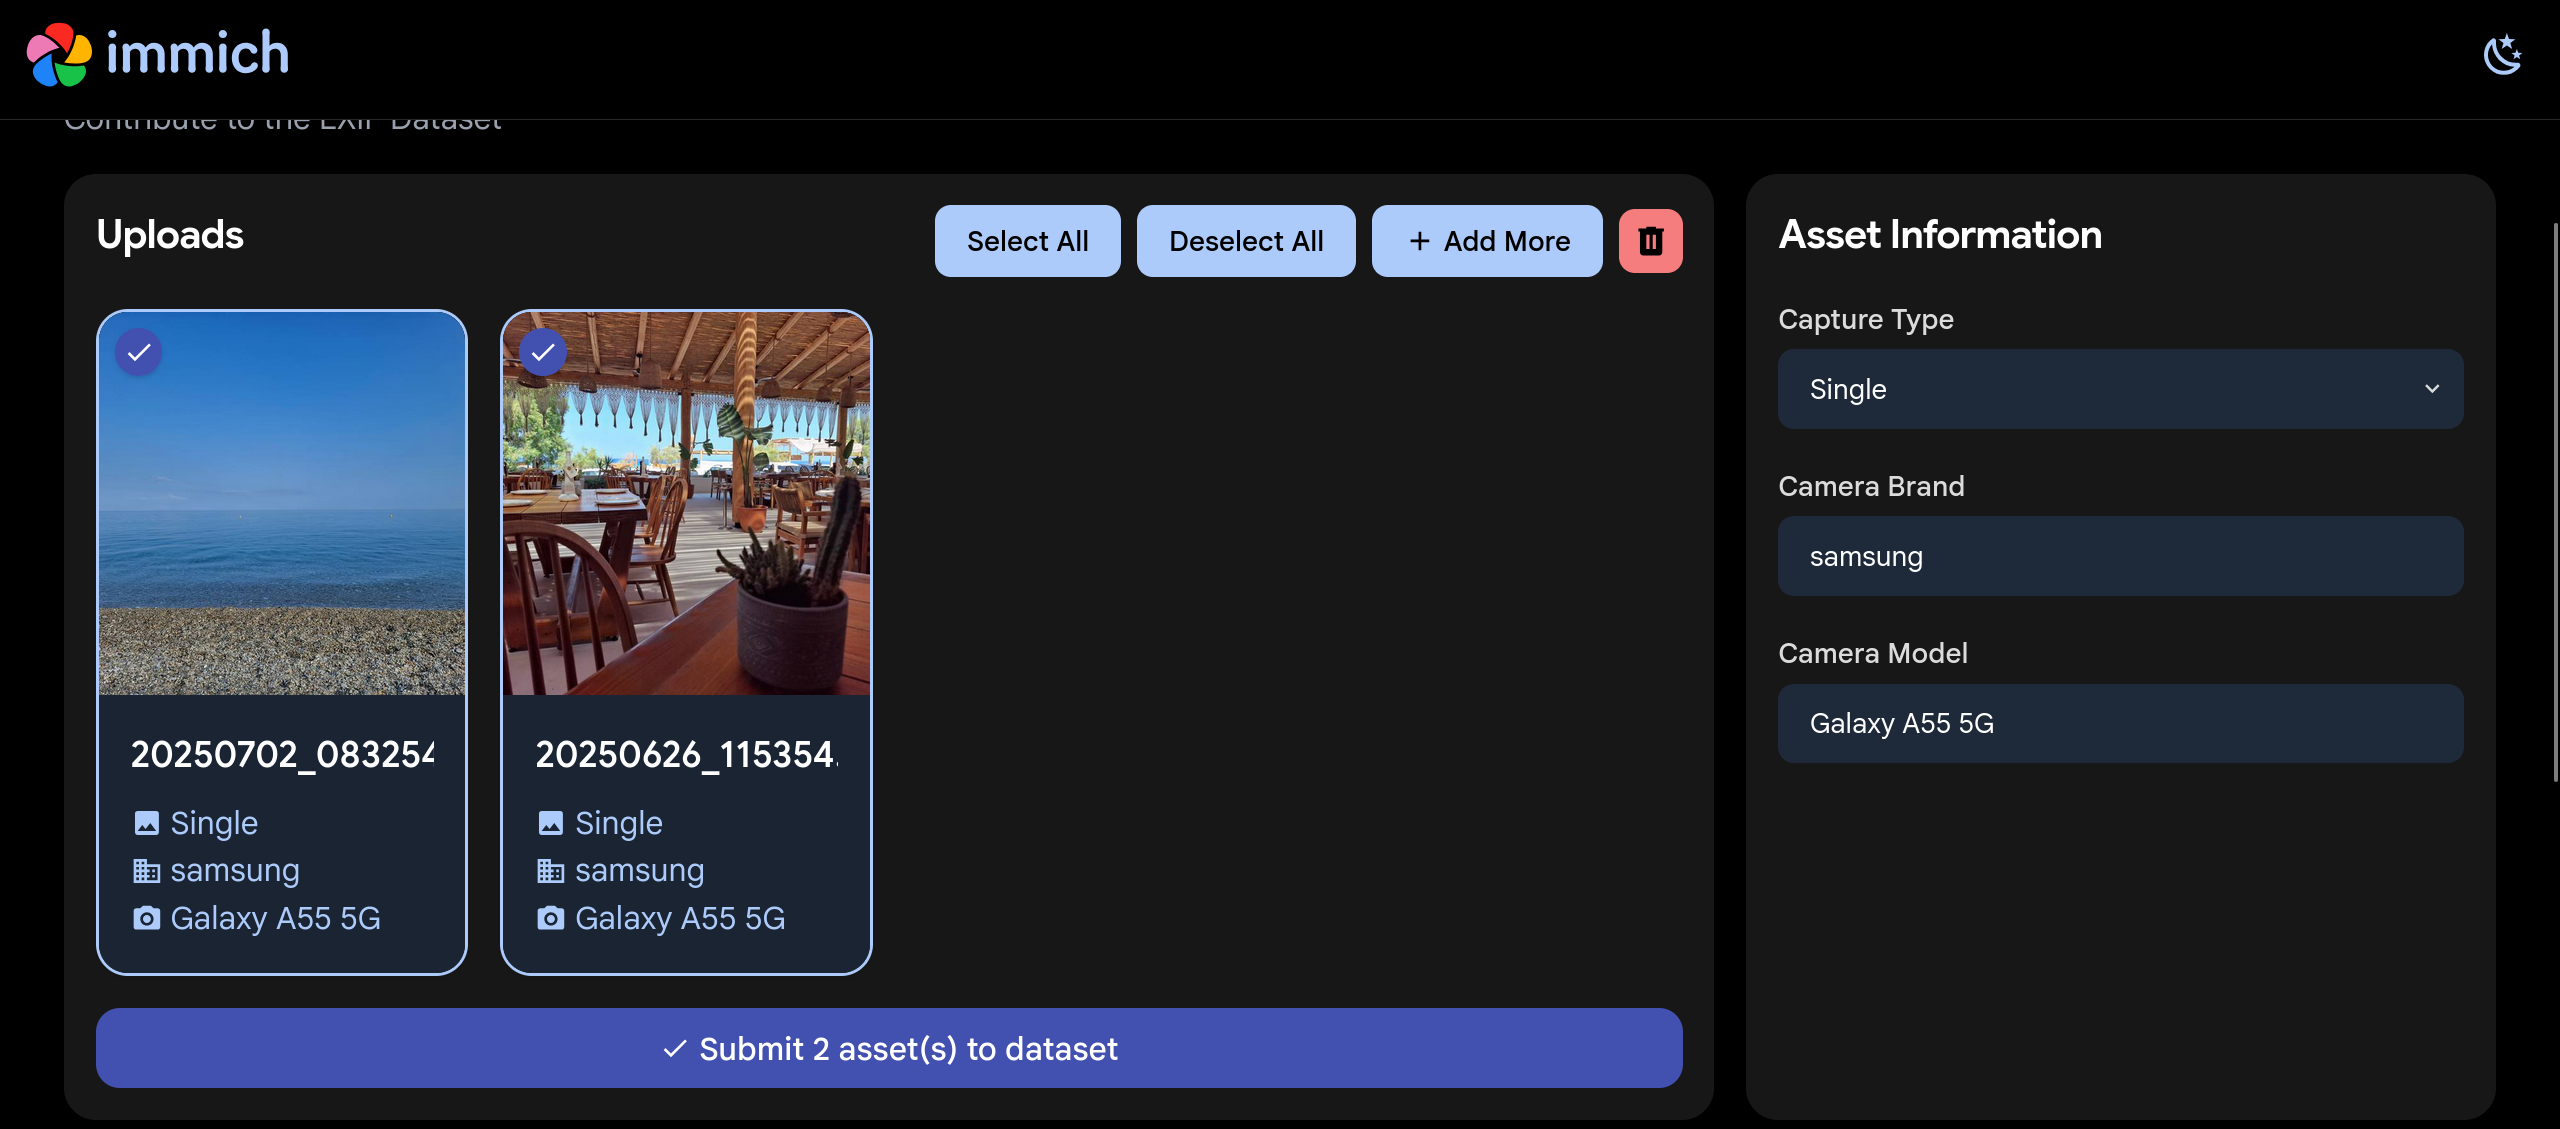
Immich, the popular open-source, self-hosted photo and video management solution, has launched a community-driven initiative to improve its metadata handling capabilities. Through the new EXIF Dataset project, users can contribute their photos to help train and improve Immich’s EXIF parsing and metadata extraction features. I recently contributed some of my own photos to the project, […]
How to Contribute to the Immich EXIF Dataset – Help Improve Open Source Photo Management -
Tutorial · February 2026 · 15 min read
QEMU on Arch Linux: A Practical Guide to Virtual Machine Testing
From cloud images and package building to kernel module debugging and cross-platform validation — all from the command line.
Contents
01 Why QEMU?
02 Spinning Up Arch Linux Cloud Images
03 Running FreeBSD in QEMU
04 Testing OpenZFS with QEMU
05 Sharing Files Between Host and Guest
06 Networking Options
07 Testing Real Hardware Drivers
08 Quick Reference
Why QEMU?
QEMU combined with KVM turns your Linux host into a bare-metal hypervisor. Unlike VirtualBox or VMware, QEMU offers direct access to hardware emulation options, PCI passthrough, and granular control over every aspect of the virtual machine. On Arch Linux, setup is minimal.
$ sudo pacman -S qemu-full

# Verify KVM support
$ lsmod | grep kvm
kvm_amd               200704  0
kvm                  1302528  1 kvm_amd
You should see
kvm_amdorkvm_intelloaded. That’s it — you’re ready to run VMs at near-native performance.Spinning Up Arch Linux Cloud Images
The fastest path to a working Arch Linux VM is the official cloud image — a pre-built qcow2 disk designed for automated provisioning with cloud-init.
Download and Prepare
$ curl -LO https://geo.mirror.pkgbuild.com/images/latest/Arch-Linux-x86_64-cloudimg.qcow2
$ qemu-img resize Arch-Linux-x86_64-cloudimg.qcow2 20G
The image ships at a minimal size. Resizing to 20G gives room for package building, compilation, and development work.
Cloud-Init Configuration
Cloud images expect a cloud-init seed to configure users, packages, and system settings on first boot. Install
cloud-utilson your host:$ sudo pacman -S cloud-utilsCreate a
user-datafile. Note the unquoted heredoc — this ensures shell variables expand correctly:SSH_KEY=$(cat ~/.ssh/id_ed25519.pub 2>/dev/null || cat ~/.ssh/id_rsa.pub) cat > user-data <<EOF #cloud-config users: - name: chris sudo: ALL=(ALL) NOPASSWD:ALL shell: /bin/bash lock_passwd: false plain_text_passwd: changeme ssh_authorized_keys: - ${SSH_KEY} packages: - base-devel - git - vim - devtools - namcap growpart: mode: auto devices: ['/'] EOF⚠ Common Pitfall
Using
'EOF'(single-quoted) prevents variable expansion, so${SSH_KEY}becomes a literal string. Always use unquotedEOFwhen you need variable substitution.Generate the seed ISO and launch:
$ cloud-localds seed.iso user-data

$ qemu-system-x86_64 \
  -enable-kvm \
  -m 4G \
  -smp 4 \
  -drive file=Arch-Linux-x86_64-cloudimg.qcow2,if=virtio \
  -drive file=seed.iso,format=raw,if=virtio \
  -nographic
Cloud-Init Runs Once
Cloud-init marks itself as complete after the first boot. If you modify
user-dataand rebuildseed.iso, the existing image ignores it. You must download a fresh qcow2 image before applying new configuration.Use
Ctrl+A, Xto kill the VM.Running FreeBSD in QEMU
FreeBSD provides pre-built VM images in qcow2 format. FreeBSD 15.0-RELEASE (December 2025) is the latest stable release, while 16.0-CURRENT snapshots are available for testing bleeding-edge features.
Download
# FreeBSD 15.0 stable
$ curl -LO https://download.freebsd.org/releases/VM-IMAGES/15.0-RELEASE/amd64/Latest/FreeBSD-15.0-RELEASE-amd64-ufs.qcow2.xz
$ xz -d FreeBSD-15.0-RELEASE-amd64-ufs.qcow2.xz

# FreeBSD 16.0-CURRENT (development snapshot)
$ curl -LO https://download.freebsd.org/snapshots/VM-IMAGES/16.0-CURRENT/amd64/Latest/FreeBSD-16.0-CURRENT-amd64-ufs.qcow2.xz
$ xz -d FreeBSD-16.0-CURRENT-amd64-ufs.qcow2.xz

$ qemu-img resize FreeBSD-15.0-RELEASE-amd64-ufs.qcow2 20G
The Serial Console Challenge
Unlike Linux cloud images, FreeBSD VM images default to VGA console output. Launching with
-nographicappears to hang — the system is actually booting, but sending output to the emulated display.Boot with VGA first to configure serial:
$ qemu-system-x86_64 \
  -enable-kvm \
  -m 4G \
  -smp 4 \
  -hda FreeBSD-15.0-RELEASE-amd64-ufs.qcow2 \
  -vga std
Login as
root(no password), then enable serial console permanently:# echo 'console="comconsole"' >> /boot/loader.conf # poweroffAll subsequent boots work with
-nographic. Alternatively, at the FreeBSD boot menu, press 3 to escape to the loader prompt and typeset console=comconsolethenboot.Disk Interface Note
If FreeBSD fails to boot with
if=virtio, fall back to IDE emulation using-hdainstead. IDE is universally supported.Testing OpenZFS with QEMU
One of the most powerful uses of QEMU on Arch Linux is building and testing OpenZFS against new kernels. Arch’s rolling release model means kernel updates arrive frequently, and out-of-tree modules like ZFS need validation after every update.
Build Environment
$ git clone https://github.com/openzfs/zfs.git
$ cd zfs
$ ./autogen.sh
$ ./configure --enable-debug
$ make -j$(nproc)
$ sudo make install
$ sudo ldconfig
$ sudo modprobe zfs
Running the ZFS Test Suite
Before running the test suite, a critical and often-missed step — install the test helpers:
$ sudo ~/zfs/scripts/zfs-helpers.sh -i

# Create loop devices for virtual disks
for i in $(seq 0 15); do
  sudo mknod -m 0660 /dev/loop$i b 7 $i 2>/dev/null
done

# Run sanity tests
$ ~/zfs/scripts/zfs-tests.sh -v -r sanity
Real-World Debugging: From 18% to 97.6%
Testing OpenZFS 2.4.99 on kernel 6.18.8-arch2-1 revealed two cascading issues that dropped the pass rate dramatically. Here’s what happened and how to fix it.
Problem 1: Permission denied for ephemeral users. The test suite creates temporary users (
staff1,staff2) for permission testing. If your ZFS source directory is under a home directory with restrictive permissions, these users can’t traverse the path:err: env: 'ksh': Permission denied staff2 doesn't have permissions on /home/arch/zfs/tests/zfs-tests/bin$ chmod o+x /home/arch $ chmod -R o+rx /home/arch/zfs $ sudo chmod o+rw /dev/zfsProblem 2: Leftover test pools cascade failures. If a previous test run left a ZFS pool mounted, every subsequent setup script fails with “Device or resource busy”:
$ sudo zfs destroy -r testpool/testfs
$ sudo zpool destroy testpool
$ rm -rf /var/tmp/testdir
✓ Result
After fixing both issues, the sanity suite completed in 15 minutes: 808 PASS, 6 FAIL, 14 SKIP. The remaining 6 failures were all environment-related (missing packages) — zero kernel compatibility regressions.
Sharing Files Between Host and Guest
QEMU’s 9p virtfs protocol allows sharing a host directory with the guest without network configuration — ideal for an edit-on-host, build-in-guest workflow:
$ qemu-system-x86_64 \
  -enable-kvm \
  -m 4G \
  -smp 4 \
  -drive file=Arch-Linux-x86_64-cloudimg.qcow2,if=virtio \
  -virtfs local,path=/home/chris/shared,mount_tag=host_share,security_model=mapped-xattr,id=host_share \
  -nographic
Inside the guest:
$ sudo mount -t 9p -o trans=virtio host_share /mnt/sharedNetworking Options
QEMU’s user-mode networking (
-nic user) is the simplest setup — it provides NAT-based internet access and port forwarding without any host configuration:# Forward host port 2222 to guest SSH -nic user,hostfwd=tcp::2222-:22This is sufficient for most development and testing workflows. For bridged or TAP networking, consult the QEMU documentation.
Testing Real Hardware Drivers
QEMU emulates standard hardware (e1000 NICs, emulated VGA), not your actual devices. If you need to test drivers against real hardware — such as a Realtek Ethernet controller or an AMD GPU — you have two options:
PCI Passthrough (VFIO): Bind a real PCI device to the
vfio-pcidriver and pass it directly to the VM. This requires IOMMU support (amd_iommu=onin the kernel command line) and removes the device from the host for the duration.Native Boot from USB: Write a live image to a USB stick and boot your physical machine directly. For driver testing, this is almost always the better choice:
$ sudo dd if=FreeBSD-16.0-CURRENT-amd64-memstick.img of=/dev/sdX bs=4M status=progressQuick Reference
Task Command Start Arch VM qemu-system-x86_64 -enable-kvm -m 4G -smp 4 -drive file=arch.qcow2,if=virtio -drive file=seed.iso,format=raw,if=virtio -nographicStart FreeBSD (VGA) qemu-system-x86_64 -enable-kvm -m 4G -smp 4 -hda freebsd.qcow2 -vga stdStart FreeBSD (serial) qemu-system-x86_64 -enable-kvm -m 4G -smp 4 -hda freebsd.qcow2 -nographicKill VM Ctrl+A, XResize disk qemu-img resize image.qcow2 20GCreate seed ISO cloud-localds seed.iso user-data
QEMU Arch Linux FreeBSD OpenZFS KVM
Written from real-world testing on AMD Ryzen 9 9900X · Arch Linux · Kernel 6.18.8
-
WordPress.com strips <style> tags from posts. Here’s how to work around that and create beautifully styled technical articles with custom typography, code blocks, and layout components — without a self-hosted installation.
If you’ve ever tried to write a technical blog post on WordPress.com and found the default styling lacking — ugly code blocks, no control over fonts, tables that look like spreadsheets from 2005 — you’ve hit the platform’s biggest limitation. WordPress.com sanitizes post HTML aggressively, stripping out
<style>and<link>tags for security reasons.This post documents the approach I use to get full control over article styling on a WordPress.com Premium plan, without needing a self-hosted WordPress installation.
The Problem
WordPress.com’s block editor (Gutenberg) gives you paragraphs, headings, images, and code blocks. But the built-in styling is generic — it inherits your theme’s defaults, which are designed for broad appeal, not for technical writing. Specifically:
Code blocks use your theme’s monospace font with minimal contrast. No syntax highlighting, no language labels, no dark background that signals “this is code” to a scanning reader.
Tables get basic browser defaults — no header styling, inconsistent padding, no visual hierarchy between header and data rows.
Callout boxes don’t exist natively. You can use a Quote block, but it looks like a quote, not like a tip or warning. There’s no way to add a colored left border with a label.
Typography is locked to your theme. If your theme uses a system font stack, every post looks like a Google Doc.
The obvious fix — adding a
<style>block to your post HTML — doesn’t work. WordPress.com strips it on save.The Solution: Additional CSS + Custom HTML Blocks
The approach splits styling from content across two places:
Additional CSS+
site-wide stylesCustom HTML Block=
post content with classesStyled Post
fonts, colors, layoutAdditional CSS lives in the WordPress Customizer (Appearance → Customize → Additional CSS, or via the Site Editor on block themes). It’s injected into every page’s
<head>as a legitimate<style>block. WordPress.com allows this on paid plans (Personal and above) because it’s a controlled environment — you’re editing a dedicated CSS field, not injecting arbitrary HTML into post content.Custom HTML blocks in the post editor accept raw HTML with class attributes. WordPress.com doesn’t strip
classfrom elements, so your post HTML can reference any class defined in Additional CSS.The result: your CSS lives in one place and applies to all posts. Your post content is clean, semantic HTML with descriptive class names. No inline styles, no duplication, no fighting the sanitizer.
Setting Up the CSS
I scope everything under a single wrapper class —
.rss-post— to avoid polluting the rest of the site. Every selector starts with.rss-post, so the styles only apply inside posts that use the wrapper div.Fonts
The CSS imports three fonts from Google Fonts via
@import:css@import url('https://fonts.googleapis.com/css2?family=Newsreader:ital,opsz,wght@0,6..72,400;0,6..72,600;1,6..72,400&family=JetBrains+Mono:wght@400;500&family=DM+Sans:wght@400;500;600&display=swap');Newsreader is an optical-size serif that works beautifully for body text — it adjusts its weight and contrast based on font size, so headings and body text both look sharp without manual tweaking. JetBrains Mono is a purpose-built coding font with ligatures and distinct characters for
0/Oand1/l/I. DM Sans handles UI elements like labels, table headers, and info box titles — places where a clean sans-serif reads better than a serif.The accent system
A single accent color (
#e07a2f, a warm amber) ties the design together. It appears in four places: the left border on headings, the left border on info boxes, the info box label text, and link hover states. This creates visual consistency without overwhelming the page.css.rss-post h2 { position: relative; padding-left: 1.1rem; } .rss-post h2::before { content: ''; position: absolute; left: 0; top: 0.15em; bottom: 0.15em; width: 3.5px; background: #e07a2f; border-radius: 2px; }The
::beforepseudo-element creates the accent bar. This is one of the things you can’t do with inline styles — pseudo-elements only work in stylesheets, which is exactly why Additional CSS is necessary.Code blocks
The default WordPress code block is functional but visually flat. The custom CSS gives code blocks a dark background (
#1e1e2e, matching the Catppuccin Mocha palette), a subtle border, and generous padding. A floating language label in the top-right corner uses a<span class="label">inside the<pre>block:css.rss-post pre { background: #1e1e2e; color: #cdd6f4; font-family: 'JetBrains Mono', monospace; font-size: 0.82rem; line-height: 1.7; padding: 1.4rem 1.6rem; border-radius: 8px; border: 1px solid #313244; } .rss-post pre .label { position: absolute; top: 0; right: 0; font-family: 'DM Sans', sans-serif; font-size: 0.62rem; text-transform: uppercase; color: #6c7086; background: #313244; padding: 0.2em 0.8em; border-radius: 0 8px 0 6px; }Inline
codegets a light warm background (#edebe6) that’s visible without being distracting.Info boxes
Tips, warnings, and gotchas use the
.infoboxclass — a light background with an amber left border and an uppercase label:Example This is what an info box looks like. The label is a<strong>element styled with uppercase text and the accent color. The background is a warm off-white that distinguishes it from the main content without creating harsh contrast.The HTML for this is minimal:
html<div class="infobox">
  <strong>Tip</strong>
  Your message here.
</div>
Flow diagrams
For simple architecture or process diagrams, the
.flowclass creates a horizontal flex layout with dark boxes and arrow separators:Step 1→Step 2→Step 3The
.accentmodifier highlights one box in amber. On mobile, the flex container wraps naturally.Writing a Post
The workflow for creating a styled post is:
1. Create a new post in the WordPress editor.
2. Add a Custom HTML block (not a Paragraph, not a Code block). Click the
+button, search for “Custom HTML”.3. Paste your HTML wrapped in
<div class="rss-post">. Use standard HTML tags —<h2>,<p>,<pre><code>,<table>— with the custom classes where needed (.infobox,.flow,.label,.lead).4. Preview and publish. The Additional CSS applies automatically.
Important Use a single Custom HTML block for the entire post, not multiple blocks. If you mix Custom HTML blocks with regular Paragraph or Heading blocks, the regular blocks won’t be inside the.rss-postwrapper and won’t get the custom styling.Why Not Use the Block Editor Natively?
A reasonable question. Gutenberg’s blocks do offer some styling — you can set colors, font sizes, and spacing per block. But there are real limitations:
No custom fonts. You’re limited to what your theme provides plus WordPress.com’s font library. Want JetBrains Mono for code? Not an option through the block editor.
No pseudo-elements. The accent bar on headings uses
::before. There’s no block editor control for that.No reusable component patterns. An info box with a colored border, background, and styled label would need manual per-block styling every time. With CSS classes, it’s one
<div class="infobox">.No code block theming. The built-in Code block doesn’t support dark themes, language labels, or custom fonts.
Consistency. When all styling comes from a single CSS file, every post looks consistent. Per-block styling drifts over time.
Available Components
Here’s a quick reference for the CSS classes available in the current stylesheet:
Class Element Purpose .rss-post<div>Wrapper — all styles are scoped under this .lead<p>Subtitle / intro paragraph in muted gray .infobox<div>Tip / warning / note callout box .flow<div>Horizontal flow diagram container .flow-box<div>Individual box in a flow diagram .flow-box.accent<div>Highlighted (amber) flow box .flow-arrow<span>Arrow between flow boxes .label<span>Language label inside <pre>blocks.tag-list<ul>Horizontal tag/category pills The Tradeoff
This approach is not without downsides. You’re writing raw HTML instead of using the visual editor, which is slower and more error-prone. The post editor’s preview won’t show the custom styles (you need to use the site preview or publish as draft). And if you ever change themes, the Additional CSS carries over but may need adjustments to avoid conflicts with the new theme’s styles.
For me, the tradeoff is worth it. I write technical content with code blocks, tables, and diagrams. The default WordPress.com styling doesn’t serve that content well, and this approach gives me full control without needing to self-host WordPress or pay for a Business plan with plugin access.
One CSS file. Clean HTML with classes. Posts that actually look the way you want them to.
-
How to bring back RSS feeds for sites that removed them, scrape full article content, and unify everything in a single self-hosted reader.
RSS isn’t dead — it’s just been abandoned by publishers chasing engagement metrics and walled gardens. Websites that once offered clean XML feeds now force you into newsletters, push notifications, or algorithmic timelines. But with a bit of self-hosting, you can take that control back.
This post walks through my setup: FreshRSS as the reader, RSS-Bridge as the scraper for sites that killed their feeds, all running on TrueNAS Scale with Docker and exposed through Tailscale for secure remote access.
The Architecture
The data flow is straightforward:
Website→
(no RSS)RSS-Bridge→
scrapes & generates feedFreshRSS→
polls & displaysYou
browser / appFor sites that still offer RSS, FreshRSS subscribes directly. For sites that removed their feeds, RSS-Bridge sits in between — it loads the page, parses the HTML with CSS selectors, and generates a standard Atom feed that FreshRSS can consume like any other subscription.
Why RSS-Bridge Over Alternatives
There are several tools that can generate feeds from websites. I chose RSS-Bridge for a few reasons:
Lightweight. RSS-Bridge is PHP-based and runs in about 50 MB of RAM. Compare that with RSSHub (Node.js, 300 MB+) or Huginn (Ruby, even heavier). On a NAS where every container counts, this matters.
FreshRSS integration. There’s a native FreshRSS extension (
xExtension-RssBridge) if you want tight integration, though the simpler approach — just subscribing to the generated feed URL — works perfectly and survives app updates.CssSelectorBridge. This built-in bridge is incredibly flexible. Give it a URL, tell it which CSS selectors match your articles, and it produces a feed. No coding required, no custom JavaScript routes to maintain.
Deploying RSS-Bridge on TrueNAS
I run RSS-Bridge as a Docker container through Portainer. First, create the config directory and enable all bridges:
bash# Create config directory on ZFS
sudo mkdir -p /mnt/zfs_tank/docker/rss-bridge

# Enable all bridges
sudo tee /mnt/zfs_tank/docker/rss-bridge/config.ini.php << 'EOF'
[system]
enabled_bridges[] = *
EOF
Then deploy the stack in Portainer:
docker-composeversion: "3"
services:
  rss-bridge:
    image: rssbridge/rss-bridge:latest
    container_name: rss-bridge
    restart: unless-stopped
    ports:
      - "3001:80"
    volumes:
      - /mnt/zfs_tank/docker/rss-bridge:/config
RSS-Bridge is now accessible at
http://<truenas-ip>:3001.Remote Access with Tailscale Serve
If you already run a Tailscale container on your TrueNAS box, you can expose RSS-Bridge through it:
bashdocker exec ix-tailscale-tailscale-1 tailscale serve --bg --https 3001 http://localhost:3001This makes RSS-Bridge available at
https://your-machine.tailnet-name.ts.net:3001/from any device on your tailnet. Use a non-443 port to avoid overwriting your TrueNAS GUI’s Tailscale Serve config.Tip When adding feed URLs to FreshRSS, use the local IP (e.g.http://192.168.0.13:3001/...) rather than the Tailscale hostname. Both services run on the same box, so going through the LAN is faster and more reliable — and the FreshRSS container may not have Tailscale DNS available.Scraping a Site: A Real Example
The Greek tech blog techblog.gr removed its RSS feed during a 2025 site redesign. Here’s how I brought it back.
Step 1 — Identify the selectors
Open the site, right-click an article title, and choose Inspect. On techblog.gr, each article title is an
<a>inside an<h3>. On article pages, the content lives insidediv.article-content.Step 2 — Configure CssSelectorBridge
In the RSS-Bridge web UI, find CSS Selector and fill in:
Field Value Site URL https://techblog.gr/Selector for article links h3 aURL pattern (empty) Expand article content .article-contentContent cleanup (empty) Title cleanup | Techblog.grLimit 20Step 3 — Generate and subscribe
Click Generate feed, right-click the Atom button and copy the link. In FreshRSS, go to Subscription management → Add a feed and paste the URL. Done — full article content in your reader, from a site with no RSS feed.
Finding the Right CSS Selectors
For the article link selector: On the homepage, right-click an article title → Inspect. Look at the tag structure. Common patterns are
h2 a,h3 a, or.post-title a. If the site uses generic<a>tags everywhere, combine with a URL pattern to filter (e.g./blog/202to match only blog post URLs).For the content selector: Open any individual article, right-click the body text → Inspect. Look at the parent
<div>wrapping all the paragraphs. WordPress sites typically use.entry-contentor.article-content. Drupal sites often use.field-name-bodyor.node-content.Gotcha: Iframes Some sites (especially job boards) load content inside iframes. RSS-Bridge can only parse the main page HTML — if the content is in an iframe, you’re limited to titles and links. Check your browser’s inspector for<iframe>elements if the content selector doesn’t seem to work.Setting Sensible Limits
The Limit field controls how many items RSS-Bridge returns per request. Since FreshRSS remembers articles it has already seen, you only need enough to cover new posts between polling intervals:
Feed type Limit Reasoning News sites 20 High frequency, many posts per day Blogs 10 Weekly or monthly posts Job boards 10 Few listings, slow turnover What About Paywalled Sites?
RSS-Bridge has limits. If a site blocks automated requests (returning 403 errors) or loads content via JavaScript that requires authentication, RSS-Bridge can’t help. This applies to most academic journals and some major news outlets.
For journals like NEJM, the publisher’s RSS feed is your only option — and it often contains just titles and volume/page references, no abstracts. A useful workaround for medical journals: use PubMed’s RSS feeds instead. PubMed indexes the same articles and includes full abstracts. Search for a journal, save the search, and create an RSS feed from the results.
Unifying Multiple Feed Readers
If you’re migrating from a desktop reader like Akregator to a self-hosted FreshRSS instance, both support OPML import/export. Export from both, then compare the feed URLs to identify:
Feeds in both — already synced, nothing to do.
Feeds only in the old reader — evaluate whether to add them to FreshRSS or drop them.
Feeds only in FreshRSS — typically your newer RSS-Bridge feeds replacing broken native feeds.
Watch for feeds that exist in both but with different URLs — same source, different CDN, or an old Politepol/feed proxy URL that you’ve since replaced with RSS-Bridge.
Closing Thoughts
This setup takes about 30 minutes to deploy and configure. What you get in return is a single, self-hosted interface for consuming content from any website — with or without their cooperation. No algorithms deciding what you see, no newsletters cluttering your inbox, no tracking pixels following you around.
RSS never died. It just needs a little infrastructure.
-
How to set up a disposable VM for running the ZFS test suite on bleeding-edge kernels
Why This Matters
OpenZFS supports a wide range of Linux kernels, but regressions can slip through on newer ones. Arch Linux ships the latest stable kernels (6.18+ at the time of writing), making it an ideal platform for catching issues before they hit other distributions.
The ZFS test suite is the project’s primary quality gate — it exercises thousands of scenarios across pool creation, send/receive, snapshots, encryption, scrub, and more. Running it on your kernel version and reporting results is one of the most valuable contributions you can make, even without writing any code.
Why a VM, Not Docker?
This is the key architectural decision. ZFS is a kernel module — the test suite needs to:
- Load and unload
spl.koandzfs.kokernel modules - Create and destroy loopback block devices for test zpools
- Exercise kernel-level filesystem operations (mount, unmount, I/O)
- Potentially crash the kernel if a bug is triggered
Docker containers share the host kernel. If you load ZFS modules inside a container, they affect your entire host system. A crashing test could take down your workstation. With a QEMU/KVM virtual machine, you get a fully isolated kernel — crashes stay inside the VM, and you can just reboot it.
┌─────────────────────────────────────────────────┐│ HOST (your workstation) ││ Arch Linux · Kernel 6.18.8 · Your ZFS pools ││ ││ ┌───────────────────────────────────────────┐ ││ │ QEMU/KVM VM │ ││ │ Arch Linux · Kernel 6.18.7 │ ││ │ │ ││ │ ┌─────────────┐ ┌───────────────────┐ │ ││ │ │ spl.ko │ │ ZFS Test Suite │ │ ││ │ │ zfs.ko │ │ (file-backed │ │ ││ │ │ (from src) │ │ loopback vdevs) │ │ ││ │ └─────────────┘ └───────────────────┘ │ ││ │ │ ││ │ If something crashes → only VM affected │ ││ └──────────────────────────────────┬────────┘ ││ SSH :2222 ←┘ │└─────────────────────────────────────────────────┘What Is the Arch Linux Cloud Image?
We use the official Arch Linux cloud image — a minimal, pre-built qcow2 disk image maintained by the Arch Linux project. It’s designed for cloud/VM environments and includes:
- A minimal Arch Linux installation (no GUI, no bloat)
- cloud-init support for automated provisioning (user creation, SSH keys, hostname)
- A growable root filesystem (we resize it to 40G)
- systemd-networkd for automatic DHCP networking
This is NOT the “archzfs” project (archzfs.com provides prebuilt ZFS packages). We named our VM hostname “archzfs” for convenience, but we build ZFS entirely from source.
The cloud-init seed image is a tiny ISO that tells cloud-init how to configure the VM on first boot — what user to create, what password to set, what hostname to use. On a real cloud provider, this comes from the metadata service; for local QEMU, we create it manually.
Step-by-Step Setup
Prerequisites (Host)
# Install QEMU and toolssudo pacman -S qemu-full cdrtools# Optional: virt-manager for GUI managementsudo pacman -S virt-manager libvirt dnsmasqsudo systemctl enable --now libvirtdsudo usermod -aG libvirt $USER1. Download and Prepare the Cloud Image
mkdir ~/zfs-testvm && cd ~/zfs-testvm# Download the latest Arch Linux cloud imagewget https://geo.mirror.pkgbuild.com/images/latest/Arch-Linux-x86_64-cloudimg.qcow2# Resize to 40G (ZFS tests need space for file-backed vdevs)qemu-img resize Arch-Linux-x86_64-cloudimg.qcow2 40G2. Create the Cloud-Init Seed
mkdir -p /tmp/seed# User configurationcat > /tmp/seed/user-data << 'EOF'#cloud-confighostname: archzfsusers:- name: archshell: /bin/bashsudo: ALL=(ALL) NOPASSWD:ALLlock_passwd: falseplain_text_passwd: test123ssh_pwauth: trueEOF# Instance metadatacat > /tmp/seed/meta-data << 'EOF'instance-id: archzfs-001local-hostname: archzfsEOF# Build the seed ISOmkisofs -output seed.img -volid cidata -joliet -rock /tmp/seed/3. Boot the VM
qemu-system-x86_64 \-enable-kvm \-m 8G \-smp 8 \-drive file=Arch-Linux-x86_64-cloudimg.qcow2,if=virtio \-drive file=seed.img,if=virtio,format=raw \-nic user,hostfwd=tcp::2222-:22 \-nographicWhat each flag does:
Flag Purpose -enable-kvmUse hardware virtualization (huge performance gain) -m 8G8GB RAM (ZFS ARC cache benefits from more) -smp 88 virtual CPUs (adjust to your host) -drive ...qcow2,if=virtioBoot disk with virtio for best I/O -drive ...seed.imgCloud-init configuration -nic user,hostfwd=...User-mode networking with SSH port forward -nographicSerial console (no GUI window needed) Login will appear on the serial console. Credentials:
arch/test123.You can also SSH from another terminal:
ssh -p 2222 arch@localhost4. Install Build Dependencies (Inside VM)
sudo pacman -Syu --noconfirm \base-devel git autoconf automake libtool python \linux-headers libelf libaio openssl zlib \ksh bc cpio fio inetutils sysstat jq pax rsync \nfs-utils lsscsi xfsprogs parted perf5. Clone and Build ZFS
# Clone YOUR fork (replace with your GitHub username)git clone https://github.com/YOUR_USERNAME/zfs.gitcd zfs# Build everything./autogen.sh./configure --enable-debugmake -j$(nproc)The build compiles:
- Kernel modules (
spl.ko,zfs.ko) against the running kernel headers - Userspace tools (
zpool,zfs,zdb, etc.) - Test binaries and test scripts
Build time: ~5-10 minutes with 8 vCPUs.
Note: You’ll see many
objtoolwarnings aboutspl_panic()andluaD_throw()missing__noreturn. These are known issues on newer kernels and don’t affect functionality.6. Load Modules and Run Tests
# Load the ZFS kernel modulessudo scripts/zfs.sh# Verify modules are loadedlsmod | grep zfs# Run the FULL test suite (4-8 hours)scripts/zfs-tests.sh -v 2>&1 | tee /tmp/zts-full.txt# Or run a single test (for quick validation)scripts/zfs-tests.sh -v \-t /home/arch/zfs/tests/zfs-tests/tests/functional/cli_root/zpool_create/zpool_create_001_pos.kshImportant notes on
zfs-tests.sh:- Do NOT run as root — the script uses sudo internally
- The
-tflag requires absolute paths to individual.kshtest files - Missing utilities
netandpamtesterare okay — only NFS/PAM tests will skip - The “Permission denied” warning at startup is harmless
7. Extract and Analyze Results
From your host machine:
# Copy the summary logscp -P 2222 arch@localhost:/tmp/zts-full.txt ~/zts-full.txt# Copy detailed per-test logsscp -r -P 2222 arch@localhost:/var/tmp/test_results/ ~/zfs-test-results/Understanding the Results
The test results summary looks like:
Results SummaryPASS 2847FAIL 12SKIP 43Running Time: 05:23:17What to look for:
- Compare against known failures — check the ZFS Test Suite Failures wiki
- Identify NEW failures — any FAIL not on the known list for your kernel version
- Check the detailed logs — in
/var/tmp/test_results/<timestamp>/each test has stdout/stderr output
Reporting Results
If you find new failures, file a GitHub issue at openzfs/zfs with:
Title: Test failure: <test_name> on Linux 6.18.7 (Arch Linux)**Environment:**- OS: Arch Linux (cloud image)- Kernel: 6.18.7-arch1-1- ZFS: built from master (commit <hash>)- VM: QEMU/KVM, 8 vCPU, 8GB RAM**Failed test:**<test name and path>**Test output:**<paste relevant log output>**Expected behavior:**Test should PASS (passes on kernel X.Y.Z / other distro)Tips and Tricks
Snapshot the VM after setup to avoid repeating the build:
# On host, after VM is set up and ZFS is builtqemu-img snapshot -c "zfs-built" Arch-Linux-x86_64-cloudimg.qcow2# Restore laterqemu-img snapshot -a "zfs-built" Arch-Linux-x86_64-cloudimg.qcow2Run a subset of tests by test group:
# All zpool testsfor t in /home/arch/zfs/tests/zfs-tests/tests/functional/cli_root/zpool_*/*.ksh; doecho "$t"done# Run tests matching a patternfind /home/arch/zfs/tests/zfs-tests/tests/functional -name "*.ksh" | grep snapshot | head -5Increase disk space if tests fail with ENOSPC:
# On host (VM must be stopped)qemu-img resize Arch-Linux-x86_64-cloudimg.qcow2 +20G# Inside VM after rebootsudo growpart /dev/vda 3 # or whichever partitionsudo resize2fs /dev/vda3Suppress floppy drive errors (the harmless
I/O error, dev fd0messages):# Add to QEMU command line:-fda none
This guide was written while setting up an OpenZFS test environment for kernel 6.18.7 on Arch Linux. The same approach works for any Linux distribution that provides cloud images — just swap the base image and package manager commands.
OpenZFS Test VM Architecture
QEMU/KVM + Arch Linux Cloud Image + ZFS from Source
Host MachineHardware Arch Linux · Kernel 6.18.8 · 24 coresHypervisor QEMU 9.x + KVM (hardware virtualization)VM Disk Arch-Linux-x86_64-cloudimg.qcow2 (resized 40G)Cloud-Init Seed seed.img (ISO9660) → user, password, hostnameNetwork User-mode networking · hostfwd :2222→:22Get Results scp -P 2222 arch@localhost:/var/tmp/test_results/ .SSH
:2222 ⇄ serial
ttyS0QEMU VM (archzfs)Guest OS Arch Linux · Kernel 6.18.7 · 8 vCPU · 8GB RAMCloud-Init User: arch · Pass: test123 · NOPASSWD sudoZFS Source (from fork) git clone github.com/YOUR_USER/zfs
./autogen.sh → ./configure –enable-debug → make -j8ZFS Kernel Modules scripts/zfs.sh → loads spl.ko + zfs.koZFS Test Suite scripts/zfs-tests.sh -v
Uses loopback devices (file-vdev0..2)Test Results /var/tmp/test_results/YYYYMMDDTHHMMSS/
Per-test logs with pass/fail/skip⚠ Why a VM instead of Docker?
ZFS tests need to load and unload kernel modules (spl.ko, zfs.ko). Docker containers share the host kernel — loading ZFS modules in a container affects your host system and could crash it. A QEMU/KVM VM has its own isolated kernel, so module crashes stay contained. The VM also provides loopback block devices for creating test zpools, which Docker can’t safely offer.
Setup Flow
1Get Cloud Image
Download official Arch cloud image. Resize qcow2 to 40G with
qemu-img resize.2Create Cloud-Init
Write user-data + meta-data YAML. Build ISO seed with
mkisofs.3Boot VM
qemu-system-x86_64 -enable-kvm -m 8G -smp 8with SSH forward on 2222.4Install Deps
pacman -S base-devel git ksh bc fio linux-headersand test dependencies.5Build ZFS
Clone fork →
autogen.sh→configure→make -j86Load & Test
scripts/zfs.shloads modules.zfs-tests.sh -vruns the suite (4-8h).7Extract Results
SCP results to host. Compare against known failures. Report regressions on GitHub.
- Load and unload