Category: TrueNAS
-
How to bring back RSS feeds for sites that removed them, scrape full article content, and unify everything in a single self-hosted reader.
RSS isn’t dead — it’s just been abandoned by publishers chasing engagement metrics and walled gardens. Websites that once offered clean XML feeds now force you into newsletters, push notifications, or algorithmic timelines. But with a bit of self-hosting, you can take that control back.
This post walks through my setup: FreshRSS as the reader, RSS-Bridge as the scraper for sites that killed their feeds, all running on TrueNAS Scale with Docker and exposed through Tailscale for secure remote access.
The Architecture
The data flow is straightforward:
Website→
(no RSS)RSS-Bridge→
scrapes & generates feedFreshRSS→
polls & displaysYou
browser / appFor sites that still offer RSS, FreshRSS subscribes directly. For sites that removed their feeds, RSS-Bridge sits in between — it loads the page, parses the HTML with CSS selectors, and generates a standard Atom feed that FreshRSS can consume like any other subscription.
Why RSS-Bridge Over Alternatives
There are several tools that can generate feeds from websites. I chose RSS-Bridge for a few reasons:
Lightweight. RSS-Bridge is PHP-based and runs in about 50 MB of RAM. Compare that with RSSHub (Node.js, 300 MB+) or Huginn (Ruby, even heavier). On a NAS where every container counts, this matters.
FreshRSS integration. There’s a native FreshRSS extension (
xExtension-RssBridge) if you want tight integration, though the simpler approach — just subscribing to the generated feed URL — works perfectly and survives app updates.CssSelectorBridge. This built-in bridge is incredibly flexible. Give it a URL, tell it which CSS selectors match your articles, and it produces a feed. No coding required, no custom JavaScript routes to maintain.
Deploying RSS-Bridge on TrueNAS
I run RSS-Bridge as a Docker container through Portainer. First, create the config directory and enable all bridges:
bash# Create config directory on ZFS
sudo mkdir -p /mnt/zfs_tank/docker/rss-bridge

# Enable all bridges
sudo tee /mnt/zfs_tank/docker/rss-bridge/config.ini.php << 'EOF'
[system]
enabled_bridges[] = *
EOF
Then deploy the stack in Portainer:
docker-composeversion: "3"
services:
  rss-bridge:
    image: rssbridge/rss-bridge:latest
    container_name: rss-bridge
    restart: unless-stopped
    ports:
      - "3001:80"
    volumes:
      - /mnt/zfs_tank/docker/rss-bridge:/config
RSS-Bridge is now accessible at
http://<truenas-ip>:3001.Remote Access with Tailscale Serve
If you already run a Tailscale container on your TrueNAS box, you can expose RSS-Bridge through it:
bashdocker exec ix-tailscale-tailscale-1 tailscale serve --bg --https 3001 http://localhost:3001This makes RSS-Bridge available at
https://your-machine.tailnet-name.ts.net:3001/from any device on your tailnet. Use a non-443 port to avoid overwriting your TrueNAS GUI’s Tailscale Serve config.Tip When adding feed URLs to FreshRSS, use the local IP (e.g.http://192.168.0.13:3001/...) rather than the Tailscale hostname. Both services run on the same box, so going through the LAN is faster and more reliable — and the FreshRSS container may not have Tailscale DNS available.Scraping a Site: A Real Example
The Greek tech blog techblog.gr removed its RSS feed during a 2025 site redesign. Here’s how I brought it back.
Step 1 — Identify the selectors
Open the site, right-click an article title, and choose Inspect. On techblog.gr, each article title is an
<a>inside an<h3>. On article pages, the content lives insidediv.article-content.Step 2 — Configure CssSelectorBridge
In the RSS-Bridge web UI, find CSS Selector and fill in:
Field Value Site URL https://techblog.gr/Selector for article links h3 aURL pattern (empty) Expand article content .article-contentContent cleanup (empty) Title cleanup | Techblog.grLimit 20Step 3 — Generate and subscribe
Click Generate feed, right-click the Atom button and copy the link. In FreshRSS, go to Subscription management → Add a feed and paste the URL. Done — full article content in your reader, from a site with no RSS feed.
Finding the Right CSS Selectors
For the article link selector: On the homepage, right-click an article title → Inspect. Look at the tag structure. Common patterns are
h2 a,h3 a, or.post-title a. If the site uses generic<a>tags everywhere, combine with a URL pattern to filter (e.g./blog/202to match only blog post URLs).For the content selector: Open any individual article, right-click the body text → Inspect. Look at the parent
<div>wrapping all the paragraphs. WordPress sites typically use.entry-contentor.article-content. Drupal sites often use.field-name-bodyor.node-content.Gotcha: Iframes Some sites (especially job boards) load content inside iframes. RSS-Bridge can only parse the main page HTML — if the content is in an iframe, you’re limited to titles and links. Check your browser’s inspector for<iframe>elements if the content selector doesn’t seem to work.Setting Sensible Limits
The Limit field controls how many items RSS-Bridge returns per request. Since FreshRSS remembers articles it has already seen, you only need enough to cover new posts between polling intervals:
Feed type Limit Reasoning News sites 20 High frequency, many posts per day Blogs 10 Weekly or monthly posts Job boards 10 Few listings, slow turnover What About Paywalled Sites?
RSS-Bridge has limits. If a site blocks automated requests (returning 403 errors) or loads content via JavaScript that requires authentication, RSS-Bridge can’t help. This applies to most academic journals and some major news outlets.
For journals like NEJM, the publisher’s RSS feed is your only option — and it often contains just titles and volume/page references, no abstracts. A useful workaround for medical journals: use PubMed’s RSS feeds instead. PubMed indexes the same articles and includes full abstracts. Search for a journal, save the search, and create an RSS feed from the results.
Unifying Multiple Feed Readers
If you’re migrating from a desktop reader like Akregator to a self-hosted FreshRSS instance, both support OPML import/export. Export from both, then compare the feed URLs to identify:
Feeds in both — already synced, nothing to do.
Feeds only in the old reader — evaluate whether to add them to FreshRSS or drop them.
Feeds only in FreshRSS — typically your newer RSS-Bridge feeds replacing broken native feeds.
Watch for feeds that exist in both but with different URLs — same source, different CDN, or an old Politepol/feed proxy URL that you’ve since replaced with RSS-Bridge.
Closing Thoughts
This setup takes about 30 minutes to deploy and configure. What you get in return is a single, self-hosted interface for consuming content from any website — with or without their cooperation. No algorithms deciding what you see, no newsletters cluttering your inbox, no tracking pixels following you around.
RSS never died. It just needs a little infrastructure.
-
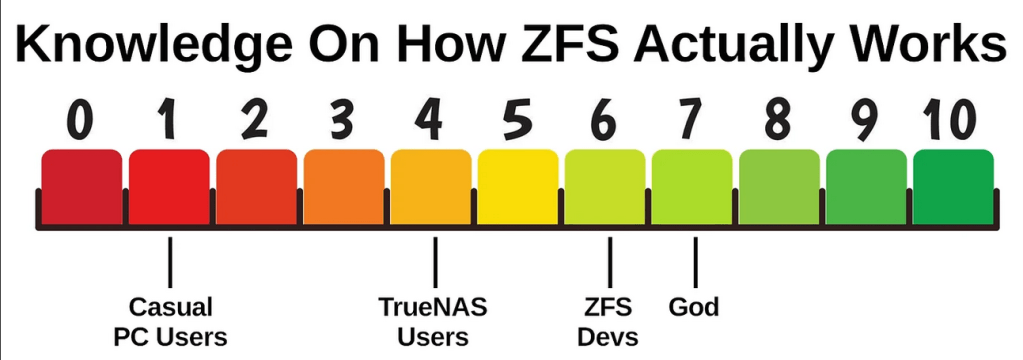
How to set up a disposable VM for running the ZFS test suite on bleeding-edge kernels
Why This Matters
OpenZFS supports a wide range of Linux kernels, but regressions can slip through on newer ones. Arch Linux ships the latest stable kernels (6.18+ at the time of writing), making it an ideal platform for catching issues before they hit other distributions.
The ZFS test suite is the project’s primary quality gate — it exercises thousands of scenarios across pool creation, send/receive, snapshots, encryption, scrub, and more. Running it on your kernel version and reporting results is one of the most valuable contributions you can make, even without writing any code.
Why a VM, Not Docker?
This is the key architectural decision. ZFS is a kernel module — the test suite needs to:
- Load and unload
spl.koandzfs.kokernel modules - Create and destroy loopback block devices for test zpools
- Exercise kernel-level filesystem operations (mount, unmount, I/O)
- Potentially crash the kernel if a bug is triggered
Docker containers share the host kernel. If you load ZFS modules inside a container, they affect your entire host system. A crashing test could take down your workstation. With a QEMU/KVM virtual machine, you get a fully isolated kernel — crashes stay inside the VM, and you can just reboot it.
┌─────────────────────────────────────────────────┐│ HOST (your workstation) ││ Arch Linux · Kernel 6.18.8 · Your ZFS pools ││ ││ ┌───────────────────────────────────────────┐ ││ │ QEMU/KVM VM │ ││ │ Arch Linux · Kernel 6.18.7 │ ││ │ │ ││ │ ┌─────────────┐ ┌───────────────────┐ │ ││ │ │ spl.ko │ │ ZFS Test Suite │ │ ││ │ │ zfs.ko │ │ (file-backed │ │ ││ │ │ (from src) │ │ loopback vdevs) │ │ ││ │ └─────────────┘ └───────────────────┘ │ ││ │ │ ││ │ If something crashes → only VM affected │ ││ └──────────────────────────────────┬────────┘ ││ SSH :2222 ←┘ │└─────────────────────────────────────────────────┘What Is the Arch Linux Cloud Image?
We use the official Arch Linux cloud image — a minimal, pre-built qcow2 disk image maintained by the Arch Linux project. It’s designed for cloud/VM environments and includes:
- A minimal Arch Linux installation (no GUI, no bloat)
- cloud-init support for automated provisioning (user creation, SSH keys, hostname)
- A growable root filesystem (we resize it to 40G)
- systemd-networkd for automatic DHCP networking
This is NOT the “archzfs” project (archzfs.com provides prebuilt ZFS packages). We named our VM hostname “archzfs” for convenience, but we build ZFS entirely from source.
The cloud-init seed image is a tiny ISO that tells cloud-init how to configure the VM on first boot — what user to create, what password to set, what hostname to use. On a real cloud provider, this comes from the metadata service; for local QEMU, we create it manually.
Step-by-Step Setup
Prerequisites (Host)
# Install QEMU and toolssudo pacman -S qemu-full cdrtools# Optional: virt-manager for GUI managementsudo pacman -S virt-manager libvirt dnsmasqsudo systemctl enable --now libvirtdsudo usermod -aG libvirt $USER1. Download and Prepare the Cloud Image
mkdir ~/zfs-testvm && cd ~/zfs-testvm# Download the latest Arch Linux cloud imagewget https://geo.mirror.pkgbuild.com/images/latest/Arch-Linux-x86_64-cloudimg.qcow2# Resize to 40G (ZFS tests need space for file-backed vdevs)qemu-img resize Arch-Linux-x86_64-cloudimg.qcow2 40G2. Create the Cloud-Init Seed
mkdir -p /tmp/seed# User configurationcat > /tmp/seed/user-data << 'EOF'#cloud-confighostname: archzfsusers:- name: archshell: /bin/bashsudo: ALL=(ALL) NOPASSWD:ALLlock_passwd: falseplain_text_passwd: test123ssh_pwauth: trueEOF# Instance metadatacat > /tmp/seed/meta-data << 'EOF'instance-id: archzfs-001local-hostname: archzfsEOF# Build the seed ISOmkisofs -output seed.img -volid cidata -joliet -rock /tmp/seed/3. Boot the VM
qemu-system-x86_64 \-enable-kvm \-m 8G \-smp 8 \-drive file=Arch-Linux-x86_64-cloudimg.qcow2,if=virtio \-drive file=seed.img,if=virtio,format=raw \-nic user,hostfwd=tcp::2222-:22 \-nographicWhat each flag does:
Flag Purpose -enable-kvmUse hardware virtualization (huge performance gain) -m 8G8GB RAM (ZFS ARC cache benefits from more) -smp 88 virtual CPUs (adjust to your host) -drive ...qcow2,if=virtioBoot disk with virtio for best I/O -drive ...seed.imgCloud-init configuration -nic user,hostfwd=...User-mode networking with SSH port forward -nographicSerial console (no GUI window needed) Login will appear on the serial console. Credentials:
arch/test123.You can also SSH from another terminal:
ssh -p 2222 arch@localhost4. Install Build Dependencies (Inside VM)
sudo pacman -Syu --noconfirm \base-devel git autoconf automake libtool python \linux-headers libelf libaio openssl zlib \ksh bc cpio fio inetutils sysstat jq pax rsync \nfs-utils lsscsi xfsprogs parted perf5. Clone and Build ZFS
# Clone YOUR fork (replace with your GitHub username)git clone https://github.com/YOUR_USERNAME/zfs.gitcd zfs# Build everything./autogen.sh./configure --enable-debugmake -j$(nproc)The build compiles:
- Kernel modules (
spl.ko,zfs.ko) against the running kernel headers - Userspace tools (
zpool,zfs,zdb, etc.) - Test binaries and test scripts
Build time: ~5-10 minutes with 8 vCPUs.
Note: You’ll see many
objtoolwarnings aboutspl_panic()andluaD_throw()missing__noreturn. These are known issues on newer kernels and don’t affect functionality.6. Load Modules and Run Tests
# Load the ZFS kernel modulessudo scripts/zfs.sh# Verify modules are loadedlsmod | grep zfs# Run the FULL test suite (4-8 hours)scripts/zfs-tests.sh -v 2>&1 | tee /tmp/zts-full.txt# Or run a single test (for quick validation)scripts/zfs-tests.sh -v \-t /home/arch/zfs/tests/zfs-tests/tests/functional/cli_root/zpool_create/zpool_create_001_pos.kshImportant notes on
zfs-tests.sh:- Do NOT run as root — the script uses sudo internally
- The
-tflag requires absolute paths to individual.kshtest files - Missing utilities
netandpamtesterare okay — only NFS/PAM tests will skip - The “Permission denied” warning at startup is harmless
7. Extract and Analyze Results
From your host machine:
# Copy the summary logscp -P 2222 arch@localhost:/tmp/zts-full.txt ~/zts-full.txt# Copy detailed per-test logsscp -r -P 2222 arch@localhost:/var/tmp/test_results/ ~/zfs-test-results/Understanding the Results
The test results summary looks like:
Results SummaryPASS 2847FAIL 12SKIP 43Running Time: 05:23:17What to look for:
- Compare against known failures — check the ZFS Test Suite Failures wiki
- Identify NEW failures — any FAIL not on the known list for your kernel version
- Check the detailed logs — in
/var/tmp/test_results/<timestamp>/each test has stdout/stderr output
Reporting Results
If you find new failures, file a GitHub issue at openzfs/zfs with:
Title: Test failure: <test_name> on Linux 6.18.7 (Arch Linux)**Environment:**- OS: Arch Linux (cloud image)- Kernel: 6.18.7-arch1-1- ZFS: built from master (commit <hash>)- VM: QEMU/KVM, 8 vCPU, 8GB RAM**Failed test:**<test name and path>**Test output:**<paste relevant log output>**Expected behavior:**Test should PASS (passes on kernel X.Y.Z / other distro)Tips and Tricks
Snapshot the VM after setup to avoid repeating the build:
# On host, after VM is set up and ZFS is builtqemu-img snapshot -c "zfs-built" Arch-Linux-x86_64-cloudimg.qcow2# Restore laterqemu-img snapshot -a "zfs-built" Arch-Linux-x86_64-cloudimg.qcow2Run a subset of tests by test group:
# All zpool testsfor t in /home/arch/zfs/tests/zfs-tests/tests/functional/cli_root/zpool_*/*.ksh; doecho "$t"done# Run tests matching a patternfind /home/arch/zfs/tests/zfs-tests/tests/functional -name "*.ksh" | grep snapshot | head -5Increase disk space if tests fail with ENOSPC:
# On host (VM must be stopped)qemu-img resize Arch-Linux-x86_64-cloudimg.qcow2 +20G# Inside VM after rebootsudo growpart /dev/vda 3 # or whichever partitionsudo resize2fs /dev/vda3Suppress floppy drive errors (the harmless
I/O error, dev fd0messages):# Add to QEMU command line:-fda none
This guide was written while setting up an OpenZFS test environment for kernel 6.18.7 on Arch Linux. The same approach works for any Linux distribution that provides cloud images — just swap the base image and package manager commands.
OpenZFS Test VM Architecture
QEMU/KVM + Arch Linux Cloud Image + ZFS from Source
Host MachineHardware Arch Linux · Kernel 6.18.8 · 24 coresHypervisor QEMU 9.x + KVM (hardware virtualization)VM Disk Arch-Linux-x86_64-cloudimg.qcow2 (resized 40G)Cloud-Init Seed seed.img (ISO9660) → user, password, hostnameNetwork User-mode networking · hostfwd :2222→:22Get Results scp -P 2222 arch@localhost:/var/tmp/test_results/ .SSH
:2222 ⇄ serial
ttyS0QEMU VM (archzfs)Guest OS Arch Linux · Kernel 6.18.7 · 8 vCPU · 8GB RAMCloud-Init User: arch · Pass: test123 · NOPASSWD sudoZFS Source (from fork) git clone github.com/YOUR_USER/zfs
./autogen.sh → ./configure –enable-debug → make -j8ZFS Kernel Modules scripts/zfs.sh → loads spl.ko + zfs.koZFS Test Suite scripts/zfs-tests.sh -v
Uses loopback devices (file-vdev0..2)Test Results /var/tmp/test_results/YYYYMMDDTHHMMSS/
Per-test logs with pass/fail/skip⚠ Why a VM instead of Docker?
ZFS tests need to load and unload kernel modules (spl.ko, zfs.ko). Docker containers share the host kernel — loading ZFS modules in a container affects your host system and could crash it. A QEMU/KVM VM has its own isolated kernel, so module crashes stay contained. The VM also provides loopback block devices for creating test zpools, which Docker can’t safely offer.
Setup Flow
1Get Cloud Image
Download official Arch cloud image. Resize qcow2 to 40G with
qemu-img resize.2Create Cloud-Init
Write user-data + meta-data YAML. Build ISO seed with
mkisofs.3Boot VM
qemu-system-x86_64 -enable-kvm -m 8G -smp 8with SSH forward on 2222.4Install Deps
pacman -S base-devel git ksh bc fio linux-headersand test dependencies.5Build ZFS
Clone fork →
autogen.sh→configure→make -j86Load & Test
scripts/zfs.shloads modules.zfs-tests.sh -vruns the suite (4-8h).7Extract Results
SCP results to host. Compare against known failures. Report regressions on GitHub.
- Load and unload
-
Summary · February 4, 2026
TrueNAS Plans for 2026
iXsystems lays out its roadmap for the year — an annual release cadence, cloud-style fleet management, and hardware pushing 1 PB per rack unit.
~500KSystems Deployed60%+Fortune 500 Usage1 PBNVMe per 1U📍Where TrueNAS Stands Today
25.10 “Goldeye” is the recommended version for new deployments, now at GA. 25.04 “Fangtooth” remains best for mission-critical stability. 24.x & 13.0 are end-of-life — no further updates.
🚀TrueNAS 26 — Annual Releases, No More Fish
A shift to annual releases with simple version numbers (26.1, 26.2…) instead of fish code names. Beta arrives in April 2026 with an extended development cycle for more thorough testing and predictable upgrades.
OpenZFS 2.4 Hybrid Pools Ransomware Detection LXC Containers Webshare Search Kernel 6.18 LTS☁️TrueNAS Connect — Cloud-Style Fleet Management
Unified management for multiple TrueNAS systems, data stays on-prem. Three tiers rolling out through the year:
Foundation (free) — headless setup & config. Plus (Q1, subscription) — replication, Webshare, ransomware protection. Business (Q2) — HA systems, large fleets, MSPs. Early adopters get 50% off the first year.
⚡Hardware — Terabit Networking & Petabyte Density
The R60 brings 5th-gen hardware with 400GbE and RDMA for AI, video editing, and data science. H-Series hybrid systems mix NVMe and HDDs at 80% lower cost per TB than all-flash.
OpenZFS 2.4 adds intelligent tiering — hot data pinned to flash, cold data on spinning disk. With 122TB SSDs now available, a single 1U can house over 1 PB of NVMe storage.
🎯The Bottom Line
The theme is clear: own your data. Predictable costs, no vendor lock-in, open-source foundations you can verify. TrueNAS 26 simplifies the release model, Connect simplifies fleet management, and the hardware lineup covers everything from edge deployments to petabyte-scale AI workloads.
→Original ArticleTrueNAS Plans for 2026: Building on Your Success — truenas.com -
Why Self-Host Your Anki Sync?
Anki is the gold standard for spaced repetition learning — used by medical students, language learners, and lifelong learners worldwide. By default, Anki syncs through AnkiWeb, Anki’s official cloud service. But there are good reasons to run your own sync server: full ownership of your data, no upload limits, the ability to share a server with a study group, and the peace of mind that comes with keeping everything on your own hardware.
Anki Sync Server Enhanced wraps the official Anki sync binary in a production-ready Docker image with features you’d expect from a proper self-hosted service — and it’s now submitted to the TrueNAS Community App Catalog for one-click deployment.
What’s Included
🔐User ManagementCreate sync accounts via environment variables. No database setup required.
🔒Optional TLSBuilt-in Caddy reverse proxy for automatic HTTPS with Let’s Encrypt or custom certs.
💾Automated BackupsScheduled backups with configurable retention and S3-compatible storage support.
📊Metrics & DashboardPrometheus-compatible metrics endpoint and optional web dashboard for monitoring.
🐳Docker NativeLightweight Debian-based image. Runs as non-root. Healthcheck included.
⚡TrueNAS ReadySubmitted to the Community App Catalog. Persistent storage, configurable ports, resource limits.
How It Works
Anki Desktop / Mobile → Anki Sync Server Enhanced → TrueNAS StorageYour Anki clients sync directly to your TrueNAS server over your local network or via Tailscale/WireGuard.
The server runs the official
anki-sync-serverRust binary — the same code that powers AnkiWeb — inside a hardened container. Point your Anki desktop or mobile app at your server’s URL, and syncing works exactly like it does with AnkiWeb, just on your own infrastructure.TrueNAS Installation
Once the app is accepted into the Community train, installation is straightforward from the TrueNAS UI. In the meantime, you can deploy it as a Custom App using the Docker image directly.
PR Status: The app has been submitted to the TrueNAS Community App Catalog via PR #4282 and is awaiting review. Track progress on the app request issue #4281.To deploy as a Custom App right now, use these settings:
Connecting Your Anki Client
After the server is running, configure your Anki client to use it. In Anki Desktop, go to Tools → Preferences → Syncing and set the custom sync URL to your server address, for example
http://your-truenas-ip:8080. On AnkiDroid, the setting is under Settings → Sync → Custom sync server. On AnkiMobile (iOS), look under Settings → Syncing → Custom Server.Then simply sync as usual — your Anki client will talk to your self-hosted server instead of AnkiWeb.
Building It: Lessons from TrueNAS App Development
Packaging a Docker image as a TrueNAS app turned out to involve a few surprises worth sharing for anyone considering contributing to the catalog.
TrueNAS apps use a Jinja2 templating system backed by a Python rendering library — not raw docker-compose files. Your template calls methods like
Render(values),c1.add_port(), andc1.healthcheck.set_test()which generate a validated compose file at deploy time. This means you get built-in support for permissions init containers, resource limits, and security hardening for free.One gotcha: TrueNAS runs containers as UID/GID 568 (the
appsuser), not root. If your entrypoint writes to files owned by a different user, it will fail silently or crash. We hit this with astart_time.txtwrite and had to make it non-fatal. Another: the Anki sync server returns a 404 on/(it has no landing page), so the defaultcurl --failhealthcheck marks the container as unhealthy. Switching to a TCP healthcheck solved it cleanly.The TrueNAS CI tooling is solid — a single
ci.pyscript renders your template, validates the compose output, spins up containers, and checks health status. If the healthcheck fails, it dumps full container logs and inspect data, making debugging fast.Get Involved
Ready to Self-Host Your Anki Sync?
Deploy it on TrueNAS today or star the project on GitHub to follow development.
Anki TrueNAS Self-Hosted Docker Spaced Repetition Open Source Homelab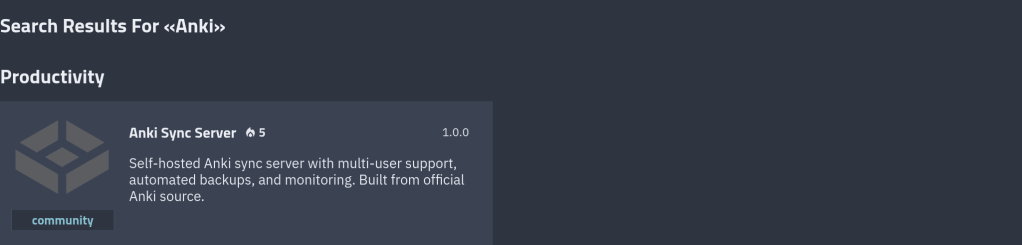
-
If you’re using Tailscale with Mullvad VPN (either via the native Tailscale integration or standalone) and Firefox’s DNS over HTTPS (DoH), you might suddenly find yourself unable to access your Tailscale services via their
*.ts.nethostnames—even though everything worked fine before.The symptoms are frustrating:
tailscale pingworks,digresolves the hostname correctly, but Firefox just refuses to connect.Why This Happens
When you enable DNS over HTTPS in Firefox (especially with “Max Protection” mode), Firefox bypasses your system’s DNS resolver entirely and sends all DNS queries directly to your chosen DoH provider—in this case, Mullvad’s DNS server at
https://base.dns.mullvad.net/dns-query.The problem? Mullvad’s public DNS server has no idea what
my-server.my-tailnet.ts.netis. That’s a private hostname that only Tailscale’s MagicDNS (running at100.100.100.100) knows how to resolve.So while your system can resolve the hostname just fine:
$ dig my-server.my-tailnet.ts.net;; ANSWER SECTION:my-server.my-tailnet.ts.net. 600 IN A 100.x.x.x;; SERVER: 100.100.100.100#53(100.100.100.100) (UDP)Firefox completely ignores this and asks Mullvad instead, which returns nothing.
The Solution
Firefox provides a way to exclude specific domains from DoH, forcing it to fall back to system DNS for those domains. Here’s how to set it up:
- Open Firefox and navigate to
about:config - Search for
network.trr.excluded-domains - Add
ts.netto the list (comma-separated if there are existing entries)
For example:
ts.netOr if you have other exclusions:
example.local, ts.netThis tells Firefox: “For any domain ending in
.ts.net, use the system DNS resolver instead of DoH.” Since your system DNS is controlled by Tailscale’s MagicDNS, the hostname will resolve correctly.The Gotcha: Old Tailnet Names
Here’s a subtle issue that can trip you up: if you previously had a different Tailscale account or renamed your tailnet, you might have an old, specific exclusion that no longer applies.
For example, you might have:
my-nas.old-tailnet.ts.netBut your current tailnet is
new-tailnet.ts.net. The old exclusion does nothing for your new tailnet!The fix is simple: instead of excluding specific tailnet hostnames, just exclude the entire
ts.netdomain. This covers all Tailscale hostnames, regardless of your tailnet name, now and in the future.Verifying the Fix
After making the change, you can verify everything is working:
- Test Tailscale connectivity (should already work):
tailscale ping your-machine-name - Test DNS resolution from the command line:
dig your-machine-name.your-tailnet.ts.net - Test in Firefox: Navigate to your Tailscale hostname—it should now load.
Summary
If you’re combining Firefox DoH with Tailscale:
- Firefox’s DoH bypasses Tailscale’s MagicDNS
- Add
ts.nettonetwork.trr.excluded-domainsinabout:config - Use
ts.net(not a specific tailnet name) to future-proof the setting
This gives you the best of both worlds: private DNS for general browsing via Mullvad, and working hostname resolution for your Tailscale network.
- Open Firefox and navigate to
-
I recently ran into a performance issue on my TrueNAS SCALE 25.10.1 system where the server felt sluggish despite low CPU usage. The system was running Docker-based applications, and at first glance nothing obvious looked wrong. The real problem turned out to be high iowait.
What iowait actually means
In Linux,
iowaitrepresents the percentage of time the CPU is idle while waiting for I/O operations (usually disk). High iowait doesn’t mean the CPU is busy — it means the CPU is stuck waiting on storage.In
top, this appears aswa:%Cpu(s): 1.8 us, 1.7 sy, 0.0 ni, 95.5 id, 0.2 wa, 0.0 hi, 0.8 si, 0.0 stUnder normal conditions, iowait should stay very low (usually under 1–2%). When it starts climbing higher, the system can feel slow even if CPU usage looks fine.
Confirming the issue with iostat
To get a clearer picture, I used
iostat, which shows per-disk activity and latency:iostat -x 1This immediately showed the problem. One or more disks had:
- Very high
%util(near or at 100%) - Elevated
awaittimes - Consistent read/write pressure
At that point it was clear the bottleneck was storage I/O, not CPU or memory.
Tracking it down to Docker services
This system runs several Docker-based services. Using
topalongsideiostat, I noticed disk activity drop immediately when certain services were stopped.In particular, high I/O was coming from applications that:
- Continuously read/write large files
- Perform frequent metadata operations
- Maintain large active datasets
Examples included downloaders, media managers, and backup-related containers.
Stopping services to confirm
To confirm the cause, I stopped Docker services one at a time and watched disk metrics:
iostat -x 1Each time a heavy I/O service was stopped, iowait dropped immediately. Once the worst offender was stopped, iowait returned to normal levels and the system became responsive again.
Why the system looked “fine” at first
This was tricky because:
- CPU usage was low
- Memory usage looked reasonable
- The web UI was responsive but sluggish
Without checking
iostat, it would have been easy to misdiagnose this as a CPU or RAM issue.Lessons learned
- High iowait can cripple performance even when CPU is idle
topalone is not enough — useiostat -x- Docker workloads can silently saturate disks
- Stopping services one by one is an effective diagnostic technique
Final takeaway
On TrueNAS SCALE 25.10.1 with Docker, high iowait was the real cause of my performance issues. The fix wasn’t a reboot, more CPU, or more RAM — it was identifying and controlling disk-heavy services.
If your TrueNAS server feels slow but CPU usage looks fine, check iowait and run
iostat. The disk may be the real bottleneck. - Very high
-
New version that is “battlefield tested” on my home server !!

https://github.com/chrislongros/docker-tailscale-serve-preserve/releases/tag/v1.1.0
https://github.com/chrislongros/docker-tailscale-serve-preserve/tree/main
-
I would like to share an AI generated script that I successfully used to automate my TrueNAS certificates with Tailscale.
This guide shows how to automatically use a Tailscale HTTPS certificate for the TrueNAS SCALE Web UI, when Tailscale runs inside a Docker container.
Overview
What this does
- Runs
tailscale certinside a Docker container - Writes the cert/key to a host bind-mount
- Imports the cert into TrueNAS
- Applies it to the Web UI
- Restarts the UI
- Runs automatically via cron
Requirements
- TrueNAS SCALE
- Docker
- A running Tailscale container (
tailscaled) - A host directory bind-mounted into the container at
/certs
Step 1 – Create a cert directory on the host
Create a dataset or folder on your pool (example):
mkdir -p /mnt//Applications/tailscale-certs
chmod 700 /mnt//Applications/tailscale-certsStep 2 – Bind-mount it into the Tailscale container
Your Tailscale container must mount the host directory to
/certs.Example (conceptually):
Host path: /mnt//Applications/tailscale-certs
Container: /certsThis is required for
tailscale certto write files that TrueNAS can read.Step 3 – Create the automation script (generic)
Save this as:
/mnt/<pool>/scripts/import_tailscale_cert.sh
Script:
#!/bin/bash
set -euo pipefail=========================
USER CONFIG (REQUIRED)
=========================
CONTAINER_NAME=“TAILSCALE_CONTAINER_NAME”
TS_HOSTNAME=“TAILSCALE_DNS_NAME”
HOST_CERT_DIR=“HOST_CERT_DIR”
LOG_FILE=“LOG_FILE”
TRUENAS_CERT_NAME=“TRUENAS_CERT_NAME”=========================
CRT=“${HOST_CERT_DIR}/ts.crt”
KEY=“${HOST_CERT_DIR}/ts.key”export PATH=“/usr/local/sbin:/usr/local/bin:/usr/sbin:/usr/bin:/sbin:/bin”
mkdir -p “$(dirname “$LOG_FILE”)”
touch “$LOG_FILE”
exec >>“$LOG_FILE” 2>&1
echo “—– $(date -Is) starting Tailscale cert import —–”command -v docker >/dev/null || { echo “ERROR: docker not found”; exit 2; }
command -v jq >/dev/null || { echo “ERROR: jq not found”; exit 2; }
command -v midclt >/dev/null || { echo “ERROR: midclt not found”; exit 2; }docker ps –format ‘{{.Names}}’ | grep -qx “$CONTAINER_NAME” || {
echo “ERROR: container not running: $CONTAINER_NAME”
exit 2
}docker exec “$CONTAINER_NAME” sh -lc ‘test -d /certs’ || {
echo “ERROR: /certs not mounted in container”
exit 2
}docker exec “$CONTAINER_NAME” sh -lc
“tailscale cert –cert-file /certs/ts.crt –key-file /certs/ts.key “$TS_HOSTNAME””[[ -s “$CRT” && -s “$KEY” ]] || {
echo “ERROR: certificate files missing”
exit 2
}midclt call certificate.create “$(jq -n
–arg n “$TRUENAS_CERT_NAME”
–rawfile c “$CRT”
–rawfile k “$KEY”
‘{name:$n, create_type:“CERTIFICATE_CREATE_IMPORTED”, certificate:$c, privatekey:$k}’)” >/dev/null || trueCERT_ID=“$(midclt call certificate.query | jq -r
–arg n “$TRUENAS_CERT_NAME” ‘. | select(.name==$n) | .id’ | tail -n 1)”[[ -n “$CERT_ID” ]] || {
echo “ERROR: failed to locate imported certificate”
exit 2
}midclt call system.general.update “$(jq -n –argjson id “$CERT_ID”
‘{ui_certificate:$id, ui_restart_delay:1}’)” >/dev/null
midclt call system.general.ui_restart >/dev/nullecho “SUCCESS: Web UI certificate updated”
Step 4 – Make it executable
chmod 700 /mnt//scripts/import_tailscale_cert.sh
Step 5 – Run once manually
/usr/bin/bash /mnt//scripts/import_tailscale_cert.sh
You will briefly disconnect from the Web UI — this is expected.
Step 6 – Verify certificate in UI
Go to:
System Settings → Certificates
Confirm the new certificate exists and uses your Tailscale hostname.
Also check:
System Settings → General → GUI
→ Web Interface HTTPS CertificateStep 7 – Create the cron job
TrueNAS UI → System Settings → Advanced → Cron Jobs → Add
/usr/bin/bash /mnt//scripts/import_tailscale_cert.sh
You can find the script on my Github repository:
https://github.com/chrislongros/truenas-tailscale-cert-automation
- Runs
-
I use Watchtower to automatically update my Docker applications on TrueNAS SCALE. At the same time, I use Tailscale Serve as a reverse proxy to provide secure HTTPS access to my home lab services.
This setup works well most of the time — except during updates.
The problem
When Watchtower updates a container, it stops and recreates it.
If the container exposes ports such as 80 or 443, the restart can fail because Tailscale Serve is already bound to those ports.The result is:
- failed container restarts,
- services going offline,
- and manual intervention required.
The solution
The solution is to temporarily disable Tailscale Serve, run Watchtower once, and then restore Tailscale Serve afterward.
On TrueNAS SCALE, Tailscale runs inside its own Docker container (for example:
ix-tailscale-tailscale-1). This makes it possible to control Serve usingdocker exec.The script below does exactly that:
- Backs up the current Tailscale Serve configuration
- Stops all Tailscale Serve listeners (freeing ports)
- Runs Watchtower in
--run-oncemode - Restores Tailscale Serve safely
Public Script: Pause Tailscale Serve During Watchtower Updates
Save as
/mnt/zfs_tank/scripts/watchtower-with-tailscale-serve.sh
(Adjust the pool name if yours is not
zfs_tank.)#!/usr/bin/env bash set -euo pipefail # ------------------------------------------------------------------------------ # watchtower-with-tailscale-serve.sh # # Purpose: # Prevent port conflicts between Watchtower and Tailscale Serve by: # 1. Backing up the current Tailscale Serve configuration # 2. Temporarily disabling Tailscale Serve # 3. Running Watchtower once # 4. Restoring Tailscale Serve # # Designed for: # - TrueNAS SCALE # - Tailscale running in a Docker container (TrueNAS app) # ------------------------------------------------------------------------------ # ========================= # CONFIGURATION # ========================= # Name of the Tailscale container (TrueNAS default shown here) TS_CONTAINER_NAME="ix-tailscale-tailscale-1" # Persistent directory for backups (must survive reboots/updates) STATE_DIR="/mnt/zfs_tank/scripts/state" # Watchtower image WATCHTOWER_IMAGE="nickfedor/watchtower" # Watchtower environment variables WATCHTOWER_ENV=( "-e" "TZ=Europe/Berlin" "-e" "WATCHTOWER_CLEANUP=true" "-e" "WATCHTOWER_INCLUDE_STOPPED=true" ) mkdir -p "$STATE_DIR" SERVE_JSON="${STATE_DIR}/tailscale-serve.json" # ========================= # FUNCTIONS # ========================= ts() { docker exec "$TS_CONTAINER_NAME" tailscale "$@" } # ========================= # MAIN # ========================= echo "==> Using Tailscale container: $TS_CONTAINER_NAME" # Ensure Tailscale container exists docker inspect "$TS_CONTAINER_NAME" >/dev/null # 1) Backup current Serve configuration (CLI-managed Serve) echo "==> Backing up Tailscale Serve configuration" if ts serve status --json > "${SERVE_JSON}.tmp" 2>/dev/null; then mv "${SERVE_JSON}.tmp" "$SERVE_JSON" else rm -f "${SERVE_JSON}.tmp" || true echo "WARN: No Serve configuration exported (may be file-managed or empty)." fi # 2) Stop all Serve listeners echo "==> Stopping Tailscale Serve" ts serve reset || true # 3) Run Watchtower once echo "==> Running Watchtower" docker run --rm \ -v /var/run/docker.sock:/var/run/docker.sock \ "${WATCHTOWER_ENV[@]}" \ "$WATCHTOWER_IMAGE" --run-once # 4) Restore Serve configuration (if present and non-empty) echo "==> Restoring Tailscale Serve" if [[ -s "$SERVE_JSON" ]] && [[ "$(cat "$SERVE_JSON")" != "{}" ]]; then docker exec -i "$TS_CONTAINER_NAME" tailscale serve set-raw < "$SERVE_JSON" || true else echo "INFO: No Serve configuration to restore." fi echo "==> Done"
Make the script executable
chmod +x /mnt/zfs_tank/scripts/watchtower-with-tailscale-serve.sh
How to run it manually
sudo /mnt/zfs_tank/scripts/watchtower-with-tailscale-serve.sh
Scheduling (recommended)
In the TrueNAS UI:
- Go to System Settings → Advanced → Cron Jobs
- Command:
/mnt/zfs_tank/scripts/watchtower-with-tailscale-serve.sh
User:
rootSchedule: daily (for example, 03:00)
Disable Watchtower’s internal schedule (
WATCHTOWER_SCHEDULE) to avoid conflicts
The repository containing the code:
https://github.com/chrislongros/watchtower-with-tailscale-serve