
https://cgit.freebsd.org/src/commit/?id=59cb18f35617d3a53f7d7e142b4f91ad7951f5e0
“Over 30 years of ‘FreeBSD’ commit activity and contributor growth. Includes daily commit counts and new committer data extracted from the cloned git repository (1993-2026), plus ‘Phabricator’ signup statistics (2013-2026). Contains no personal data – only aggregated counts. Useful for time series analysis, growth modeling, and studying open source community dynamics.”
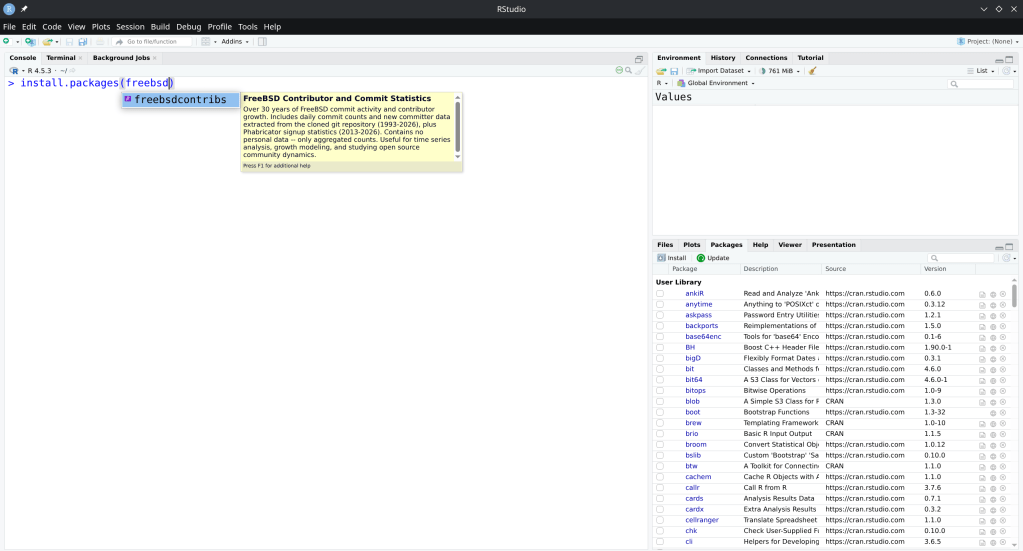
https://cran.r-project.org/web/packages/freebsdcontribs/index.html
If you run a FreeBSD VM under QEMU with -nographic and the terminal goes silent right after the kernel modules load — no login prompt, no panic, just nothing — the VM hasn’t frozen. It booted successfully. The issue is that kernel output is going somewhere you can’t see.
This post explains why that happens and how to fix it properly.
FreeBSD supports two console backends: vidconsole (virtual VGA framebuffer) and comconsole (serial port, ttyu0). Official VM disk images from download.freebsd.org default to vidconsole — a reasonable choice for hypervisors that expose a graphical display.
QEMU’s -nographic mode suppresses the display window and maps your terminal to the VM’s serial port instead. The problem is the FreeBSD kernel is unaware of this. It continues writing to vidconsole, which effectively goes nowhere in a -nographic session.
The bootloader, however, outputs to both VGA and serial simultaneously. That’s why you see the FreeBSD logo, the boot menu, and the kernel module lines — all of that is bootloader output. The moment the kernel takes control, it drops to vidconsole only, and your terminal goes quiet.
The handoff point is visible in the output:
/boot/kernel/zfs.ko size 0x788828 at 0x2795000
/etc/hostid size=0x25
/boot/entropy size=0x1000
Everything after that last line is the kernel running — login prompt included — just on a VGA console you can’t access from a -nographic session.
To get through without modifying the image, interrupt autoboot when you see the countdown. Press Space to pause it, then at the loader prompt:
set console="comconsole"
boot
This tells the kernel to route console I/O through the serial port for this boot only. You’ll see full kernel output and get a working login prompt.
Once inside the VM, make the change persistent:
echo 'console="comconsole"' >> /boot/loader.conf
From the next boot onward, the kernel will direct all console output to ttyu0 automatically. No more intercepting the bootloader, no more silent boots. This is the right fix if you’re using this image regularly for development or testing.
If you don’t need to observe the boot sequence at all, daemonize the VM and access it over SSH:
qemu-system-x86_64 \
    -enable-kvm \
    -m 4G \
    -smp 4 \
    -hda ~/vms/FreeBSD-16.0-CURRENT-amd64-zfs.qcow2 \
    -display none \
    -daemonize \
    -nic user,hostfwd=tcp::2222-:22
Give it roughly 30 seconds to reach multi-user mode, then:
ssh -p 2222 root@localhost
When you’re done:
kill $(pgrep qemu-system)
This approach sidesteps the console issue entirely and works well for quick test sessions where sshd is already enabled in the image.
The bootloader’s dual-output behavior is what makes this particularly deceptive. Because you do get output right up to the kernel handoff, it’s natural to assume something went wrong during kernel initialization — a ZFS import failure, a module panic, something with entropy. In practice, none of that. The system is fully operational, just talking to a VGA display you have no visibility into.
Kernels built with BOOT_COMCONSOLE in their config, or images specifically targeting headless/serial environments, won’t exhibit this. The stock VM images are built for general-purpose use, so VGA is the sensible default — it just doesn’t play well with -nographic out of the box.
| Goal | Solution |
|---|---|
| Fix for one boot | Press Space → set console="comconsole" → boot |
| Fix permanently | echo 'console="comconsole"' >> /boot/loader.conf |
| Skip console, SSH only | -display none -daemonize + SSH after ~30s |
Adding console="comconsole" to /boot/loader.conf is the one-time fix that makes FreeBSD under QEMU behave predictably for all subsequent work. After that, -nographic sessions give you full console output from boot to login with no intervention required.
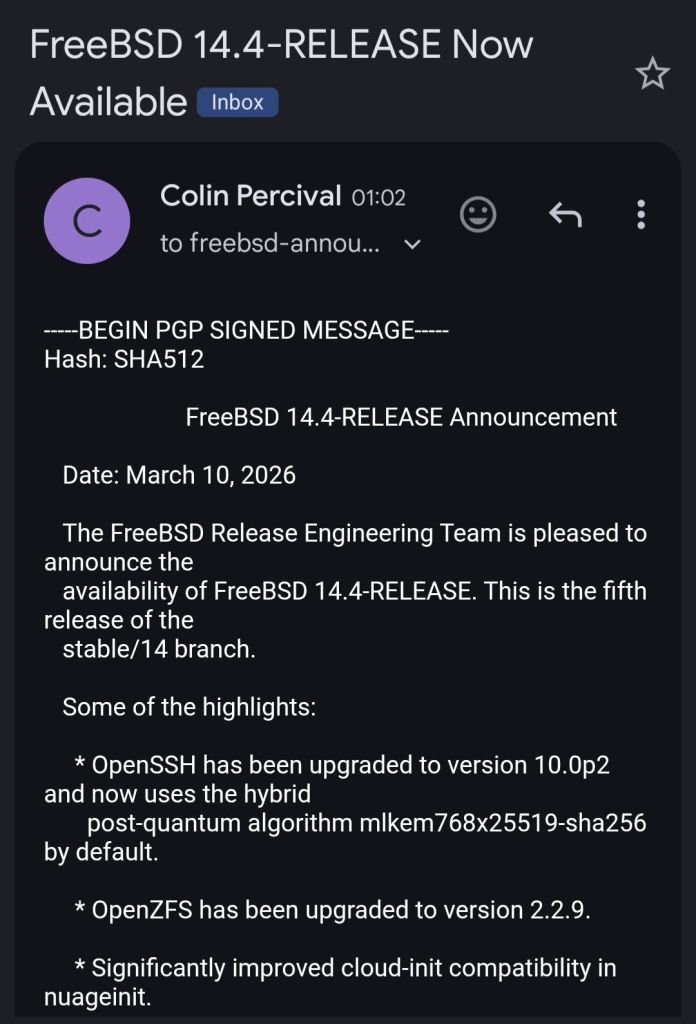
The push for a modern graphical installer in FreeBSD has been ongoing for a while. With FreeBSD 15.0 released in December 2025, many expected it to ship with a graphical installation option — but it didn’t make the cut. The good news: it’s coming in FreeBSD 15.1.
FreeBSD 15.0 shipped with the traditional bsdinstall text-based installer. While functional, it’s showing its age — the text-based dialogs work fine for experienced admins, but they’re a barrier for adoption compared to what Linux distros offer.
According to the FreeBSD Q4 2025 status report and the Foundation’s laptop project updates, FreeBSD 15.1 will include:
This is part of the FreeBSD Foundation’s broader laptop usability initiative, which has received over $750,000 in funding throughout 2025 and continues into 2026. The project covers Wi-Fi, graphics drivers, audio, power management, and installation experience.
FreeBSD has always been technically excellent but lagged behind Linux in user-friendliness. A graphical installer with KDE won’t change the OS itself, but it removes one of the biggest friction points for new users. Combined with improvements like PkgBase, s2idle sleep support, and the new SPMC power management driver, FreeBSD is becoming more approachable without sacrificing what makes it great.
For those of us who’ve been installing FreeBSD since the sysinstall days, it’s exciting to see the project evolve while keeping its identity. The FreeBSD 15.1 release schedule is worth keeping an eye on.
An annoying problem that I always had while running FreeBSD on my Dell Inspiron 15 5510 is the high temperature and fan speed. Doesn’t matter if it’s a live medium or post-installation — the average CPU temp is over 60 degrees Celsius.
With FreeBSD 15.0 (released December 2025) and the FreeBSD Foundation’s laptop project, things have improved significantly. Here’s what works.
First, load the Intel Core temperature sensor driver:
kldload -v coretempThen check the temperature with:
sysctl dev.cpu | grep temperatureTo load this automatically at boot, add to /boot/loader.conf:
coretemp_load="YES"FreeBSD ships with powerd, a daemon that dynamically adjusts CPU frequency based on load. Enable it in /etc/rc.conf:
powerd_enable="YES"
powerd_flags="-a hiadaptive -b adaptive"
This sets the CPU to hiadaptive mode on AC power (favors performance but still scales) and adaptive on battery (favors power saving).
Enable deeper CPU sleep states by adding to /etc/sysctl.conf:
hw.acpi.cpu.cx_lowest=CmaxFreeBSD 15 brings new power management features from the Foundation’s laptop initiative:
For laptops, suspend/resume support can be tested with:
acpiconf -s 3If it works, you can bind it to your laptop lid by adding to /etc/sysctl.conf:
hw.acpi.lid_switch_state=S3After applying these changes, my Dell Inspiron dropped from a constant 60+ degrees down to around 40-45 degrees at idle, and the fan became much quieter. The combination of powerd with proper C-state configuration makes a noticeable difference on FreeBSD laptops.
More details: coretemp(4), powerd(8), FreeBSD Wiki: Tuning Power Consumption
If you’ve ever rebooted a machine and NTP refused to sync because the clock drifted too far, you’ve hit the panic threshold. By default, ntpd will exit if the offset exceeds 1000 seconds.
Add this to /etc/ntp.conf:
tinker panic 0Setting panic 0 disables the panic threshold entirely, allowing ntpd to correct any offset regardless of size.
If you don’t want to permanently disable the panic threshold, you can do a one-time force sync with:
ntpd -gqThe -g flag allows the first adjustment to be any size, and -q makes ntpd set the time and exit.
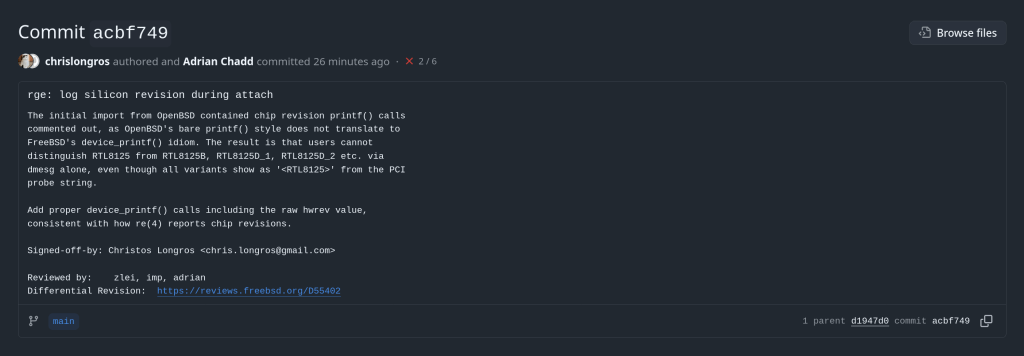
This article describes a kernel-level patch to the FreeBSD rge(4) network driver that enables proper identification of Realtek RTL8125/8126/8127 silicon variants at attach time. The change is small but reveals an interesting idiom gap between two BSD kernels.
The rge(4) driver supports a family of Realtek multi-gigabit NICs spanning three product generations. Despite sharing a common PCI device ID tree, each silicon revision has meaningfully different characteristics: different firmware images, different register maps for some functions, and different feature sets.
| Chip | hwrev register | Type constant | Generation |
|---|---|---|---|
| RTL8125 | 0x60900000 | MAC_R25 | 2.5GbE first gen |
| RTL8125B | 0x64100000 | MAC_R25B | 2.5GbE revised |
| RTL8125D_1 | 0x68800000 | MAC_R25D | 2.5GbE third gen |
| RTL8125D_2 | 0x68900000 | MAC_R25D | 2.5GbE third gen alt |
| RTL8126_1 | 0x64900000 | MAC_R26 | 5GbE first gen |
| RTL8126_2 | 0x64a00000 | MAC_R26 | 5GbE alt |
| RTL8127 | 0x6c900000 | MAC_R27 | 10GbE |
The hardware revision is detected by reading the RGE_TXCFG register and masking off the lower bits, yielding the hwrev value. This happens in rge_get_macaddr() via the attachment path in rge_attach().
The detection is a straightforward switch statement in sys/dev/rge/if_rge.c:
hwrev = CSR_READ_4(sc, RGE_TXCFG) & RGE_TXCFG_HWREV;
switch (hwrev) {
case 0x60900000:
    sc->rge_type = MAC_R25;
    break;
case 0x64100000:
    sc->rge_type = MAC_R25B;
    break;
/* ... */
}
The rge_type field stored in the softc structure is then used throughout the driver to select chip-specific paths — for example, firmware loading, ring configuration, and certain register sequences differ between MAC_R25 and MAC_R25B.
Before the patch, despite detecting seven distinct silicon variants at runtime, the driver logged nothing about which one was found. All three product families produce dmesg output that looks like this:
pci0: <network> at device 0.0 (no driver attached)
rge0: <RTL8125> mem 0xfc400000-0xfc40ffff [...] at device 0.0 on pci2
rge0: Using 1 MSI-X message
rge0: CHIP: 0x00000000
miibus0: <MII bus> on rge0
The string <RTL8125> comes from the PCI probe function — specifically device_set_desc() — which is set once during probe based on the PCI subsystem ID, before the hardware revision register is even read. It cannot distinguish RTL8125 from RTL8125B, or RTL8126_1 from RTL8126_2. A user filing a bug report, or a developer debugging an issue specific to one silicon stepping, had no way to confirm which variant was present without writing custom code to read RGE_TXCFG manually.
Examining the original import commit reveals that identification prints were always present in the source — just commented out in a non-idiomatic style:
case 0x60900000:
    sc->rge_type = MAC_R25;
// device_printf(dev, "RTL8125\n");
    break;
case 0x64100000:
    sc->rge_type = MAC_R25B;
// device_printf(dev, "RTL8125B\n");
    break;
The use of // comments is itself a signal: the FreeBSD kernel style guide mandates /* */ C89-style comments for all kernel code. The // style is characteristic of code copied directly from another source and then quickly commented out.
The origin is OpenBSD’s sys/dev/pci/if_rge.c, where the equivalent identification uses a different printing idiom:
/* OpenBSD style — appends to the in-progress attach line */
case 0x64100000:
    sc->rge_type = MAC_R25B;
    printf(": RTL8125B");
    break;
In OpenBSD, the device attachment infrastructure prints the device name on a line and drivers call bare printf() to append chip identification to that same line, producing output like:
rge0 at pci2 dev 0 function 0 "Realtek 8125" rev 0x00: RTL8125B, ...FreeBSD’s driver framework does not work this way. device_printf(dev, ...) always begins a new line prefixed with the device name — it cannot append to an existing line. A direct translation of the OpenBSD bare printf() would either produce garbled output or nothing useful. Rather than translating the idiom at import time, the prints were commented out.
The correct FreeBSD idiom is device_printf() on its own line, following attach. The patch enables all seven commented prints in the proper style, and adds the raw hwrev register value alongside the human-readable name — consistent with how the re(4) driver reports chip revisions:
switch (hwrev) {
case 0x60900000:
    sc->rge_type = MAC_R25;
    device_printf(dev, "chip rev: RTL8125 (0x%08x)\n", hwrev);
    break;
case 0x64100000:
    sc->rge_type = MAC_R25B;
    device_printf(dev, "chip rev: RTL8125B (0x%08x)\n", hwrev);
    break;
case 0x64900000:
    sc->rge_type = MAC_R26_1;
    device_printf(dev, "chip rev: RTL8126_1 (0x%08x)\n", hwrev);
    break;
case 0x64a00000:
    sc->rge_type = MAC_R26_2;
    device_printf(dev, "chip rev: RTL8126_2 (0x%08x)\n", hwrev);
    break;
case 0x68800000:
    sc->rge_type = MAC_R25D;
    device_printf(dev, "chip rev: RTL8125D_1 (0x%08x)\n", hwrev);
    break;
case 0x68900000:
    sc->rge_type = MAC_R25D;
    device_printf(dev, "chip rev: RTL8125D_2 (0x%08x)\n", hwrev);
    break;
case 0x6c900000:
    sc->rge_type = MAC_R27;
    device_printf(dev, "chip rev: RTL8127 (0x%08x)\n", hwrev);
    break;
}
Including the raw hex value serves two purposes. First, it allows unambiguous identification even if the human-readable label ever becomes incorrect or incomplete. Second, it mirrors the diagnostic value already present in the CHIP: line printed slightly later in attach, but associates it directly with the revision identification step.
After the patch, a system with an RTL8125B produces:
rge0: <RTL8125> mem 0xfc400000-0xfc40ffff [...] at device 0.0 on pci2
rge0: chip rev: RTL8125B (0x64100000)
rge0: Using 1 MSI-X message
A system with RTL8126_1 (a 5GbE part that probes as <RTL8126>) produces:
rge0: <RTL8126> mem 0xfc400000-0xfc40ffff [...] at device 0.0 on pci2
rge0: chip rev: RTL8126_1 (0x64900000)
rge0: Using 1 MSI-X message
The chip revision is now permanently captured in dmesg(8) output and system logs, available without any special tools or kernel knowledge.
The hwrev bitmask is read from bits [31:20] of RGE_TXCFG. Realtek does not publish full public documentation for these register fields, and the driver’s variant table has been built incrementally as new silicon steppings were encountered in the wild. Including the raw value means that if a new stepping appears with an hwrev not yet in the driver’s switch statement, it will still be captured in the log — giving developers the exact value needed to add support for it.
hwrev leaves rge_type at its zero-initialized value. With the patch, the raw value is logged for all handled cases, but an unknown stepping would produce no chip rev line at all — a future improvement could add a default case that logs the unknown value explicitly.
The complete change touches a single file, sys/dev/rge/if_rge.c:
7 lines changed: 7 insertions(+), 7 deletions(-)
- // device_printf(dev, "RTL8125\n");   (×7 variants)
+ device_printf(dev, "chip rev: RTL8125 (0x%08x)\n", hwrev);  (×7 variants)
No logic changes. No new dependencies. No behavioral differences other than the additional log line per attach.
The patch is under review at reviews.freebsd.org/D55402, where it will be integrated into the broader rge(4) improvement stack for the upcoming development cycle.